Connect the Refrigerant Piping to the Indoor UnitUpdated 10 days ago
Introduction
This article explains how to connect refrigerant piping to indoor units. The procedure for connecting the refrigerant piping to the indoor unit is the same for these systems:
- Diamante Essenza High-Wall (WYT-17)
- Diamante Pro High-Wall (WYT-20)
- Quantum Fresh High-Wall (WYT-FA)
- Quantum Hyperformance High-Wall (WYT-25)
- Quantum Ultra Ceiling Cassette (CYT-24)
- Quantum Ultra Ducted Ceiling Concealed (RYT-24)
- Quantum Ultra Floor-Ceiling Flex (UYT-24)
- Quantum Ultra High-Wall (WYT-24)
Steps
- Unwind the copper piping kit.
- Bring the ends of both the copper line and the indoor unit line together. Align the centers of the pipes that will be connected.
- Remove the indoor unit piping cap and check that no debris is inside. Some gas may be heard escaping, but it is dry nitrogen keeping the lines clean.
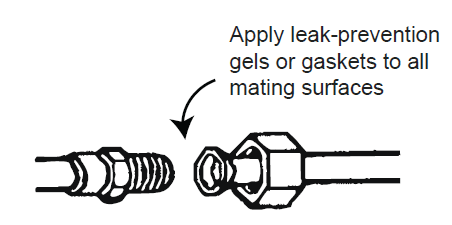
- Use leak guards and/or flare sealers on the flares of the piping.
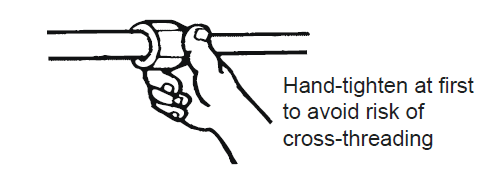
- Attach the flare nut and tighten as much as possible by hand.
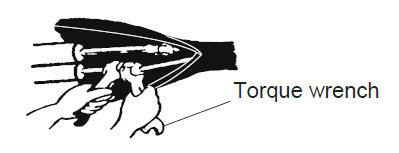
- Use two wrenches to torque correctly to the specifications found in the table below.
- Repeat this process for the other copper line.
Tightening Torque for Protection Caps & Flange Connection
Pipe Diameter | Tightening Torque [N x m] | Tightening Torque [ft-lbf] | Corresponding Stress (Using a 20 cm wrench) |
|---|---|---|---|
Φ 1/4" (6.35 mm) | 15-20 | 11-15 | Wrist strength |
| Φ 3/8" (9.52 mm) | 31-35 | 23-26 | Arm strength |
| Φ 1/2" (12 mm) | 45-50 | 33-37 | Arm strength |
| Φ 5/8" (15.88 mm) | 60-65 | 44-48 | Arm strength |
Tightening Torque [N x m] (ft-lbf) | |
|---|---|
| Service Port Nut | [7-9] (5-7) |
| Protection Caps | [25-30] (18-22) |