Set Up the Condensate Piping Connections for Floor-Ceiling Flex Indoor UnitsUpdated 2 months ago
Introduction
This article explains how to set up the condensate piping connections for floor-ceiling flex indoor units. This is the second step in the installation process for floor-ceiling flex indoor units.
This article is for the following system:
Quantum Ultra Floor-Ceiling Flex (UYT-24)
Drainpipe & Insulation Material Requirements
- Drainpipe: Polyvinyl chloride (PVC) pipe with a 3/4-inch outer diameter (19 mm).
- Heat insulation: Foamed polyethylene insulation with a maximum thickness of 3/8 of an inch (9.5 mm).
Install the Drainpipe Assembly
Attach the drainpipe assembly to the indoor unit's drain line connection.
Unlike wall-mounted systems, flex units and other light commercial air conditioning systems require a PVC drain line. The flexible drain hoses are not suitable for these applications.
Use a rubber coupler to connect the drainpipe assembly to the PVC drain line, ensuring a secure, water-tight seal. The rubber coupler and PVC drain line are sold separately from the system. 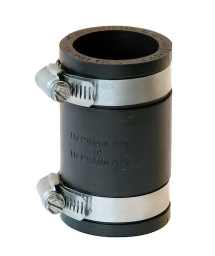
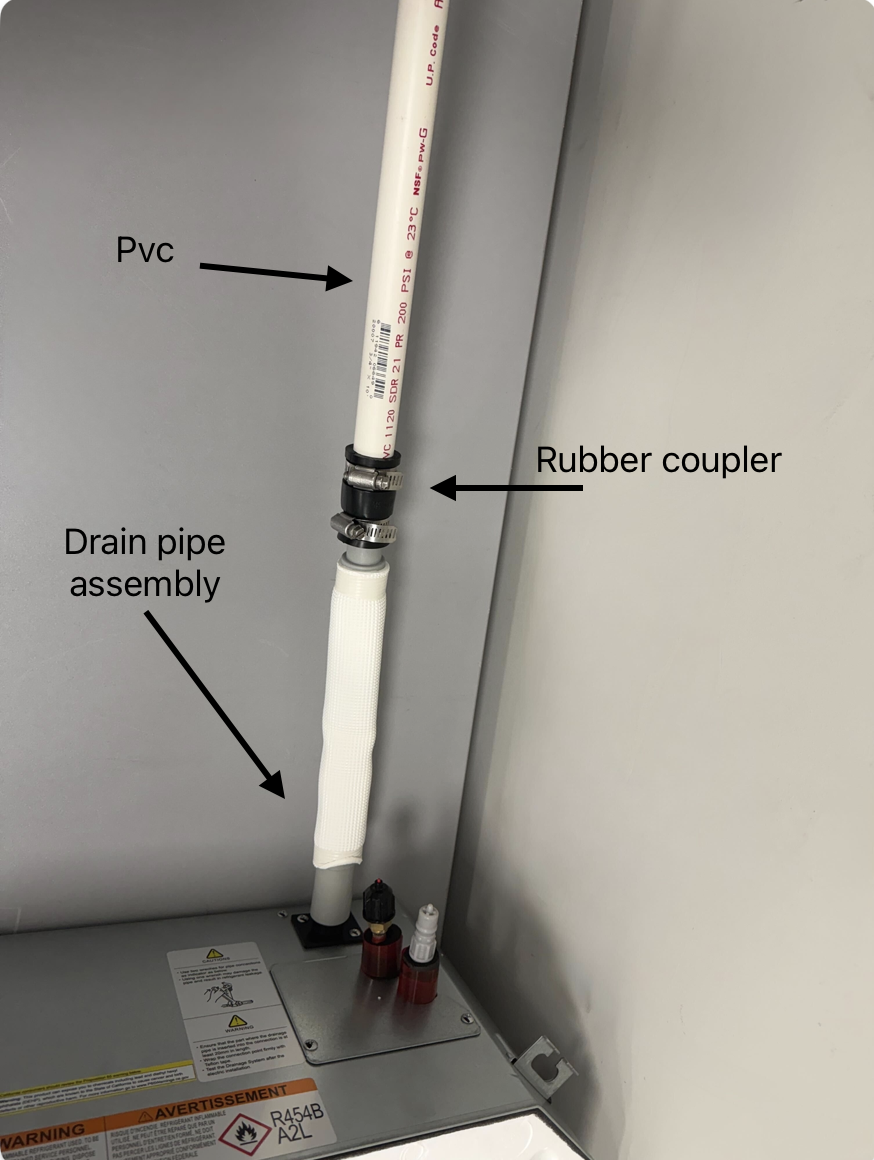
This is an example of what the drainpipe assembly should look like:
Continuous Downward Pitch & No Kinks
1. Ensure that the drain hose slopes downward all throughout with an angle of 30° to prevent back flow. 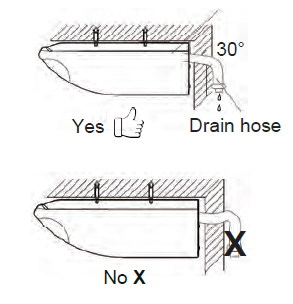
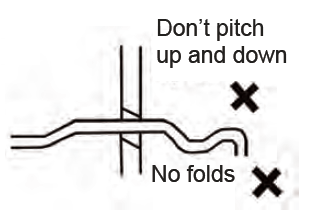
2. Make sure the hose does not have any kinks or points of upward flow throughout the entire channel.
3. Maintain at least a 2 inch (50.8 mm) gap between the drain outlet and final termination point (ground, grass, etc.)
Notes
- Insulate all drain piping and connections to the indoor unit to prevent dew formation and dripping.
- Wrap the entire length of the drain assembly carefully with the provided heat insulation material. Start from the assembly and continue to the indoor unit connection. Use additional insulation material if necessary to fully cover all piping and connections.
- Apply PVC adhesive to the connection point between the drainpipe and hose to ensure a watertight seal.
- Apply the adhesive 1-1/2 inches (38 mm) from the end of the PVC pipe, then insert it into the hose. Allow at least 10 minutes for the adhesive to cure. Do not apply pressure to the joint during the drying period.
- Ensure that there are no gaps or exposed sections that could cause condensation.
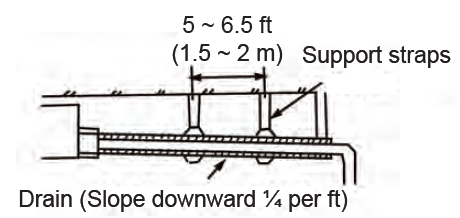
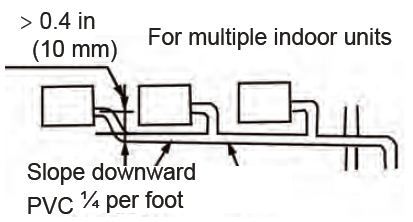
- Maintain a continuous downward slope of more than a 1/4 inch per foot (minimum slope ratio of 1/50), with no dips, sags, or reverse slopes.
- Install the support straps or brackets every 5-6-1/2 feet (1.5-2 m) along the horizontal runs to maintain proper slope and prevent sagging.
- Keep the horizontal pipe length under 65 feet (20 m).
- If installed side-by-side, maintain a gap of 3/8 of an inch (10 mm) between the parallel pipes.
After the System Installation is Completed
Check the condensate drain line for leaks, and ensure that it drains properly. If a condensate pump has been installed, make sure it operates properly. This system does not include a condensate pump. Pour water into the drain pan through the inspection port to confirm proper flow.