Installing the Air Duct & Top Mounting Plate for Rooftop RV SystemsUpdated 4 days ago
Introduction
Follow this guide to properly install the air duct and top mounting plate for the Full Inverter Rooftop RV Air Conditioner Heat Pump. This guide also covers how to install the air duct foam.
Installing the Air Duct & Top Mounting Plate
Steps
1. Remove the panel and all installation accessories from the box.
2. Reach through the air conditioner's return air inlet and pull down the outdoor unit's wire harness to make future connections easier.
3. Pull down the four-way connecting wire and sensor lead. 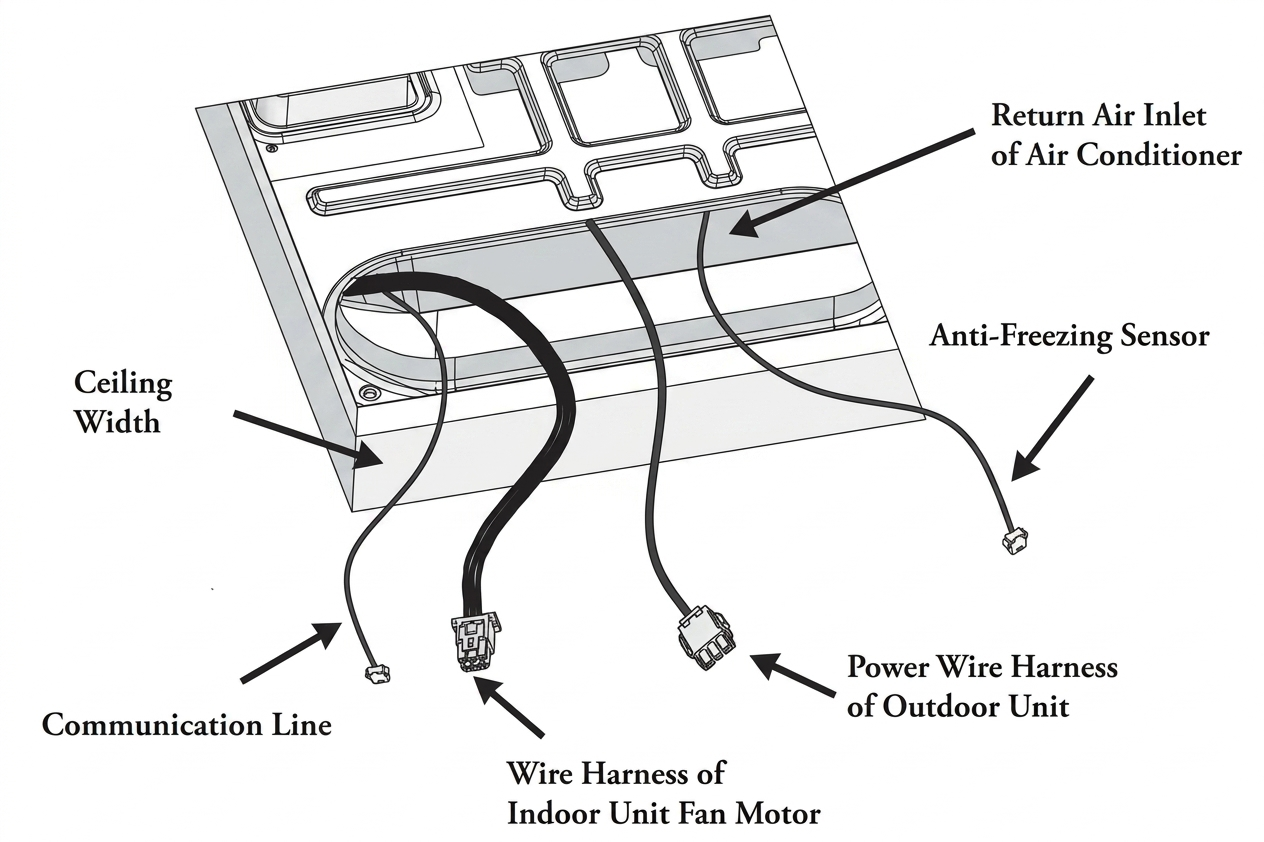
Installing the Air Duct Foam
Notes
The air duct foam is available in three thickness: 1.5, 3, and 4.5 cm.
Remove the middle portion of the air duct foam during installation. This piece is only intended to prevent deformation during shipping.
Prepare the Air Duct Foam
Measure the distance from the ceiling to the roof, and then select the appropriate air duct foam thickness based on the following guidelines:
- For a distance of 1-1.2 inches (25-30 mm), use air duct foam with a thickness of 1.5 cm.
- For a distance of 1.2-1.8 inches (30-45 mm), use air duct foam with a thickness of 3 cm.
- For a distance of 1.6-2.4 inches (40-60 mm), use air duct foam with a thickness of 4.5 cm.
- If the distance is greater than 2.4 inches (60 mm), combine air duct foams of 1.5, 3, and 4.5 cm thickness as needed based on the actual situation.
- For a distance greater than 3.9 inches (100 mm), use a field-supplied pipe joint.

Steps
1. Select the appropriate air duct foam thickness, remove the middle portion, and affix the foam to the fastening plate along the air outlet. Ensure that the holes in the foam align with the holes on the plate.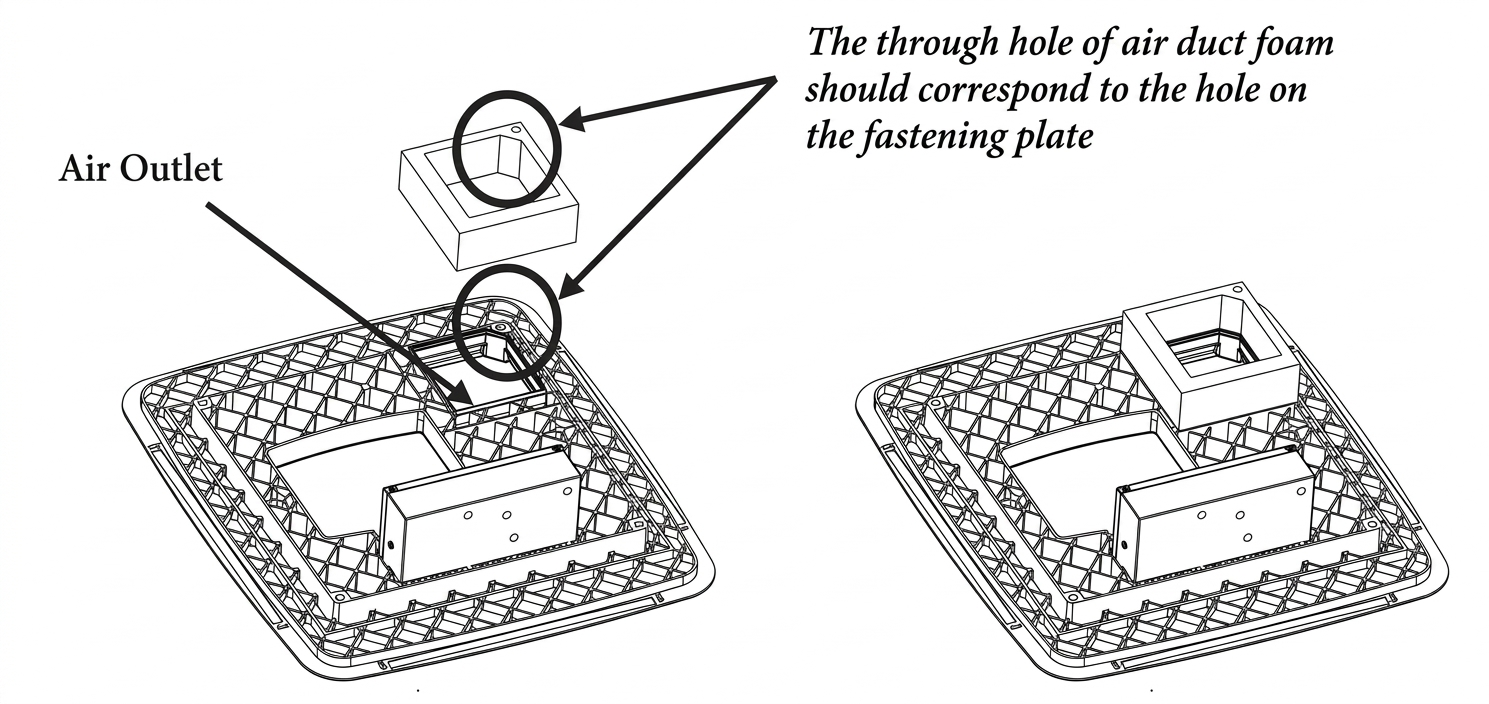
2. Align the arrow on the fastening plate toward the front of the RV, position the plate over the 14-1/4-inch (362 mm) square ceiling opening, and secure it to the rooftop air conditioner using four bolts of the appropriate length.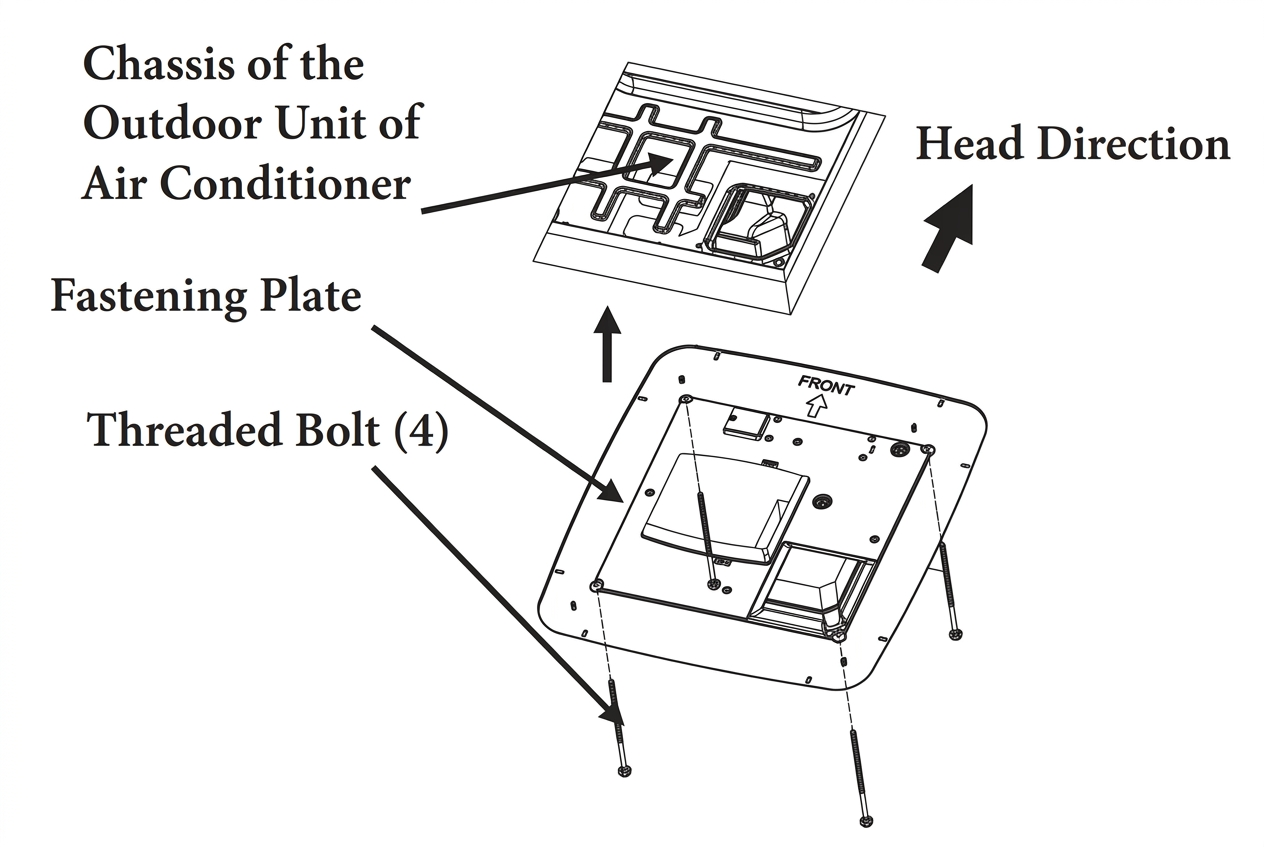
3. Hand-tighten each bolt before fully tightening them with tools. The four rivet nuts on the outdoor unit's chassis are located at the corners of the opening. Insert and hand-tighten the four long bolts into these corresponding rivet nuts.
If the bolts are too loose, the roof may not seal adequately. Conversely, overtightening them can damage the air conditioner chassis or the fixing plate. Always tighten the bolts to the specified torque.
4. Once all bolts are in place, tighten them evenly and one at a time to a torque of 3.3–4 ft-lb. This compresses the roof box foam to a thickness of approximately 1/2 inch (13 mm). Because these bolts are self-locking, do not over-tightening them.