Connect the Refrigerant Piping to the Indoor Unit for Quantum Ultra Ceiling Cassette (CYT-24) SystemsUpdated a month ago
Introduction
This article explains how to connect the refrigerant piping to the indoor unit for Quantum Ultra Ceiling Cassette (CYT-24) systems.
After connecting the refrigerant piping to indoor unit, follow the steps wrapping the lines and sealing the air gaps.
Steps
- Unwind the copper piping kit.
- Bring the ends of both the copper line and the indoor unit line together. Align the centers of the pipes that will be connected.
- Remove the indoor unit piping cap and check that no debris is inside. Some gas may be heard escaping, but it is dry nitrogen to keep lines clean.
- Apply leak-prevention gels or gaskets to all mating surfaces if available.
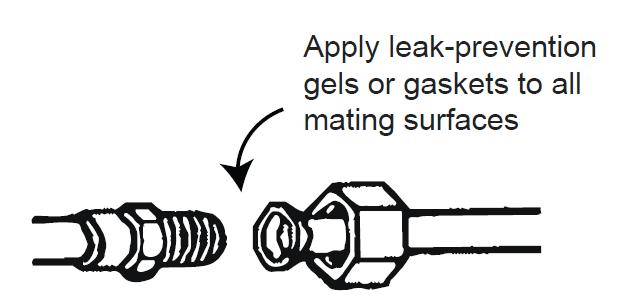
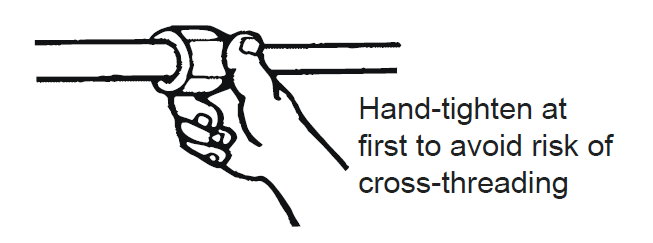
- Attach the flare nut and tighten as much as possible by hand.
- Torque correctly to the specifications found in the table below using two wrenches.
Pipe Diameter Tightening Torque
[N x m]Tightening Torque
[ft-lbf]Corresponding Stress
(Using a 20 cm wrench)Ø ¼ (6.35 mm) 15-20 11-15 Wrist Strength Ø ⅜ (9.52 mm) 31-35 23-26 Arm Strength Ø ½ (12 mm) 45-50 33-37 Arm Strength Ø ⅝ (15.88 mm) 60-65 44-48 Arm Strength 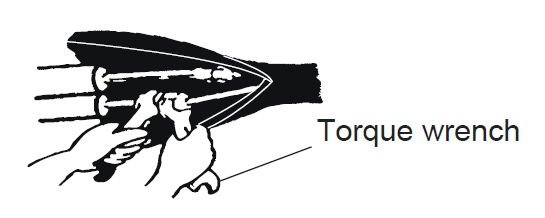
Tightening Torque
[N x m] (ft-lbf)Service Port Nut [7-9] (5-7) Protection Caps [25-30] (18-22) - Repeat the process for the other copper line.
Wrap the Lines & Seal Air Gaps
Note: Even small gaps can result in air or water leakage, or cause condensation to form.
- Arrange the pipes, cables, and drain hose correctly.
- Lag the pipe joints with insulation material and secure them with vinyl tape.

- Run the bound bundle through the wall hole, ensuring not to kink the drain pipe when binding.
- Ensure all connections between the panel and ceiling, as well as between the panel and indoor unit are properly sealed.