
Installing the Condensate Drain Hose for RYT-24 Ducted Ceiling Concealed Indoor UnitsUpdated 3 months ago
Introduction
Follow this procedure to install the condensate drain hose for the Quantum Ultra Ducted Ceiling Concealed (RYT-24) indoor unit.
The condensate drain hose, also called a drain line, directs water away from the unit. Improper installation may cause property damage.
Prerequisites
Caution
- Ensure the drain line installation complies with all local and national codes and regulations.
- Verify that the drain line is insulated to prevent condensation and potential water damage. If it is not, insulate it properly.
- If the drain line is bent or installed incorrectly, water may leak and cause a water-level switch malfunction.
- Do not pull the drain hose forcefully. This could disconnect it.
Installation Notes
- When using an extended drain line, tighten the indoor connection with an additional protection tube to prevent accidental disconnection.
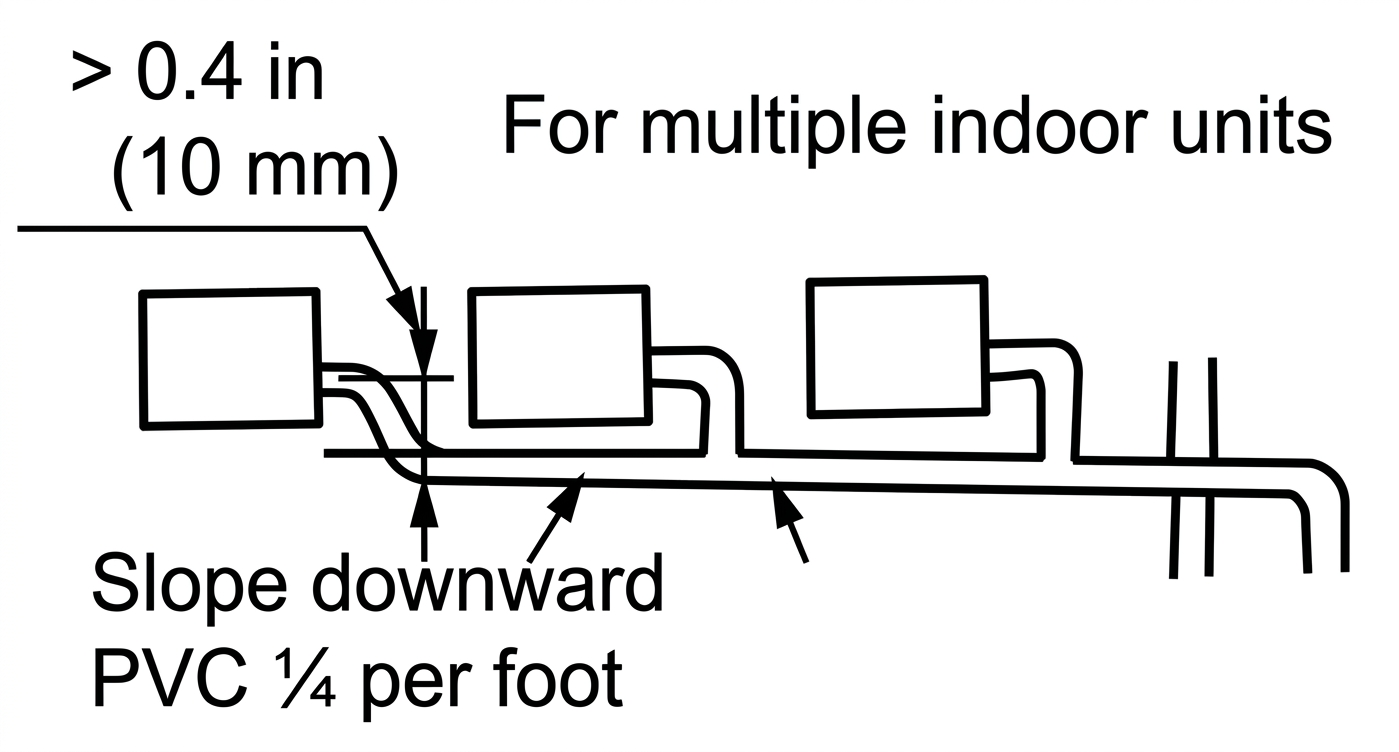
- Maintain a continuous downward slope greater than ¼ inch per foot (minimum 1/50 ratio) with no dips, sags, or reverse slopes.
- Install support straps or brackets every 5-6.5 feet (1.5 to 2 m) along horizontal runs to maintain the proper slope and prevent sagging.
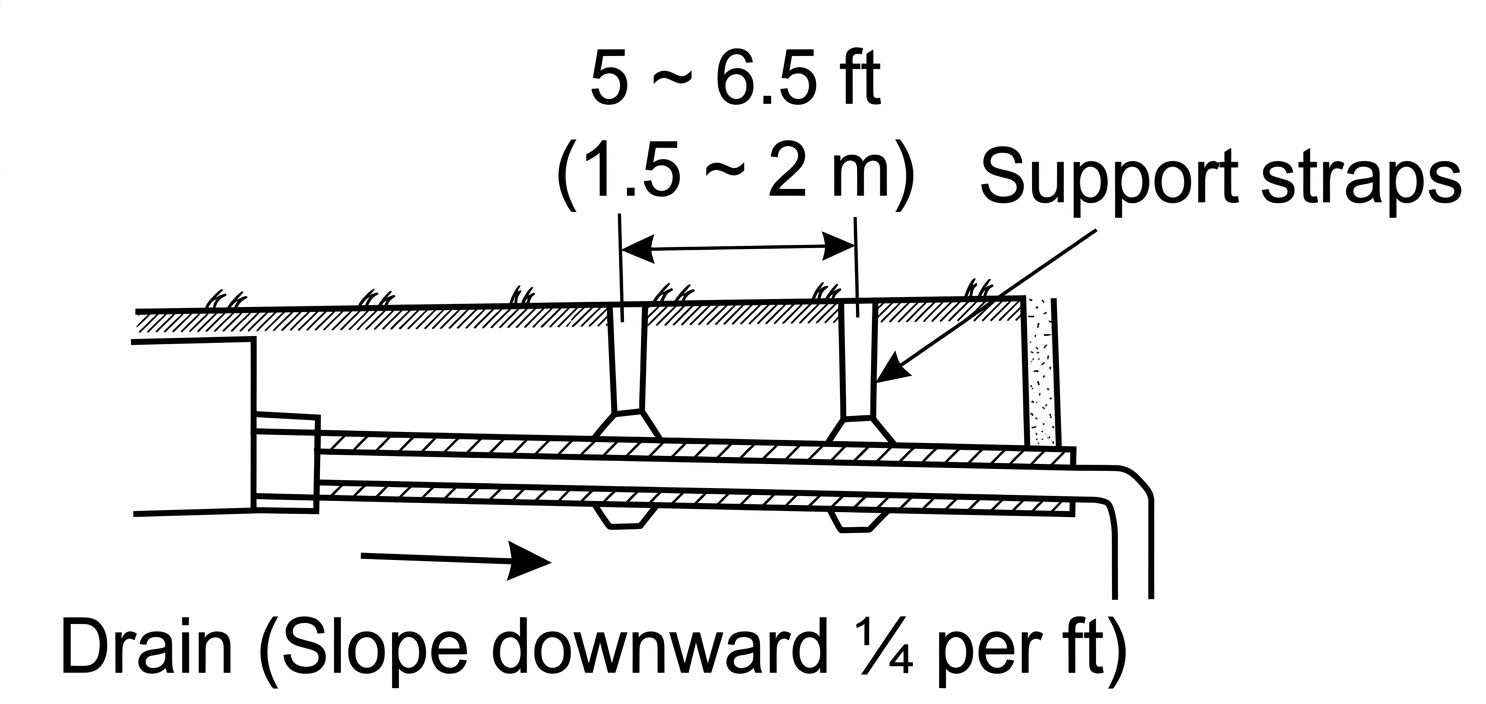
- Keep the total horizontal pipe length under 65 feet (20 m).
- When installing parallel pipes side-by-side, maintain a gap of approximately ⅜ inch (10 mm) between them.
- The maximum vertical rise of the drain line must not exceed 2.5 feet (0.8 m).
- The horizontal extension from the indoor unit drain outlet must not exceed 4 inches (102 mm) prior to the rise.
A. Planning the Drain Line Layout
Before beginning the installation, plan the drain line layout and connection.
B. Cutting the Drain Line (If Needed)
If necessary, cut the drain line to fit your layout and connection.
C. Insulating the Drain Line (If Needed)
Verify that the drain line is insulated to prevent condensation and potential water damage. If it is not, insulate it properly. Insufficient insulation may allow dew to form due to low condensate temperatures, resulting in potential water damage.
Insulate the drain line before beginning the connection, excluding the joint sections. These will be insulated at the end of the procedure.
Ensure the insulation material is fitted tightly with no gaps. Do not over-tighten the insulation material. This may compress the air out of the material, causing poor insulation and early aging.
The insulation material must be made of flame-retardant material. Select a material that complies with local regulations.
The thickness of the insulation material must be more than 3/8 of an inch (10 mm).
Apply specialized adhesive to the insulation seams, then secure them with tape. Ensure the tape is at least 2 inches (51 mm) wide and applied firmly to prevent condensation.
D. Connecting the Drain Hose
Attach the drain hose to the indoor unit's drain line connection.
Unlike wall-mounted systems, ducted ceiling concealed units and other light commercial air conditioning systems require a polyvinyl chloride (PVC) drain line. The flexible drain hoses are not suitable for these applications. Use a PVC pipe with a 3/4-inch outer diameter (19 mm).
Use a rubber coupler to connect the drainpipe to the PVC drain, ensuring a secure, water-tight seal. The rubber coupler and PVC pipe are sold separately from the system. 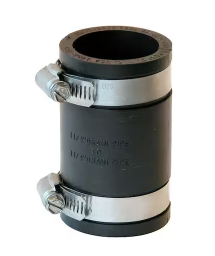
This is how the drain line assembly should look when attached to the PVC line with the rubber coupler. 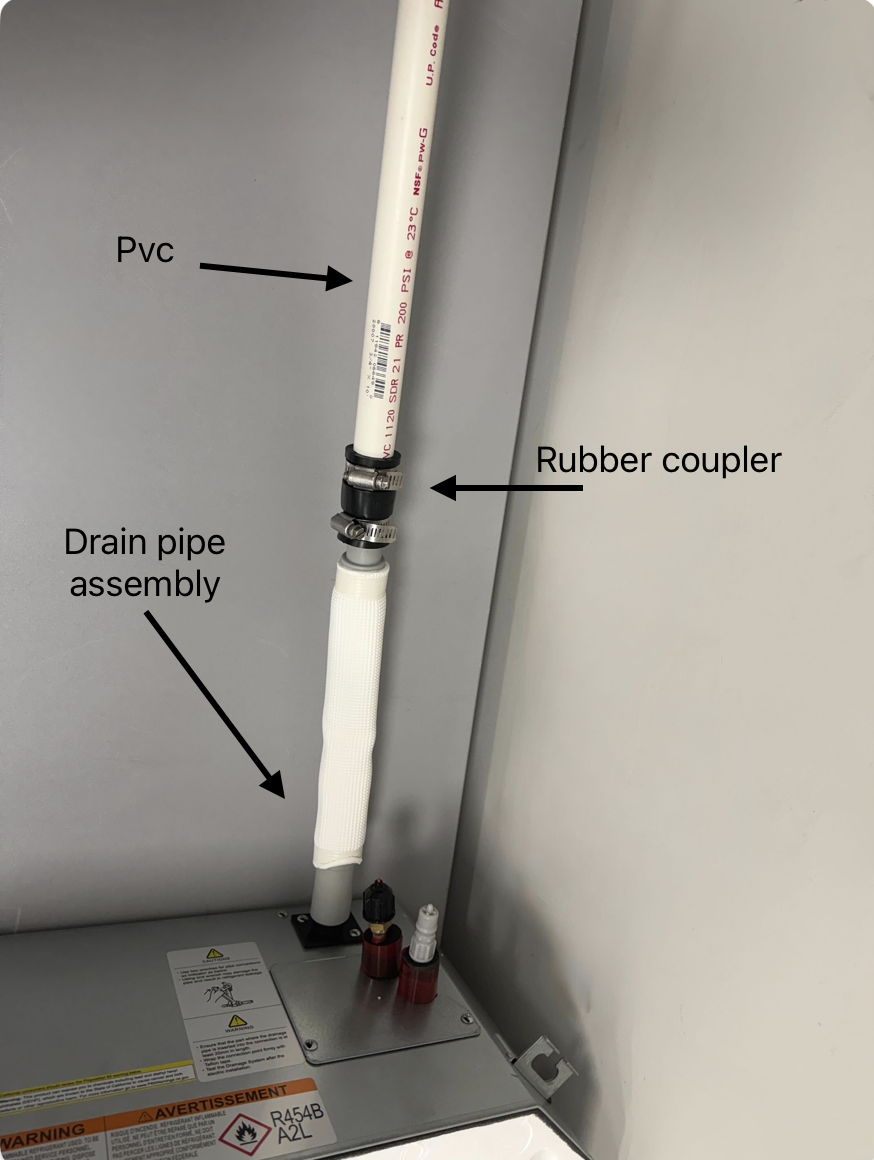
Install the drain line assembly as illustrated:
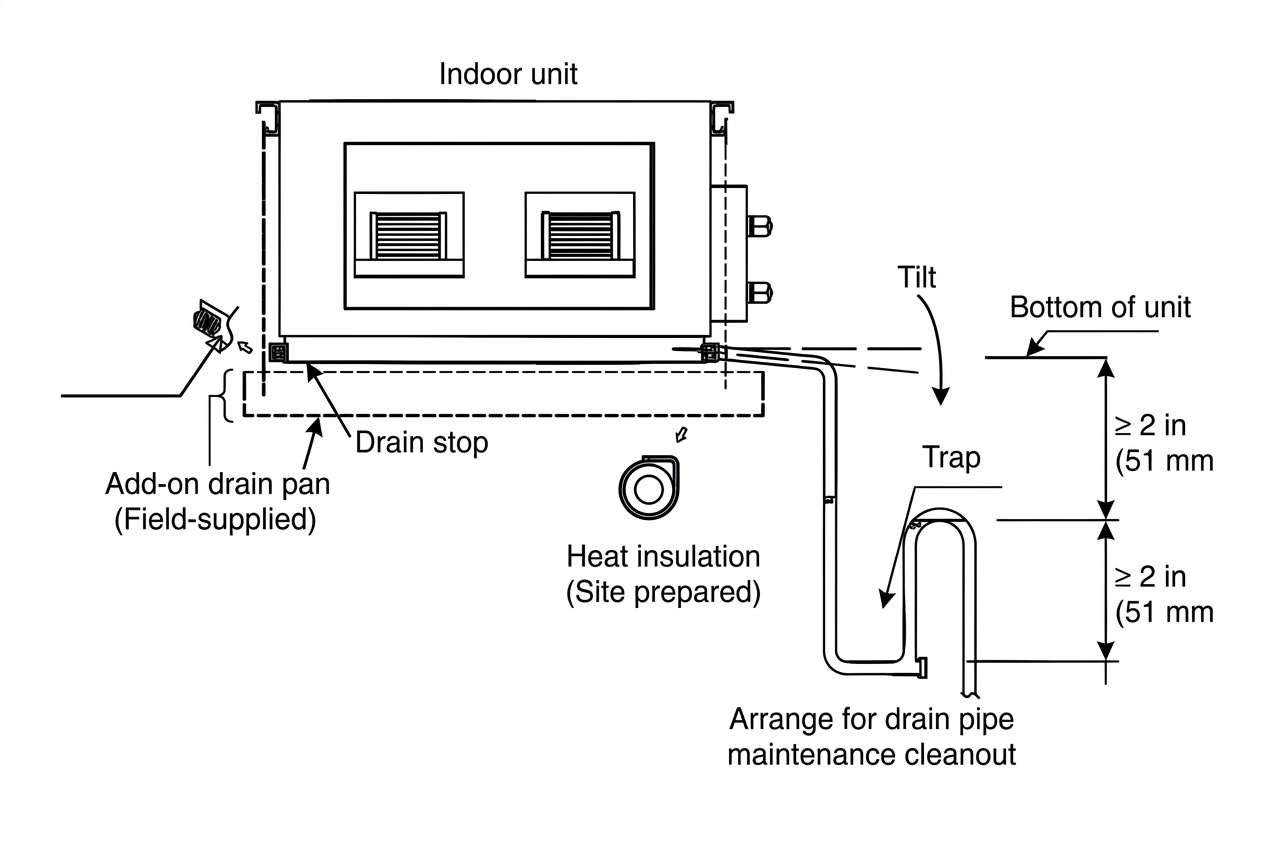
When connecting multiple drainpipes, install them as illustrated:
E. Passing the Drain Line Through the Wall Hole
When passing the drain line through the wall hole, make sure the water drains to a safe location where it will not cause water damage or a slipping hazard.
The drain line outlet should be at least 1-7/8 inches (50 mm) above the ground. If it touches the ground, the unit may become blocked, potentially leading to a malfunction.
If the water is discharged directly into the sewer, ensure the drain has a U or S pipe to prevent odors from coming back into the house.
F. Completing a Drainage Test
For information on completing a drainage test for ducted ceiling concealed systems, click this link. New buildings should perform this test before finishing the ceiling.
G. Insulating the Joint Sections
The pipe joint insulation should 2-4 inches (51-102 mm) longer than the gap to ensure a proper seal.
Insert the pipe joint insulation into the gap of the existing insulation.
Ensure the pipe joint insulation is securely fastened to the suction and liquid pipes to prevent gaps. Use glue to paste together the linking part. Do not over-tighten the insulation material. This may compress the air out of the material, causing poor insulation and early aging.