Install the Drain Joint for CYB-20 Ceiling Cassette Outdoor UnitsUpdated a day ago
Introduction
This article explains how to install the drain joint for CYB-20 ceiling cassette outdoor units.
Before anchoring the outdoor unit, install the drain joint at the bottom of the unit. When mounting the outdoor unit on slabs, the installation of the drain joint and tubing is not necessary.
There are two types of drain joints for the outdoor unit: one with a rubber seal and one without.
Steps
If the drain joint comes with a rubber seal, follow these steps:
1. Fit the rubber seal onto the end of the drain joint connecting to the outdoor unit.
2. Insert the drain joint into the hole of the unit's base pan.
3. Rotate the drain joint 90-degrees until it clicks into place facing the front of the unit.
4. Connect a drain hose extension (not included) to the drain joint in order to redirect water from the unit during Heating mode. 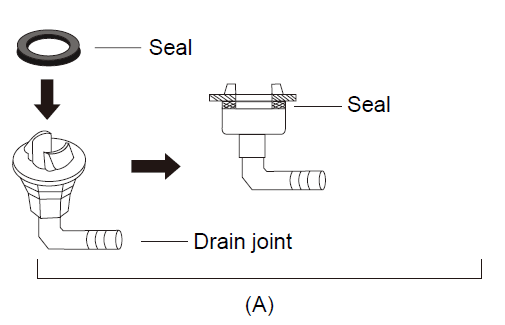
If the drain joint does not come with a rubber seal, follow these steps:
1. Insert the drain joint into the base pan hole, then press firmly to ensure it is properly installed and does not become loose.
2. Connect a drain hose extension (not included) to the drain joint in order to redirect water from the unit during Heating mode. 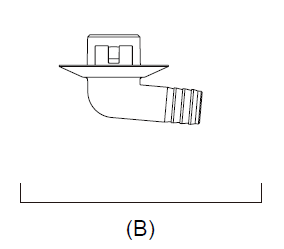
Notes
- In cold climates, make sure the drain hose is as vertical as possible to ensure swift water drainage. If water drains too slowly, it can freeze in the hose and flood into the unit.