Install the Panel for CYB-20 Ceiling Cassette Indoor UnitsUpdated a day ago
Introduction
This article explains how to install the panel for CYB-20 ceiling cassette indoor units.
Steps
1. To unlock the grille hook, push both of the tabs toward the middle simultaneously.
2. Hold the grille at a 45-degree angle, lift it up slightly, and detach it from the main body. 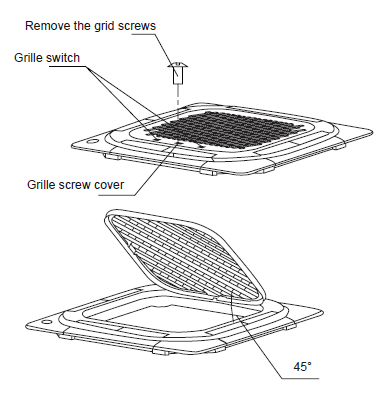
3. Attach the panel to the indoor unit's hook.
The panel hook is pre-hung to the indoor unit's flow guide ring, as shown in the image: 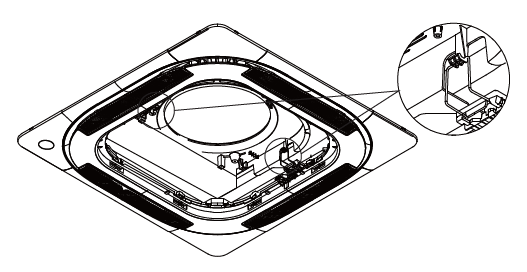
4. Secure the panel with four screws (M5).
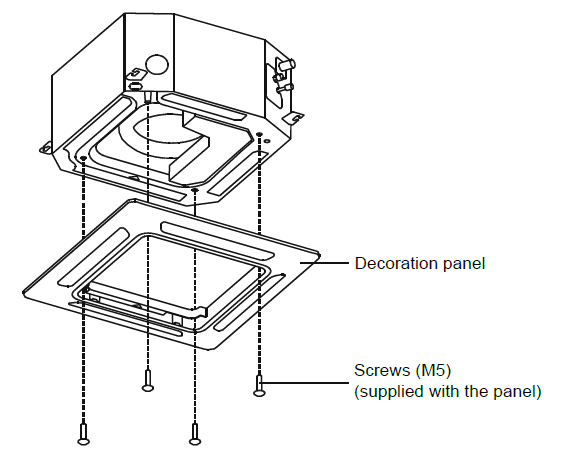
To adjust the indoor unit's height, use the openings at the four corners of the panel. Make sure the internal wiring and drainpipe are not affected by this adjustment. Failure to tighten the screws can cause water leakage. 
Caution: If the unit is not hanging correctly and a gap exists, adjust its height to ensure proper function. To do this, loosen the upper nut and adjust the lower nut. 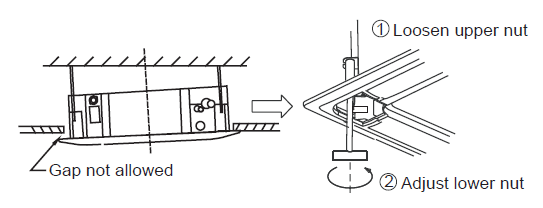
5. Hang the intake grille on the panel.
6. Connect the louver motor and control box lead connectors on the panel to the corresponding connectors on the main body.
7. Reinstall the installation cover into the style grid. 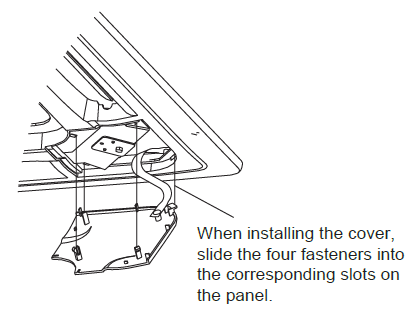
8. Attach the installation cover plate rope to the pillar of the installation cover, then gently press the installation cover plate into the panel.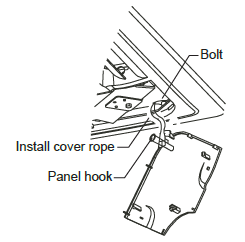
9. After installation, place the plugs on the display, swing, water pump, and other wire bodies into the electric control box.
Connection Diagrams
For panels without a vane control module, the display board CN1 connects to the main control board CN10. The motor cable connects to the main control board CN14. 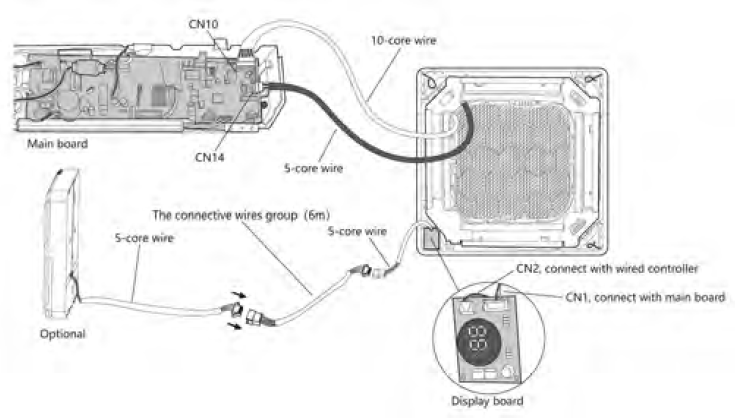
For panels with a vane control module, the display board CN1 connects to the main control board CN10. The vane control motor cable connects to the main control board CN66. 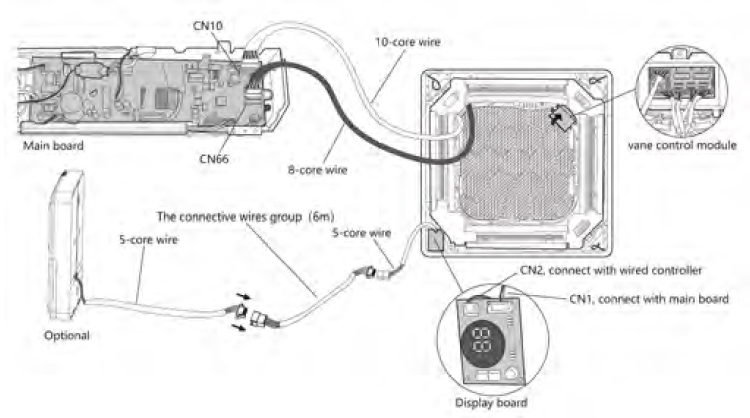
This display board CN2 attaches to a connecting cable.