Install the Decorative Panel for Ceiling Cassette Indoor UnitsUpdated 2 months ago
Introduction
This article explains how to install the decorative panel for ceiling cassette indoor units. This is the fourth step in the installation process for ceiling cassette indoor units.
The steps for installing the decorative panel differ slightly between the 9,500-16,000 BTU systems and the 23,000 BTU system.
This article is for the following system:
Quantum Ultra Ceiling Cassette (CYT-24)
Steps for 9.5K-16K BTU Systems
Model Numbers
CYT009GLSI24RL, CYT012GLSI24RL, and CYT018GLSI24RL
Remove the Return Air Grille
- Rotate the two grille fasteners to the Open position.

- Loosen the screws and carefully remove the ventilation grille. The grille will remain suspended from the panel by the attached safety cords.
Install the Panel
- Use four washers and bolts to secure the panel to the ceiling base at the designated installation bolt holes.
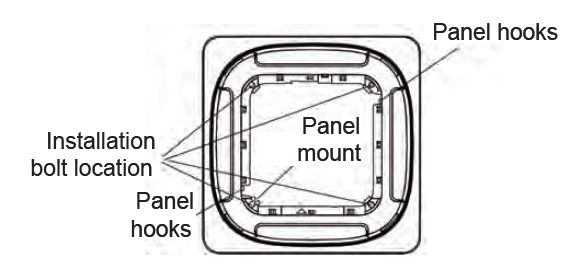
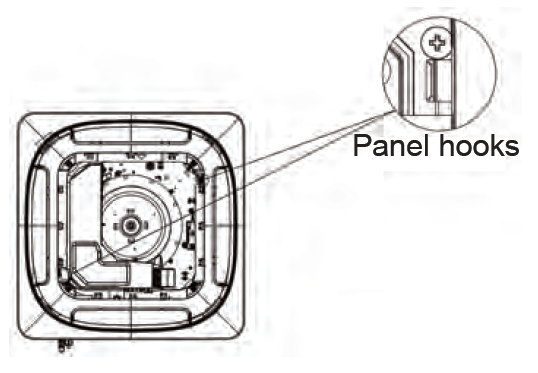
- Hang the two safety cables from the panel onto the provided panel hooks for support during installation.
- Reinstall the ventilation grille by aligning it correctly, tightening the screw, and snapping it securely back into place.
Steps for 23K BTU Systems
Model Numbers
Remove the Return Air Grille
- Rotate the two grille fasteners to the Open position.
- Loosen the screws and carefully remove the ventilation grille. The grille will remain suspended from the panel by the attached safety cords.
Remove the Installation Caps
- Remove the four installation caps located at each corner of the panel to expose the clamp mounting points.
Install the Panel
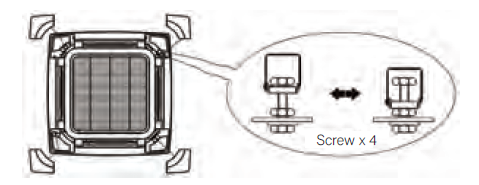
- Insert the four clamps into the hooks on the panel.
- Tighten the four bolts to securely fasten the clamps, then secure the panel to the ceiling base.
- Reattach the four installation caps to their original positions at each corner of the panel.
- Attach the panel's hanging rope (safety cord) onto the fixed bracket to prevent accidental detachment.