Indoor Unit Disassembly Guide: Diamante and Quantum Ultra High-Wall SystemsUpdated a day ago
This article provides steps for disassembling indoor units of Diamante Essenza High-Wall (WYT-17), Diamante Pro High-Wall (WYT-20S), and Quantum Ultra High-Wall (WYT-24) systems.
Steps
Before Disassembly
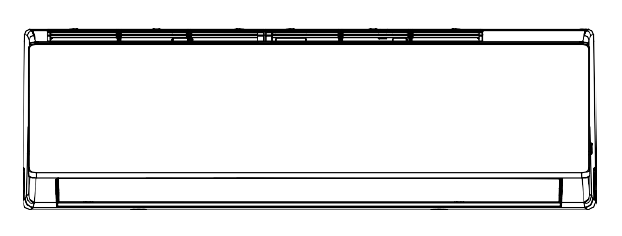
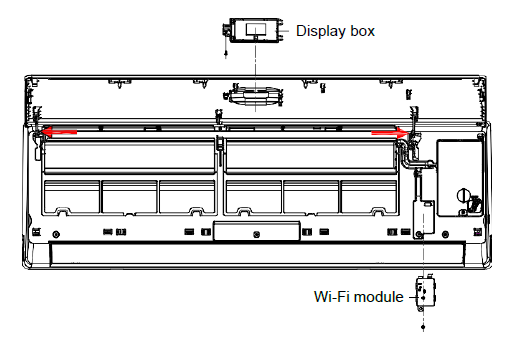
1. Remove the Front Panel, Display Box, and Wi-Fi Module.
A. Open the front panel.
B. Remove the screw that secures the display box, and then remove the display box from the panel.
C. Release the panel hinge (indicated by the red arrows) from the middle frame, then remove the panel.
D. Remove the screws that secure the Wi-Fi module, and then remove the module from the middle frame.
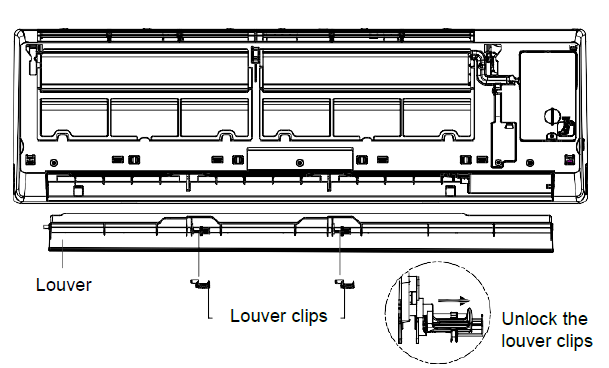
2. Remove the Louver
A. Release the louver clips.
B. Gently bend the louver by hand, and then detach it from the middle frame and the stepper motor.
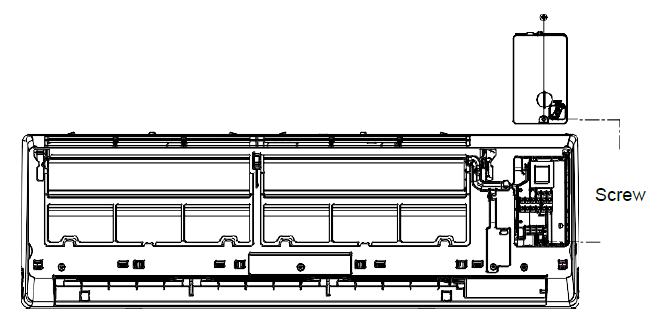
3. Remove the Electric Control Box Cover
A. Remove the screw that secures the electric control box cover, and then remove the cover.
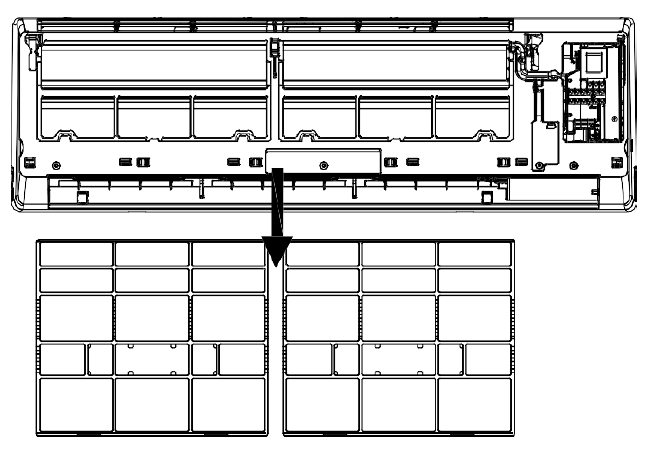
4. Remove the Filter
A. Push the filter up slightly, and then pull it out of the unit.
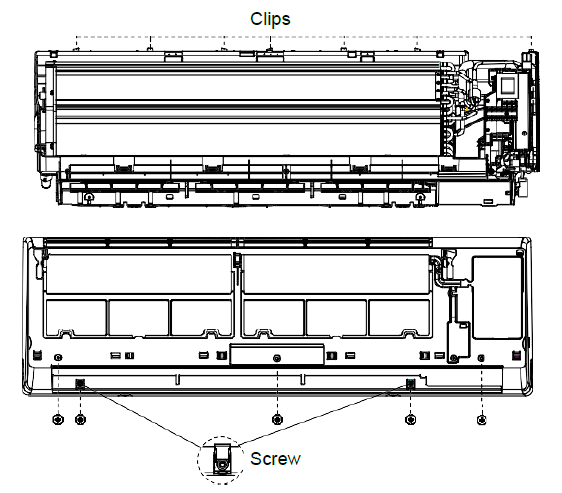
5. Remove the Middle Frame
A. Open the screw cover and remove the screw with a Phillips screwdriver.
B. Release the clips on the unit base (as shown in the image), and then lift out the middle frame.
6. Remove the Electric Control Box
A. Remove the RT and IPT sensors from the evaporator.
B. Disconnect all the ground wires from the evaporator.
C. Disconnect all the connectors from the PCB.
D. Remove the screw that secures the electric control box to the unit base, and then remove the electric control box. 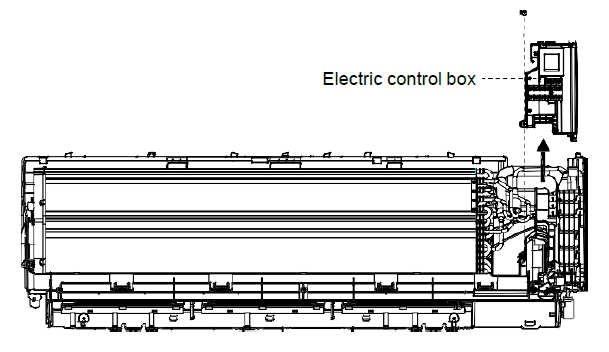
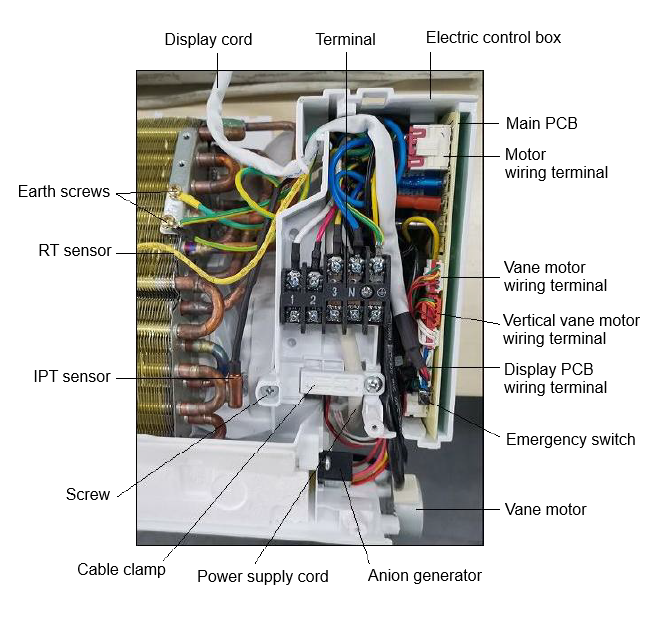 This image is for reference only. The wiring on your model may differ slightly.
7. Remove the Pipe Cover
A. Release the lower edge of the pipe cover from the unit base, and then remove the cover from the unit. 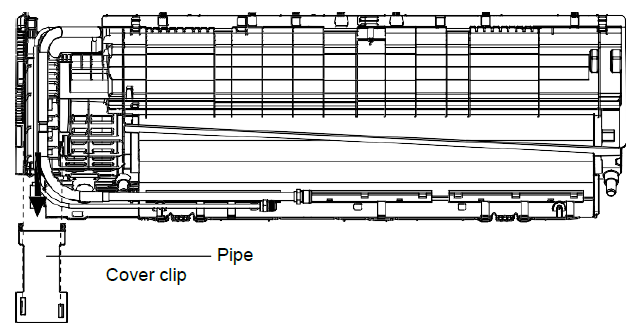
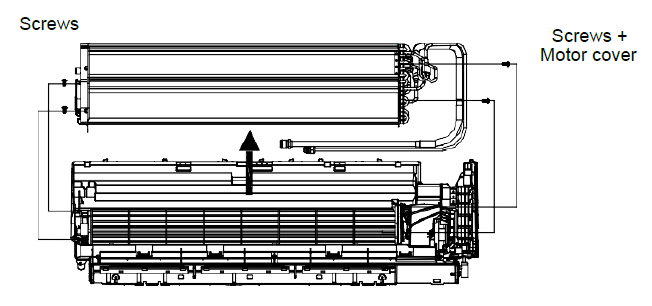
8. Remove the Evaporator
A. Remove the two screws on the left side (as shown in the image).
B. Remove the two screws that secure the motor cover to the right support plate.
C. Lift the inlet and outlet pipes slightly, and then pull the evaporator out of the unit.
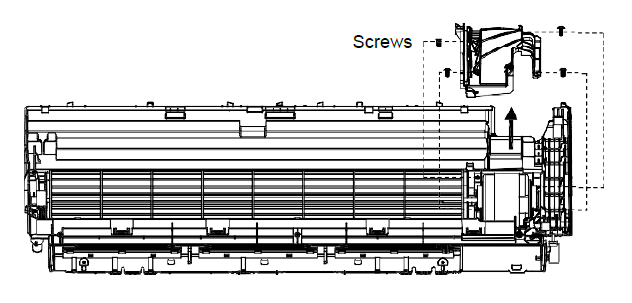
9. Remove the Motor Cover
A. Remove the four screws that secure the motor cover to the unit base.
B. Remove the motor cover from the unit base.
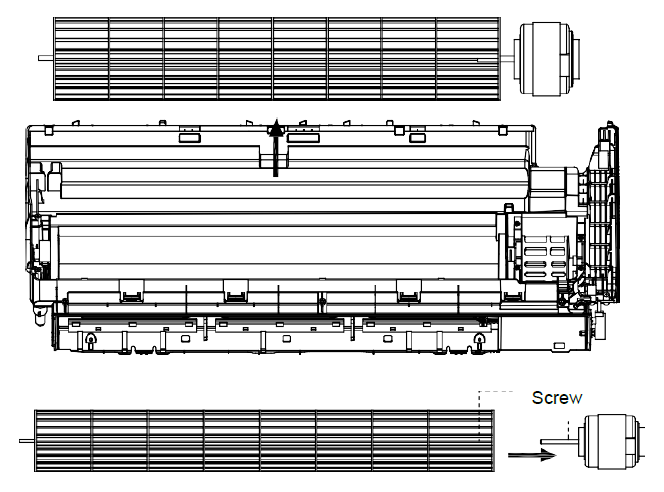
10. Separate the Fan Motor and Fan Blade
A. Lift the fan blade and fan motor out of the unit base.
B. Remove the screw that secures the fan blade to the motor shaft, and then separate the fan blade from the fan motor.