Drill the Piping Wall Hole for Wall-Mounted Indoor UnitsUpdated 2 hours ago
Introduction
This article explains how to drill the piping wall hole for wall-mounted indoor units. This is the second step in the installation process for all wall-mounted indoor units.
This article is for the following systems:
- Diamante Essenza High-Wall (WYT-17)
- Diamante Pro High-Wall (WYT-20)
- Quantum Ultra High-Wall (WYT-24)
- Quantum Hyperformance High-Wall (WYT-25)
- Quantum Fresh High-Wall (WYT-FA)
Steps
- After securing the mounting plate to the wall, temporarily mount the indoor unit onto the mounting plate in order to confirm the location of the wall hole.
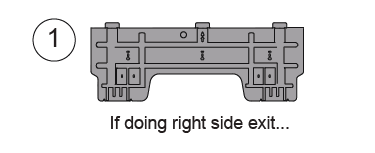
- Use a pencil to lightly trace the bottom corner of the indoor unit, depending on which side exit the piping will go through.
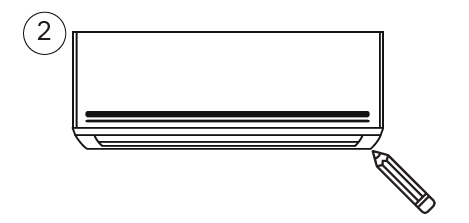
- Take the indoor unit off of the mounting plate and make a mark of where the hole will be, ensuring ample clearance between the tracing and bracket.

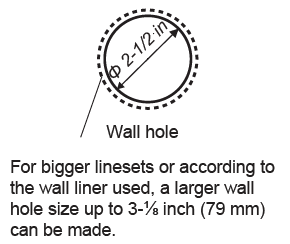
- Drill a 2-1/2 to 3-1/8 inch (63.5-79 mm) wall hole at a slight downward angle using a core drill. Be careful to avoid wires, plumbing, and other sensitive materials. The bottom of the inside hole should be a 1/4 inch (6.35 mm) above the bottom of the outside hole.
Guidelines for Drilling the Wall Holes
Below are the suggested locations for the wall holes. Each system has different guidelines.
Both the left side and right side exits have a 2-1/2 inch (63.5 mm) hole. Confirm the holes are proper by corner tracing.
Diamante Essenza High-Wall (WYT-17)
11,500 BTU Systems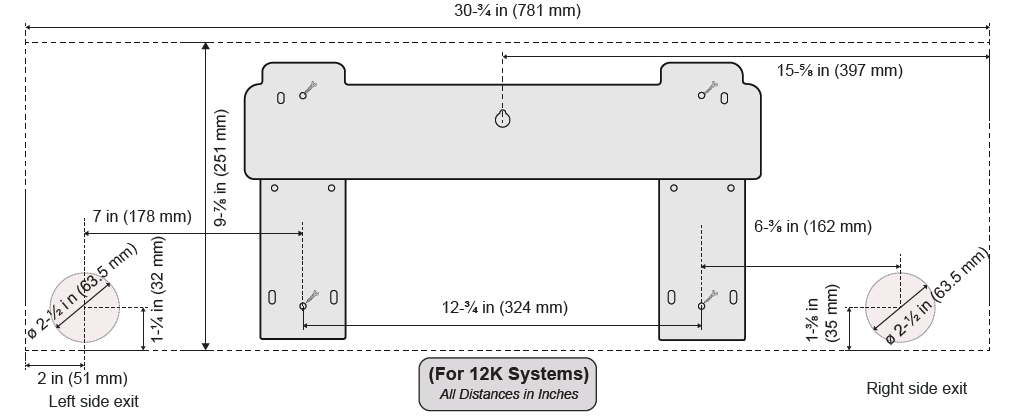
17,000 BTU Systems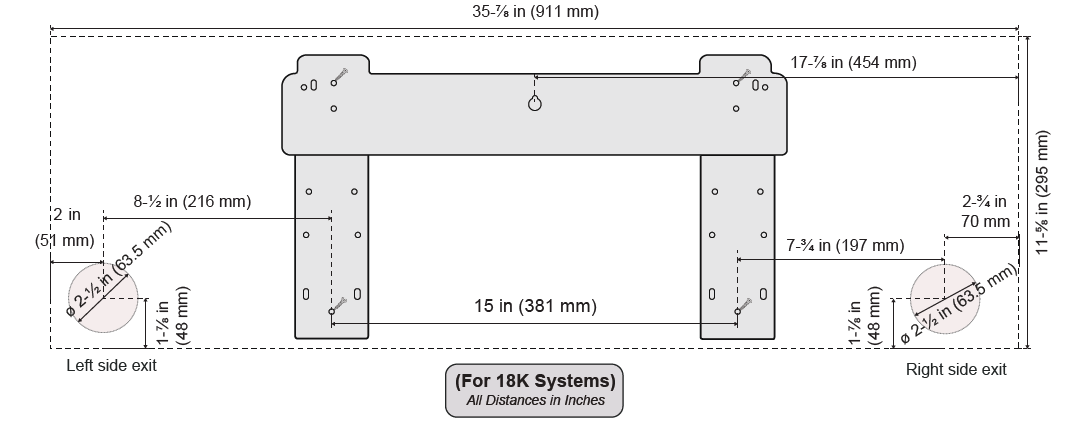
23,000 BTU Systems
35,000 BTU Systems
Diamante Pro High-Wall (WYT-20)
9,000 & 12,000 BTU Systems
18,000 BTU Systems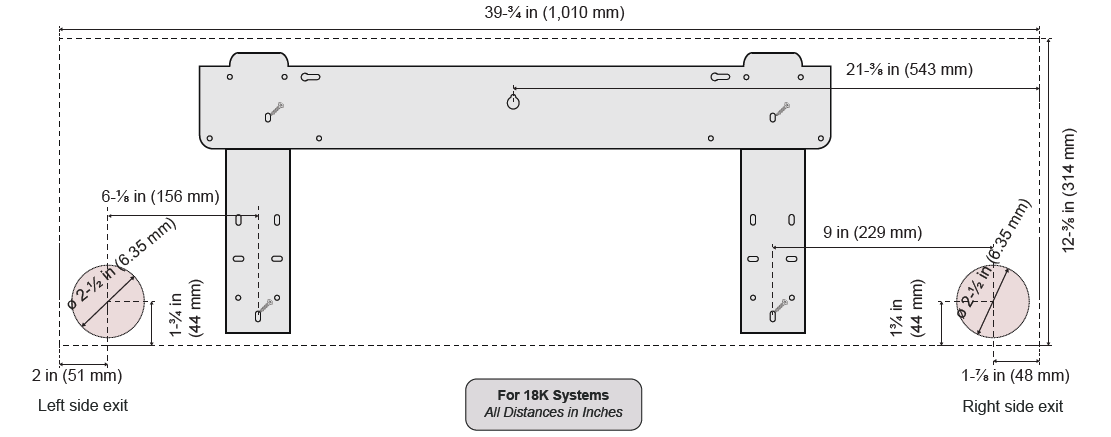
24,000, 31,500, & 36,000 BTU Systems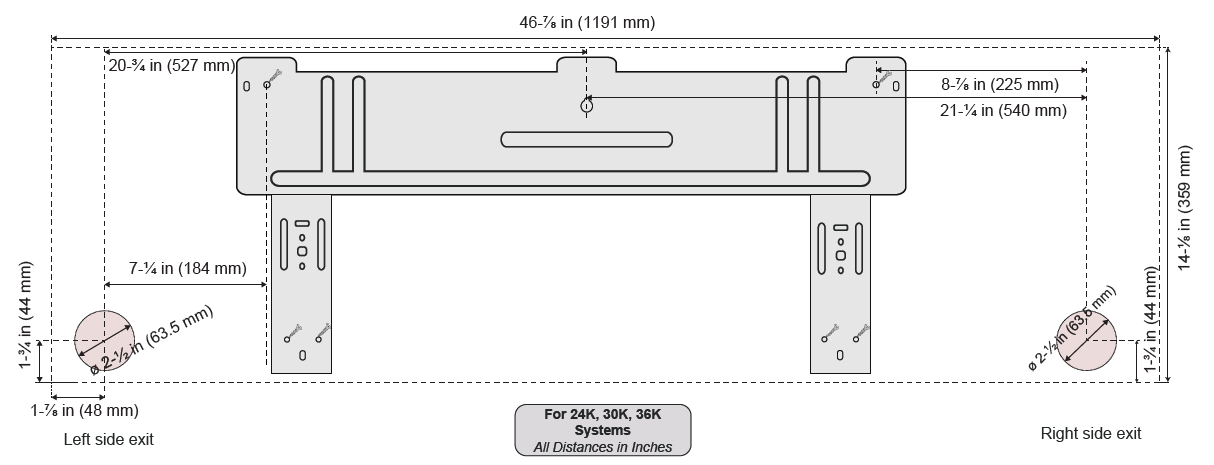
Quantum Ultra High-Wall (WYT-24)
9,000 BTU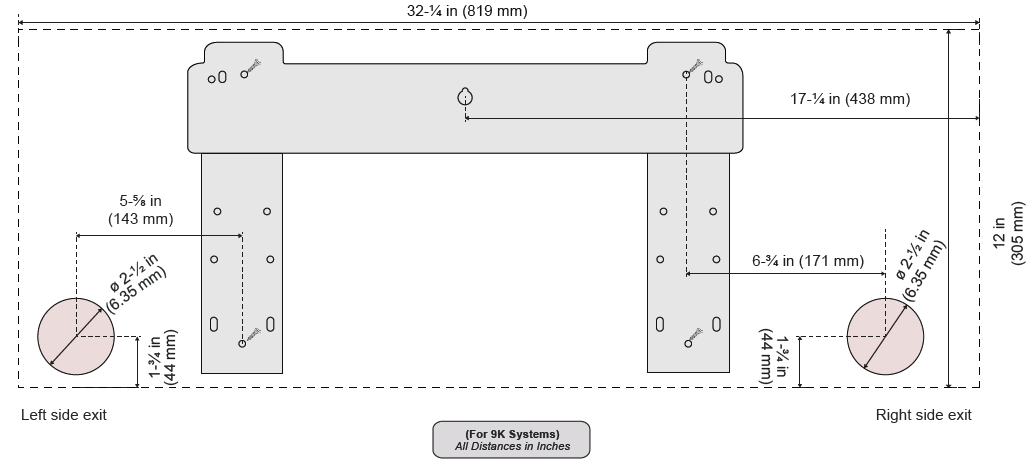 12,000 BTU
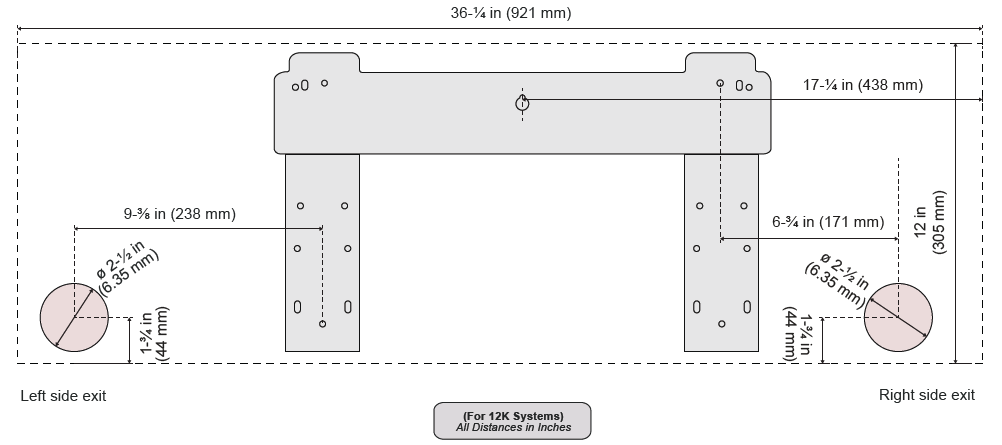
18,000 & 23,000 BTU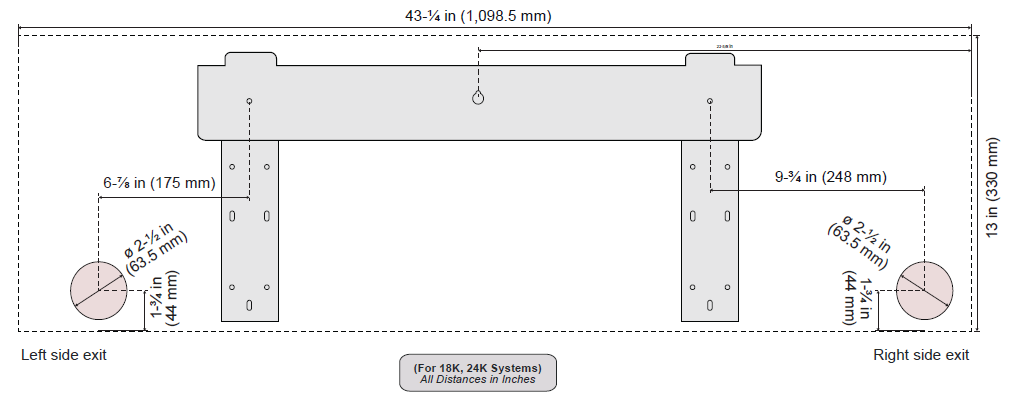 Quantum Hyperformance High-Wall (WYT-25)
9,000 BTU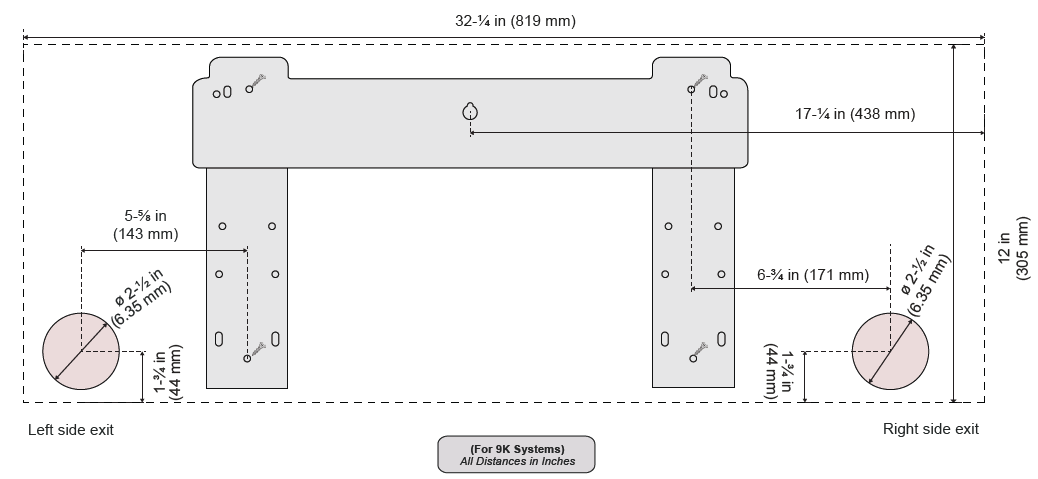 12,000 BTU
 18,000 & 24,000 BTU
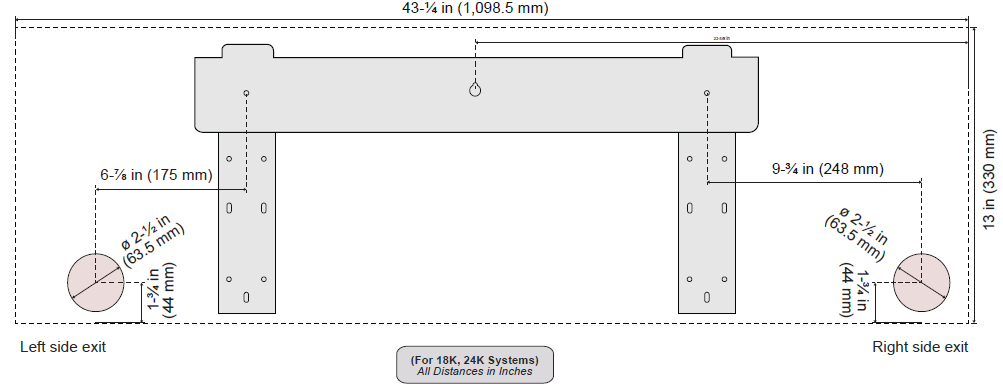 Quantum Fresh High-Wall (WYT-FA)