Mount the Floor-Ceiling Flex Indoor Unit to the FloorUpdated 4 months ago
Introduction
This article explains how to mount the floor-ceiling flex indoor unit to the floor. This is the first step in the installation process for the flex indoor unit, depending on which method was selected.
The indoor unit can be mounted to the floor or ceiling. For information on mounting the flex console to the ceiling, see this other article.
The article begins by explaining how to install the hanging bolt, then it goes over how to mount the unit onto the bolt. The available mounting methods for both floor and ceiling installations are also shown in the article.
This article is for the following system:
Quantum Ultra Floor-Ceiling Flex (UYT-24)
Pre-Installation Preparation
- Select an installation location that provides unobstructed airflow and adequate access for maintenance. Avoid positioning the unit near obstacles that may restrict air intake or discharge.
- Mount the indoor unit to a structurally sound wall that can fully support the unit's weight. The wall surface must be flat and level to allow the unit to sit flush against it. An uneven surface may cause vibration and could result in operational issues or physical damage to the unit.
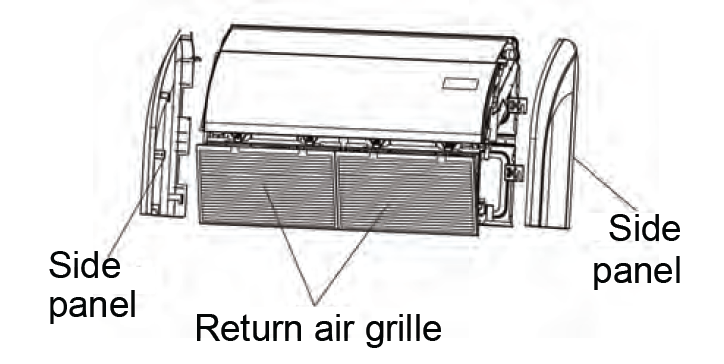
- Dislodge and remove both side panels as well as the return air grille. Set them aside.
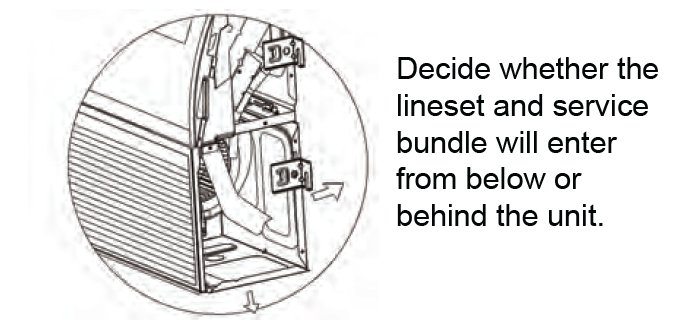
- Select the piping and drainage exit pathway, both the rear side and below side are available.
Install the Hanging Bolt & Mount the Unit
- Use four 3/8 inch mounting bolts and eight washers/nuts to suspend the indoor unit. The mounting bolts are not included with the system.
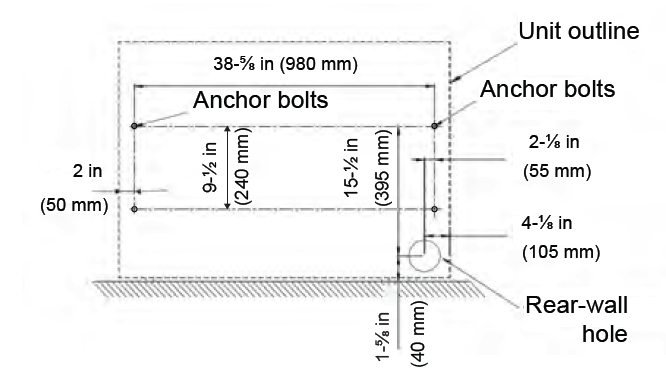
- The center-to-center distance between the bolts must match the specifications provided for the unit size.
- Follow the specific installation diagram and measurements provided to complete the hanging bolt installation.
- The available mounting methods apply to both ceiling and floor applications. Refer to the section below for more information on the mounting methods.
- Confirm the bolts are properly spaced and perfectly level.
- Hang the indoor unit onto the mounting bolts.
- Confirm the unit is perfectly level.
Mounting Methods
Finished Concrete (Brick or Slab)
- Use the expansion bolts to fix the hanging hooks directly into the concrete.
- Drill to a depth of 1-3/4 to 2 inches (45-50 mm) to ensure secure anchoring.

New Concrete Bricks
- Use one of the following methods to embed the screw bolts:
- Blade-type insertion.
- Slide-in channel insertion.
- Ensure that the screw bolts are anchored firmly into the embedded steel reinforcement bars.

Steel Roof Beam Structure
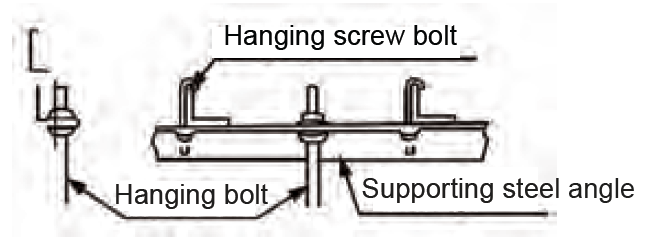
- Install the supporting angle steel brackets.
- Mount the hanging bolts through the brackets and secure them as shown in the illustration.
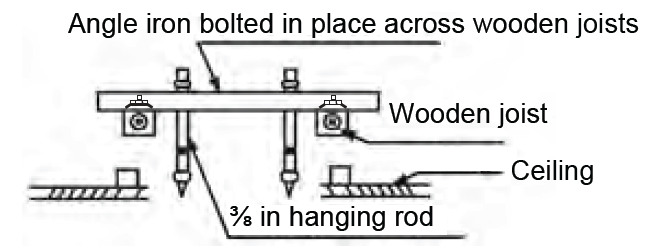
Wooden Construction
- Secure the angle iron across the wooden joints.
- Secure the hanging bolts through the channel and into the ceiling structure below.
Final Mounting Notes
- Use a 3/8-inch locking nut to secure the final assembly. Fine-tune the adjustment until the handler is level.
- Tighten all the nuts firmly to ensure a stable and vibration-free installation, then re-check for levelness.
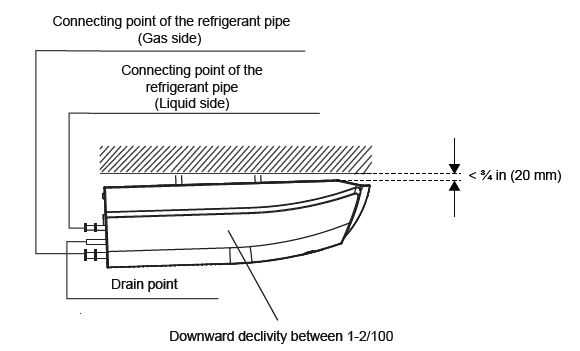
- Leave an upward tilt of 1-2/100 for drainage.
- The air gap should be 3/4 of an inch (19 mm) or less.