Installing the Wall Thermostat for Under-Bench RV SystemsUpdated 3 days ago
Introduction
Learn how to install the wall thermostat for the Under-Bench RV Inverter Packaged Heat Pump Air Conditioner.
Steps
1. Locate the wall thermostat, handheld remote, batteries, support bracket, and extension cord. During initial setup, these items are typically found in the hidden compartment on top of the system. 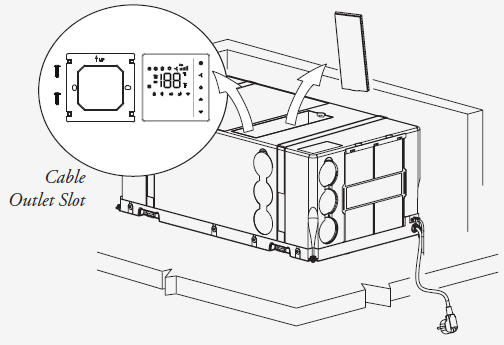
2. Secure the steel plate to the wall using self-tapping screws. The distance between the two holes must be 2-3/8 inches (60 mm), and the hole diameter must be less than 2 inches (51 mm). Use pan-head, Phillips, and self-tapping screws.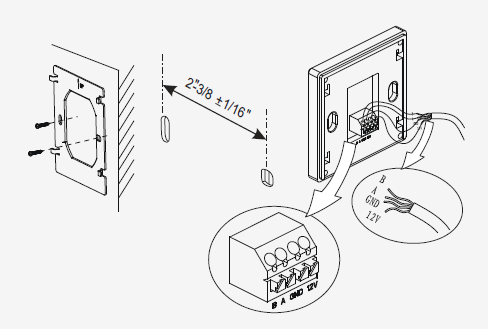
3. After connecting the wiring, place the thermostat against the steel plate and slide the buckle down.