Activate the Timer On/Timer Off FunctionUpdated 5 months ago
Introduction
This article explains how to activate the Timer On and Timer Off functions for Full Inverter Rooftop RV Air Conditioner Heat Pumps (PYZ).
The Timer function gives users the ability to set a time delay for the system to turn itself on or off.
Timer On
The system must currently be off to configure the Timer On function. The system starts in Auto mode when the Timer On function activates.
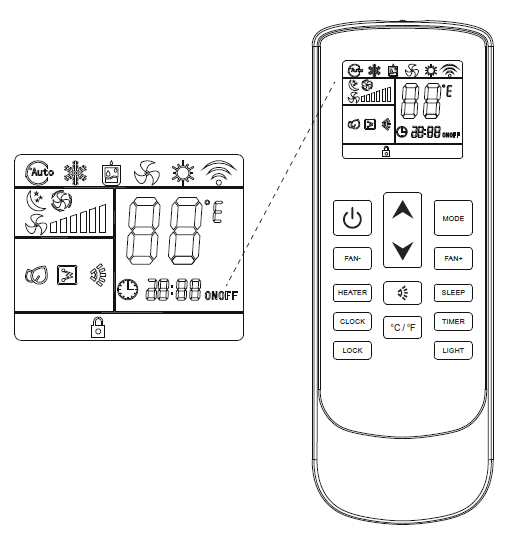
- Press the Timer button to set the time at which the system will turn on.

- Use the temperature selection buttons to modify the time value selection. Use the Up arrow to increment the time value up by 1 hour. Use the Down arrow to increment the time value up by 10 minutes.

- Press the Timer button once more to confirm the selections entered. Note: Pressing the button a third time deactivates the Timer Off function.

Timer Off
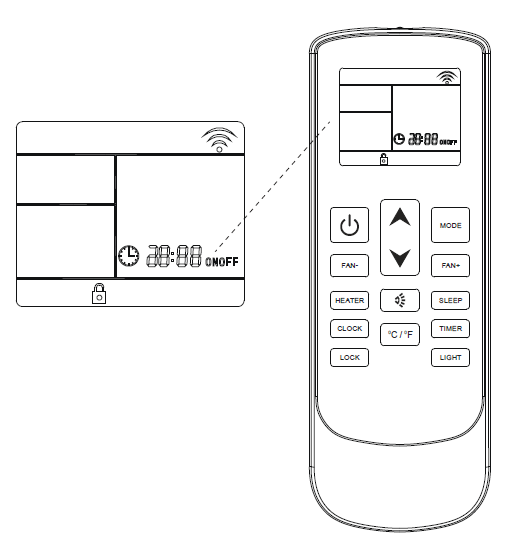
When the Timer Off button is first pressed, the symbol on the display will be flashing to signify this feature is being set. Pressing the button once more will confirm the data entered, and the icon will remain solid to indicate that the Timer Off function is set. Pressing the button a third time deactivates the Timer Off function.
- Press the On/Off button to switch the machine on or off.

- Press the Mode button to cycle through the operating modes, then select the desired mode.

- Use the temperature selection buttons to select the desired set point temperature.

- Press the fan speed buttons to select low, medium, high, or automatic fan speed.

- Press the Timer button to set the time at which the system turns itself off.

- Use the temperature selection buttons to modify the time value selection. Use the Up arrow to increment the time value up by 1 hour. Use the Down arrow to increment the time value up by 10 minutes.

- Press the Timer button to confirm the selections entered.