Activate the Timer Function for the Pioneer Airlink AppUpdated 5 months ago
Introduction
This article explains how to activate the timer function for the Pioneer Airlink app.
Users can set a timer for their air conditioner to automatically power the unit on or off, adjust the set temperature, and change the mode, wind speed, or precision airflow direction at a specific time.
Steps
1. Tap the "Timer" button. 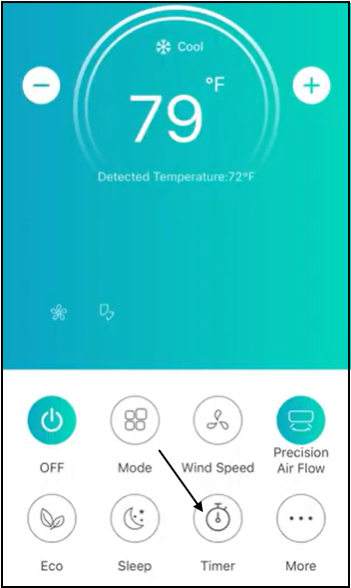
2. Tap "Add Timer".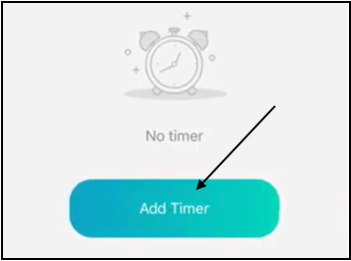
3. Set the activation time for the timer. 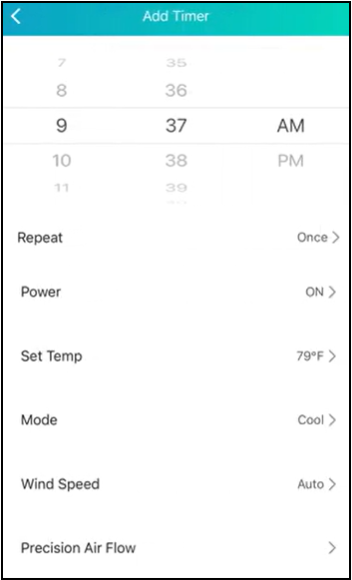
4. Users can enable the timer to repeat on a specific day of the week. Select a day for the timer to repeat, then tap "Confirm". By default, the timer will only activate once.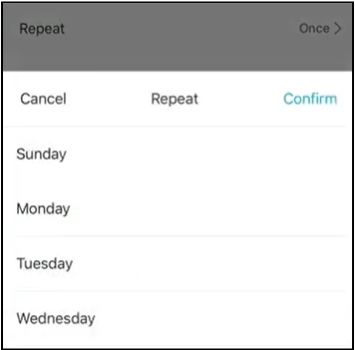
5. Users can enable the timer to turn on or off the appliance. Select either on or off, then tap "Confirm". 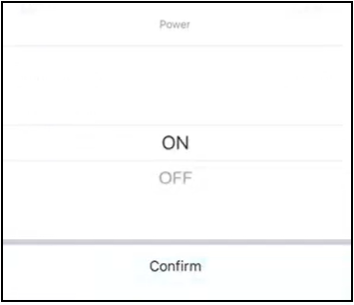
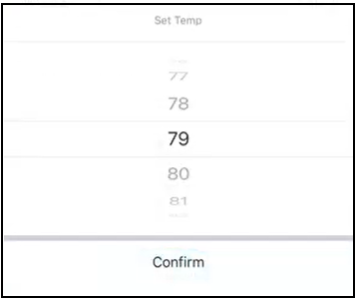
6. Select the desired temperature for the timer and tap "Confirm".
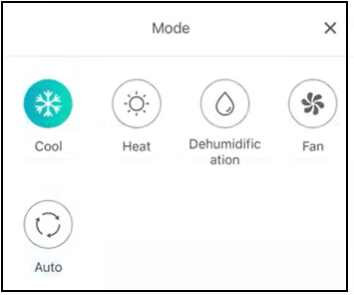
7. Select the desired mode for the timer.
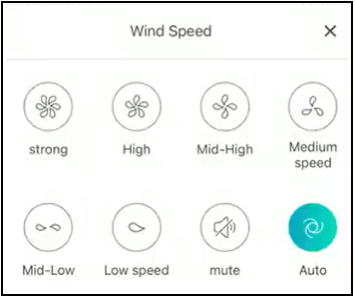
8. Select the desired wind speed for the timer.
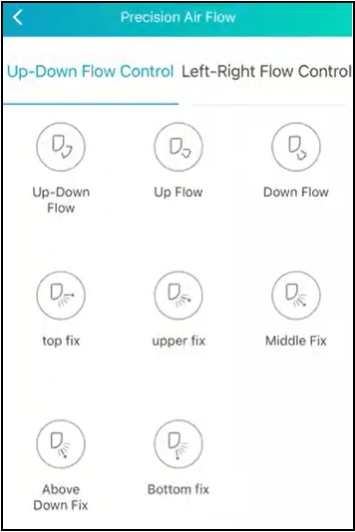
9. Select the precision airflow direction for the timer.
10. Tap the "Save" button to confirm the timer configuration. 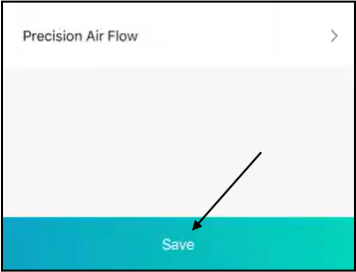
The new timer will display. Users can edit the existing timer.
Turn off the timer by toggling off the switch. 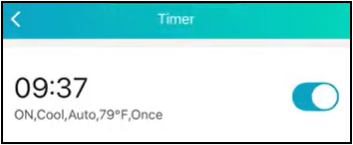
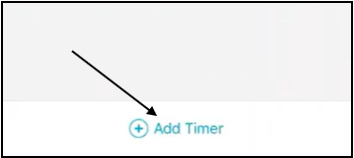
Users can delete the timer by sliding the existing timer to left and tapping "Delete". 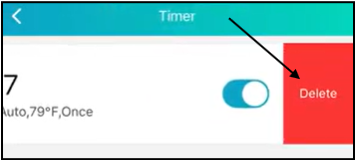
Tap the "Add Timer" button to create another timer.