Install the Internet Access ModuleUpdated 4 months ago
Introduction
This article explains how to install the internet access module for Diamante Essenza (WYT-17) and Pro (WYT-20) High-Wall systems.
These systems require the internet access module, which is sold separately. 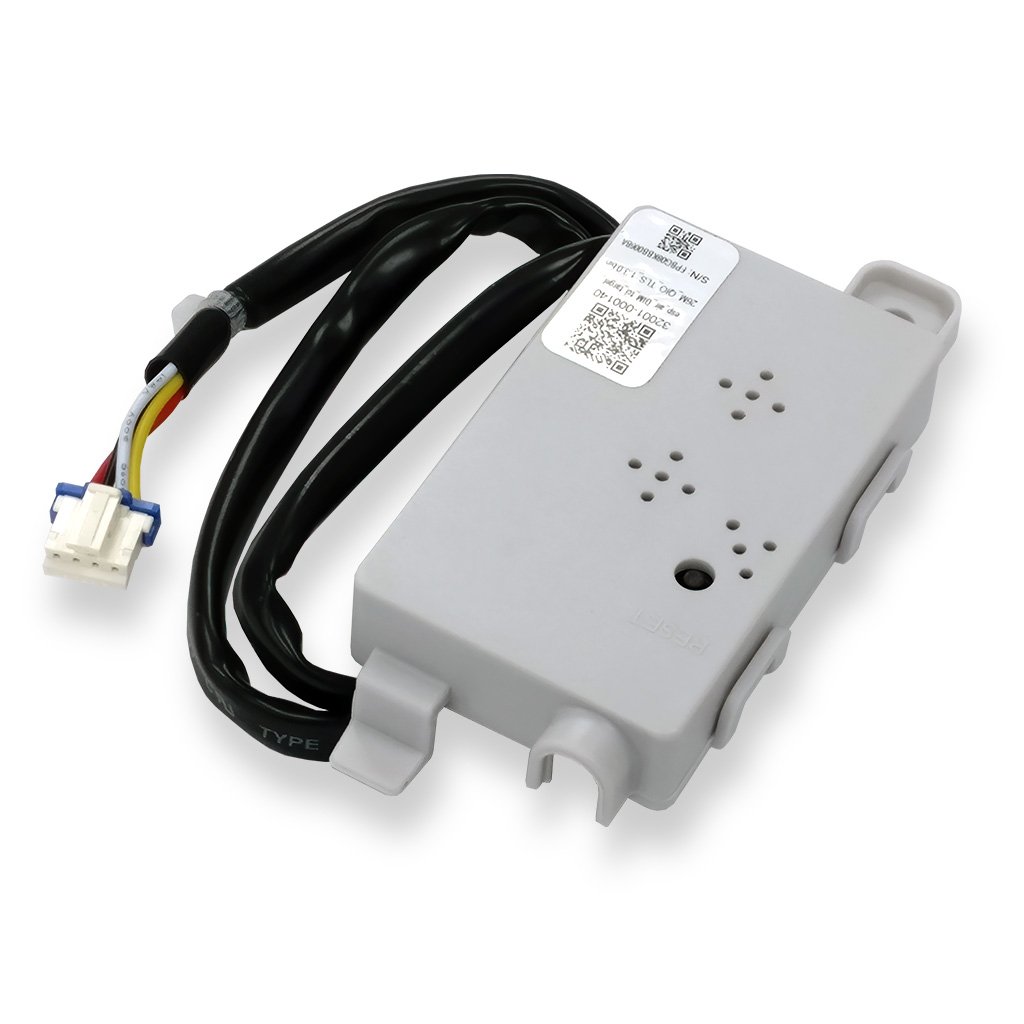
Video Tutorial
Watch our video tutorial on how to install the internet access module. The tutorial explains the installation process for the module from 0:14-1:04 in the video.
Steps
Note: Before working on any internal electrical components, always turn off the power to the system.
1. Lift up the front panel of the indoor unit, then remove the screw holding in the terminal block cover.
2. Remove the terminal block cover from the indoor unit.
3. Attach the module and one screw to the slot within the unit. 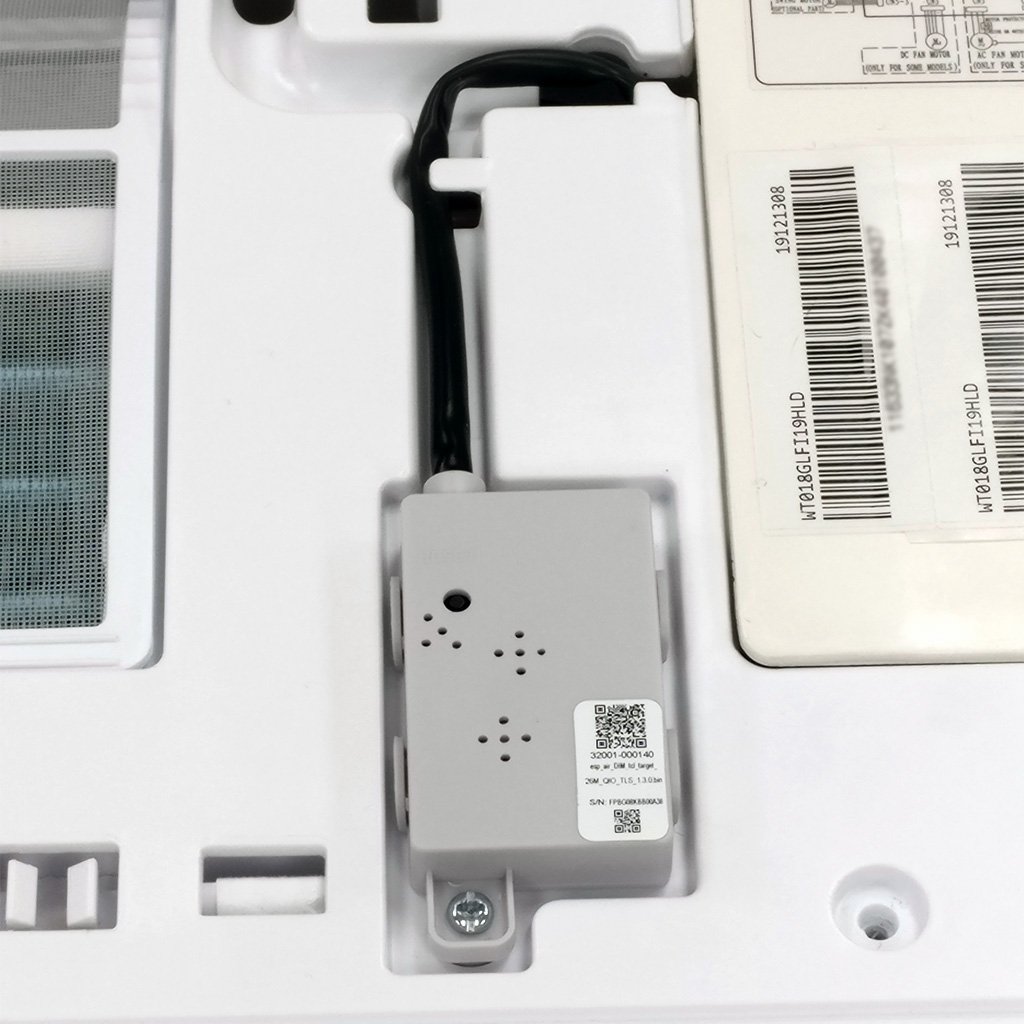
4. After properly positioning the module, tighten the screw to fasten the module.
5. Route the wire through the channel grooves in the front casing.
6. Pull on and slide out the indoor printed circuit board (PCB) to expose the terminal.
7. Connect the module's plug into the appropriate terminal. In this example, terminal CN16. 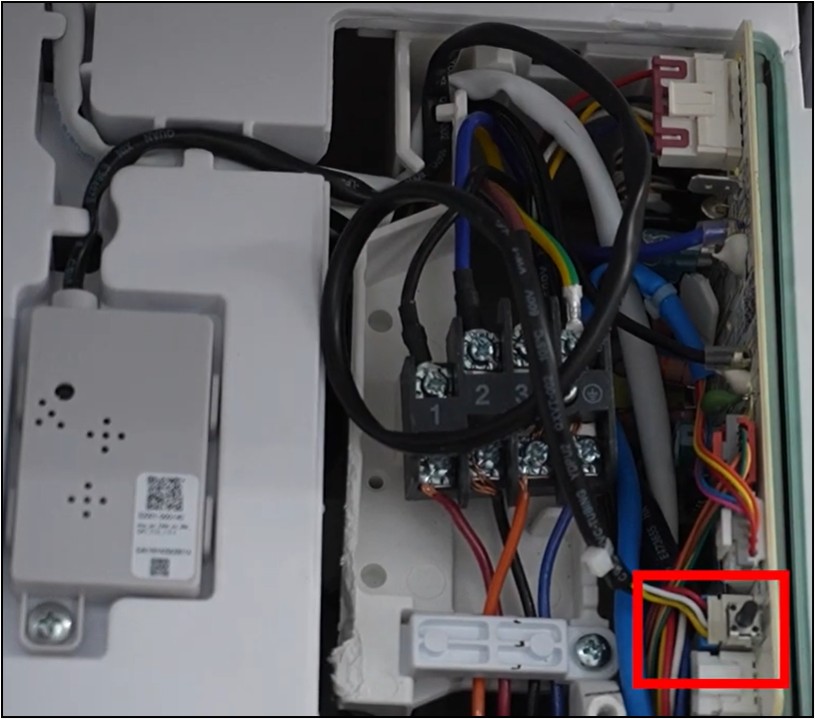
8. Re-fasten the terminal block cover, then lower the front panel cover of the indoor unit.
9. Restore power to the system.
The internet access module is now installed.