Add Members to the Home Management Settings in the Pioneer Airlink AppUpdated 4 months ago
Introduction
This article explains how to add members to the home management settings in the Pioneer Airlink app. This article also explains how to delete members.
Users, or members, can be added to the home management settings to conveniently control the device's temperatures and functions. Additional members can be manually added to the home management settings, or an invitation can be sent to an individual requesting them to join. By default, only the home owner is included in the home management settings.
Manually Add Members
1. Open the Pioneer Airlink app.
2. Open the "Me" tab. 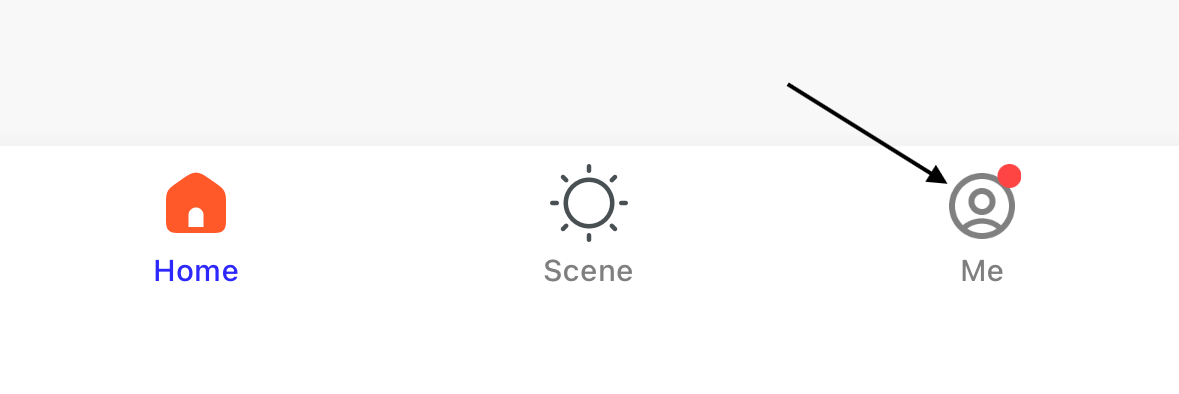
3. Tap "Home Management" to open the home management settings. 
4. Open an existing home. 
5. Tap "Add Member" to add a member to the home settings. 
6. Add the member manually by tapping "App account". 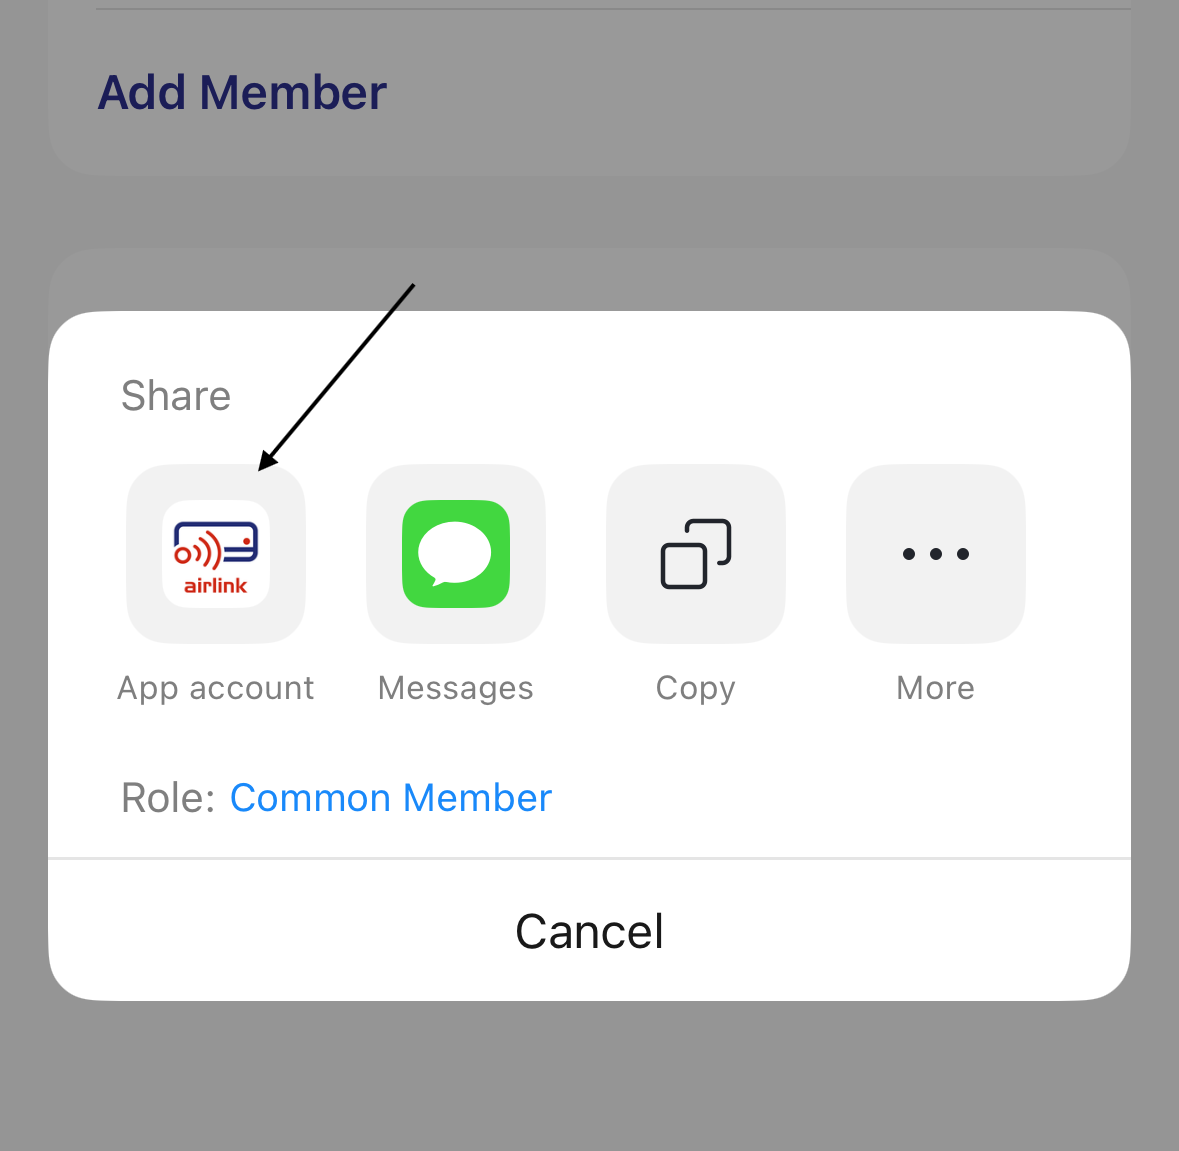
7. Enter and select the information for the new member.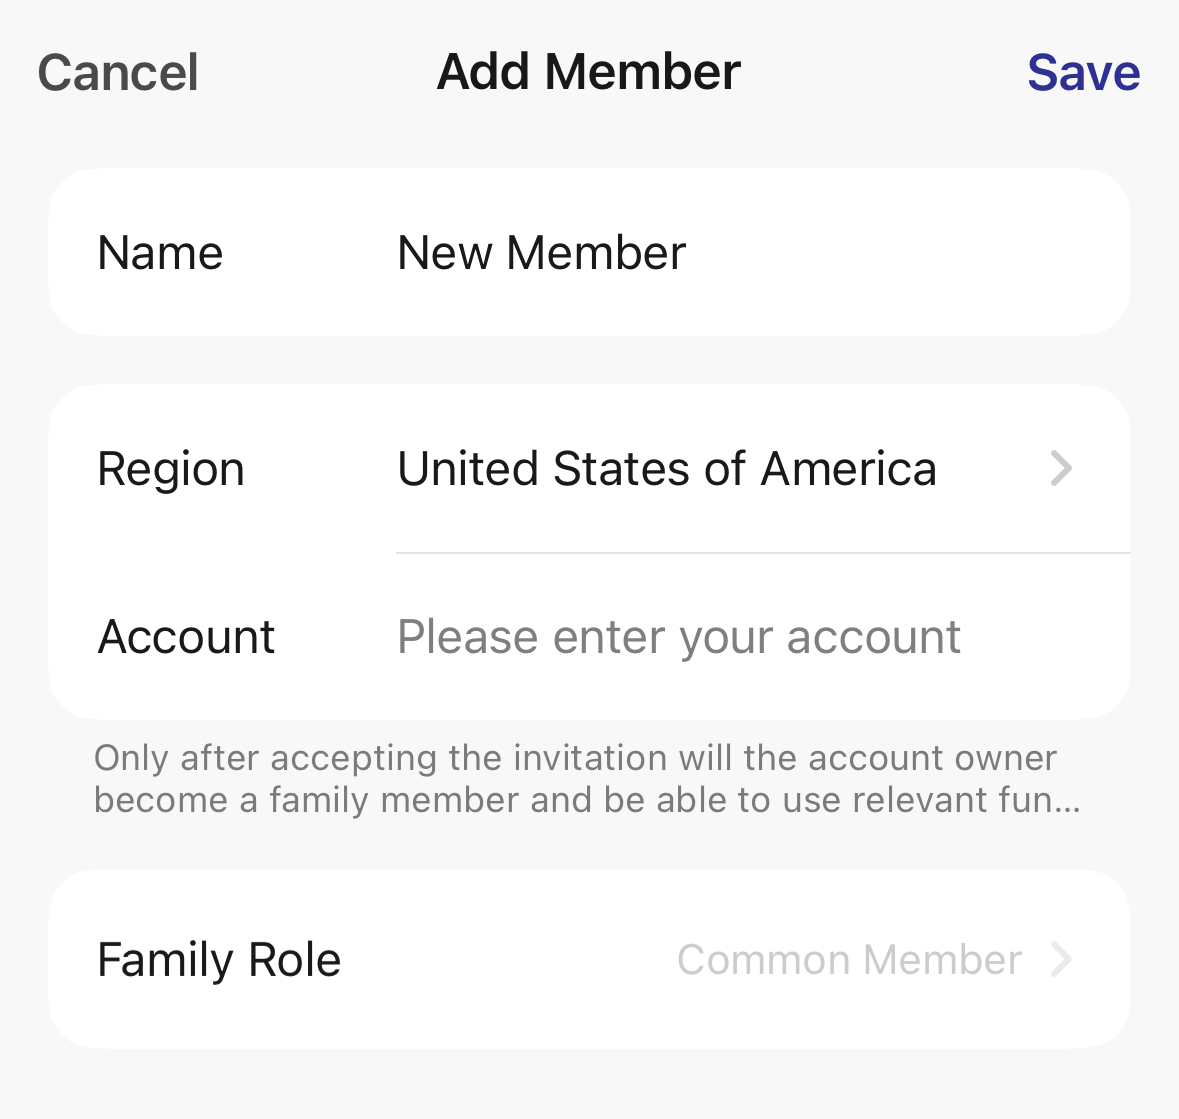
- Name: Enter the name for the new member.
- Region: Select the region for the new member.
- Account: Enter the email for the account.
- Family Role: Select the role for the new member. By default, the app offers administrator and common member as the two available roles.
8. Tap "Save" to confirm the new member. 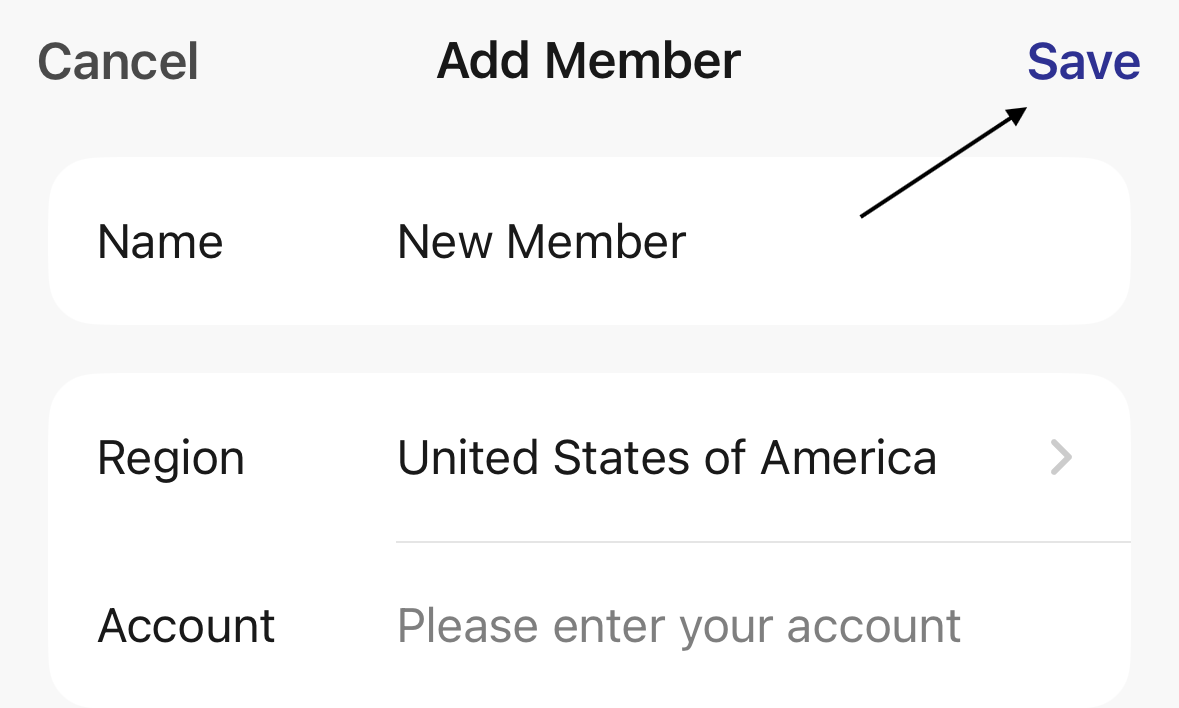
The member is now added to the home management settings.
Invite Members
1. Open the Pioneer Airlink app.
2. Open the "Me" tab.
3. Tap "Home Management" to open the home management settings.
4. Open an existing home. 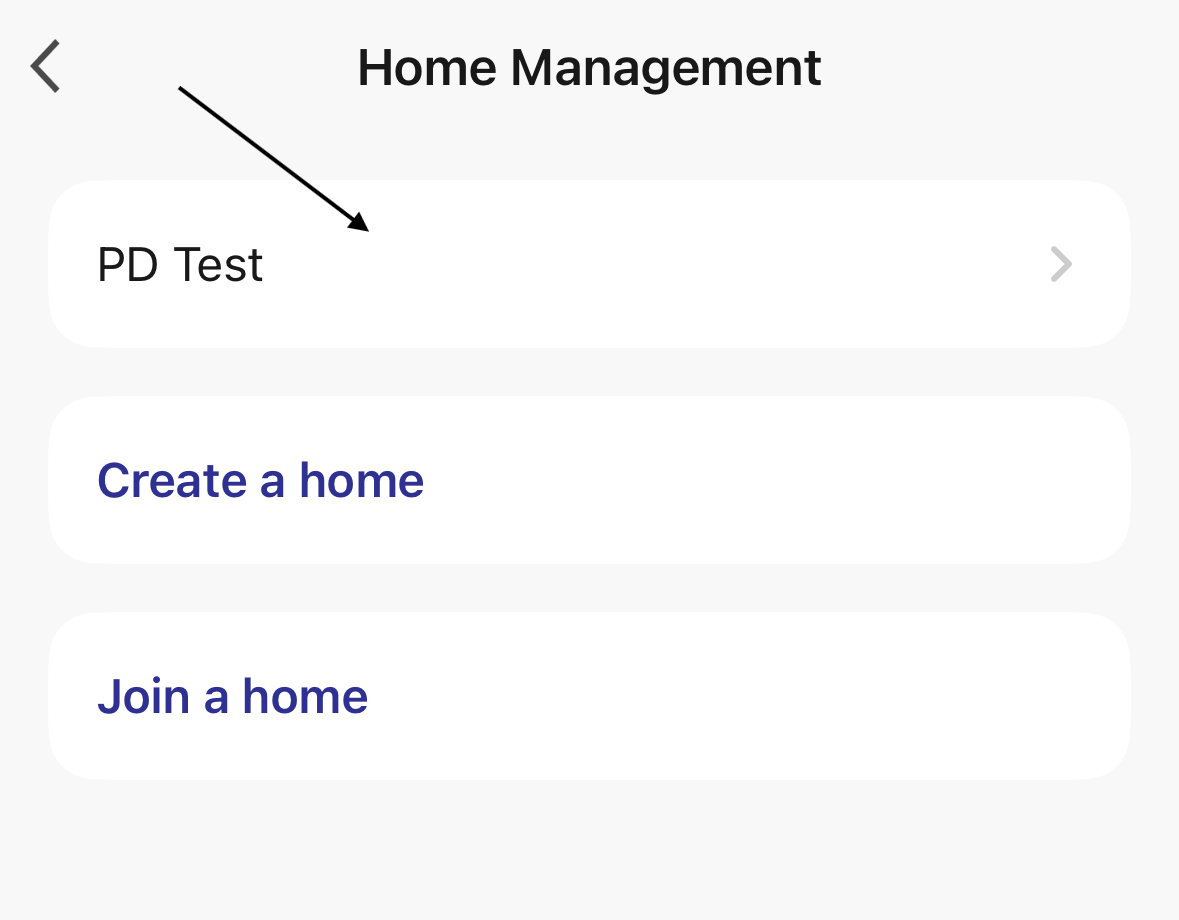
5. Tap "Add Member" to add a member to the home settings. 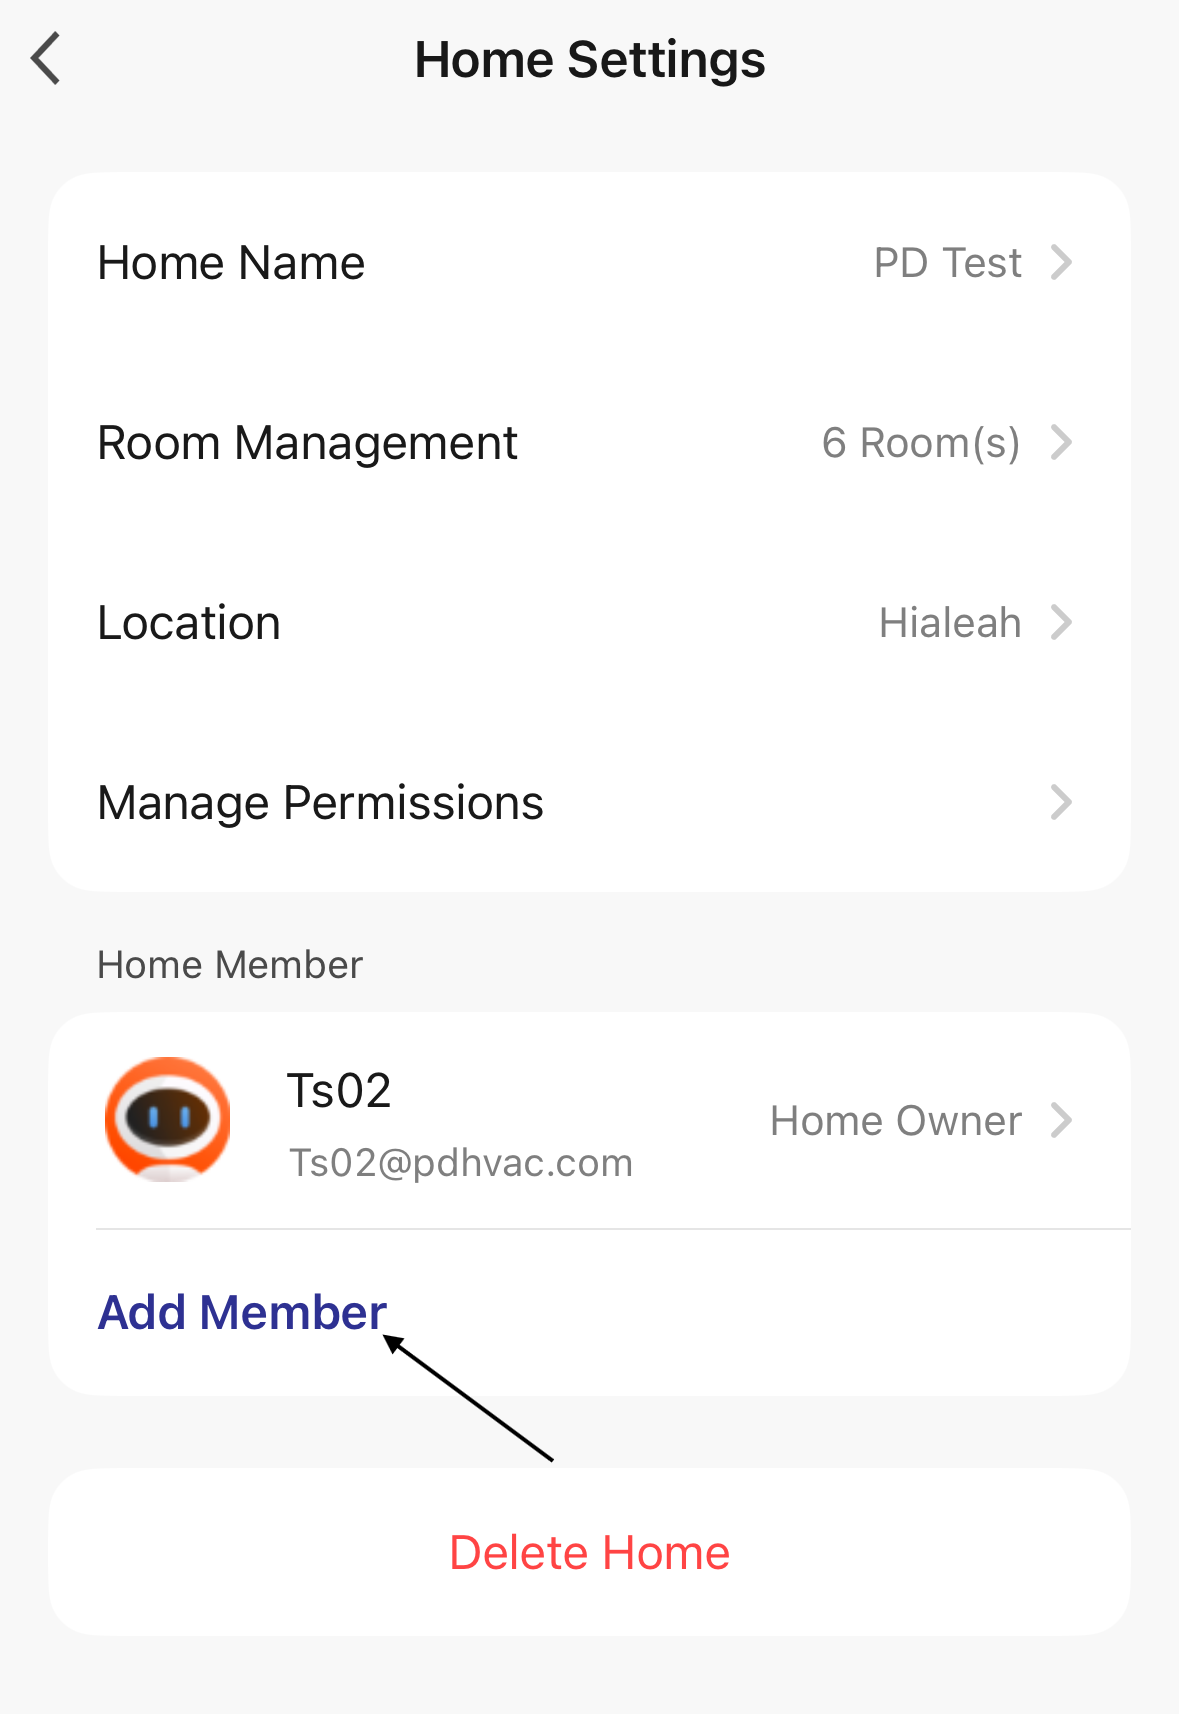
6. Tap "Messages" to text an invitation to the individual. 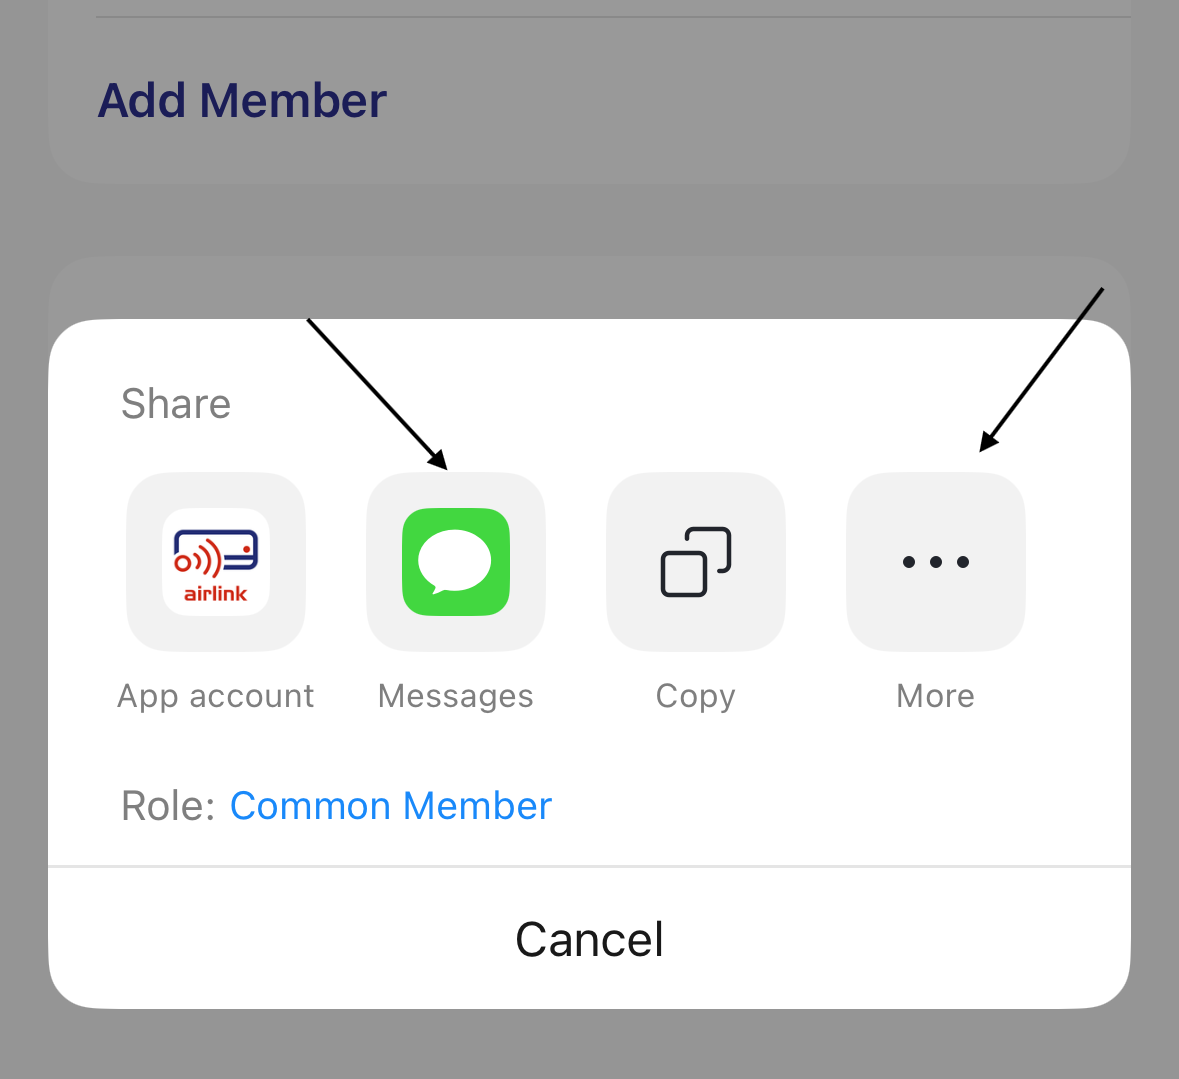
Tap "More" to send the invitation by email or an alternative method.
An invitation code will be included in the message. The invitation is valid for three days. If the invitation is not accepted within the three days, it will need to be resent.
7. The user who received the invitation can enter the invitation code by tapping "Join a home".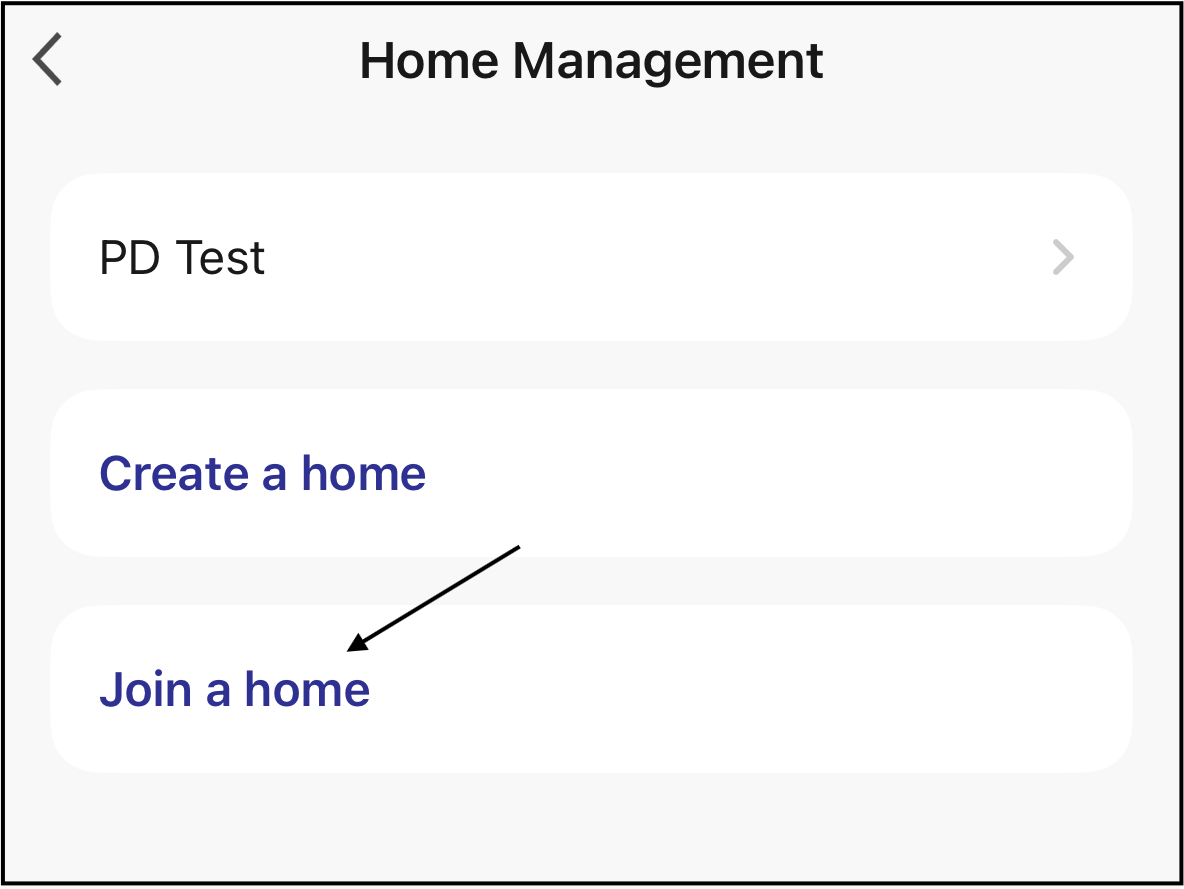
8. The user enters the invitation code, then taps the arrow icon to submit it. 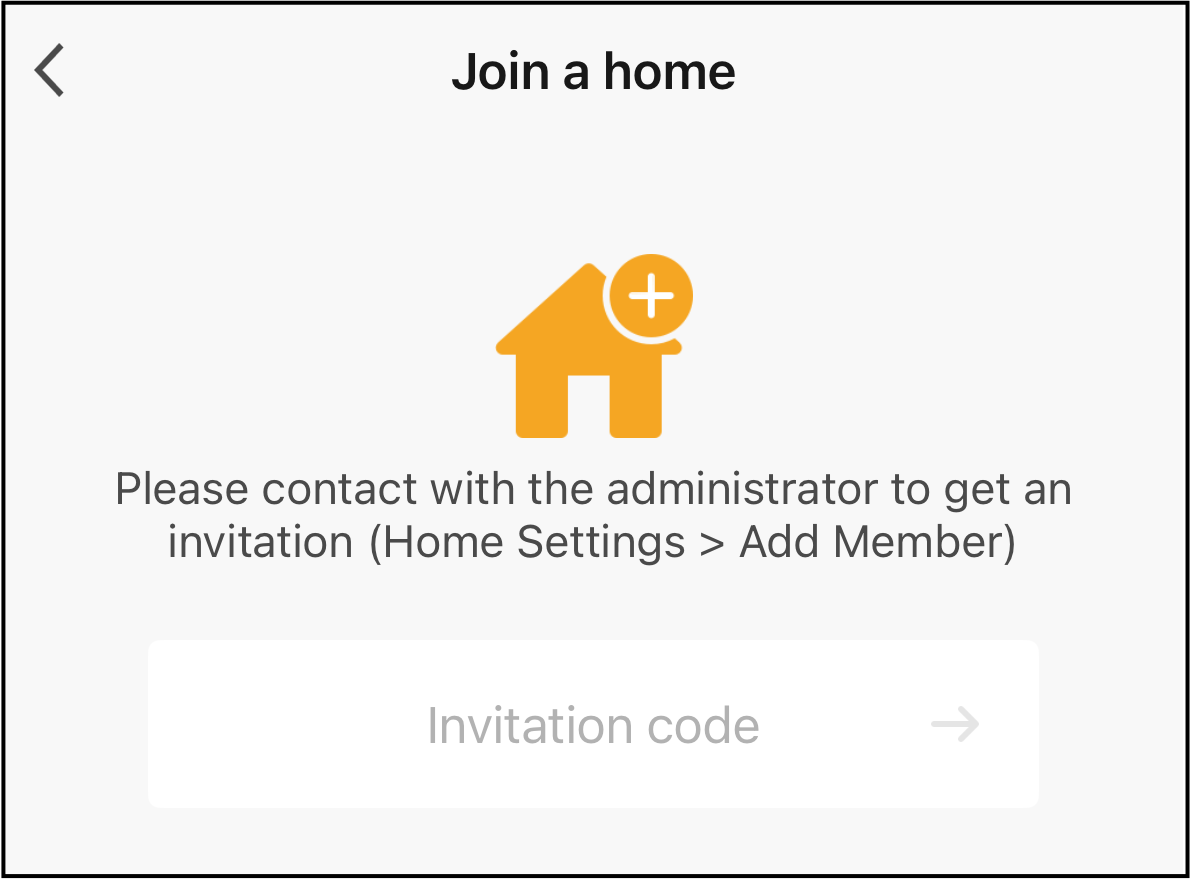
The member is now added to the home management settings.
Delete Members from the Home Settings
1. Open the Pioneer Airlink app.
2. Open the "Me" tab.
3. Tap "Home Management" to open the home management settings.
4. Open an existing home. 
5. Tap the home member you want to delete. 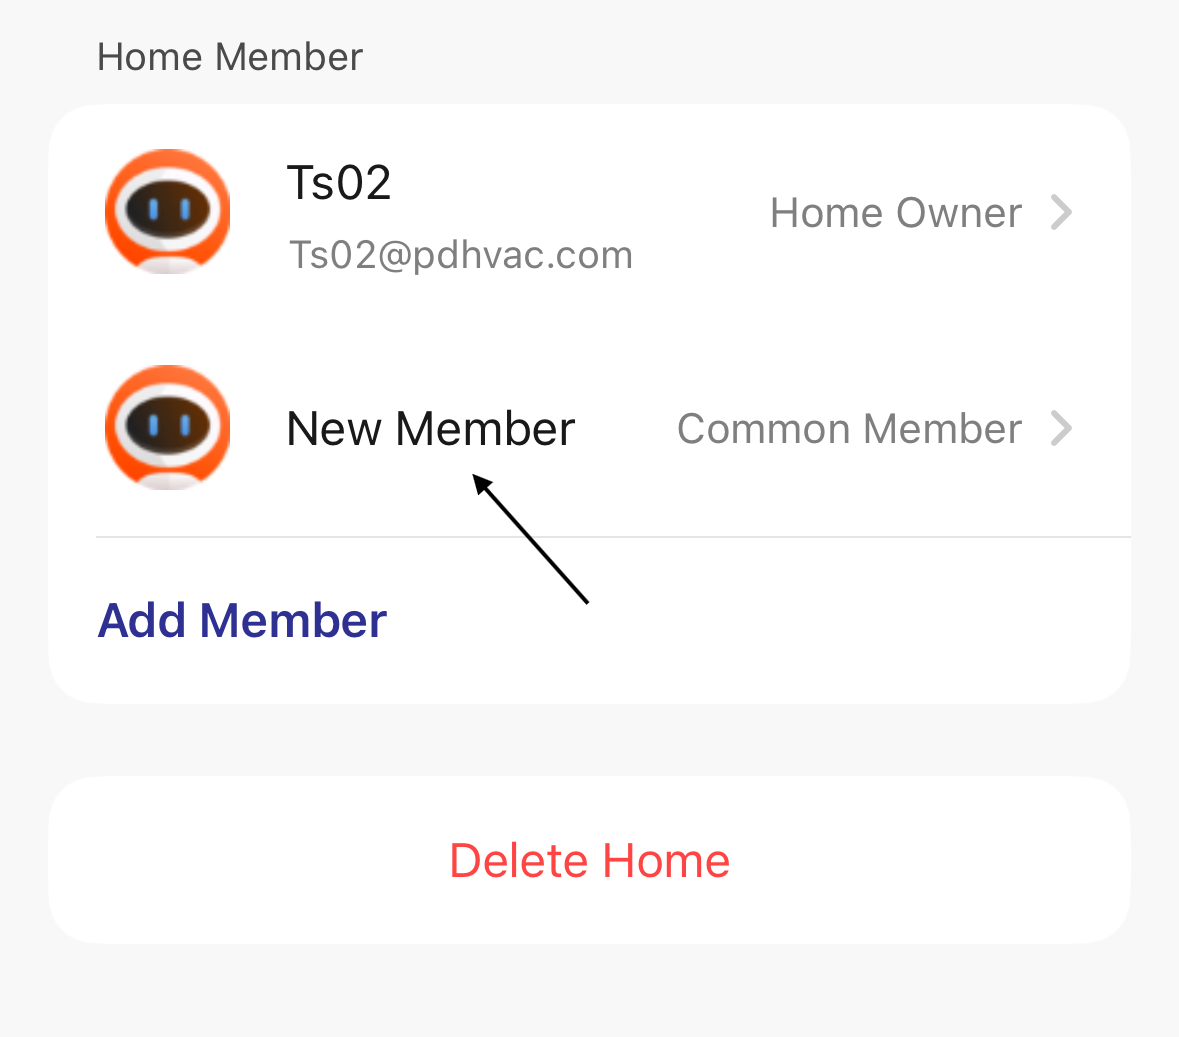
6. Tap "Remove Member" to delete the member from the home management settings. 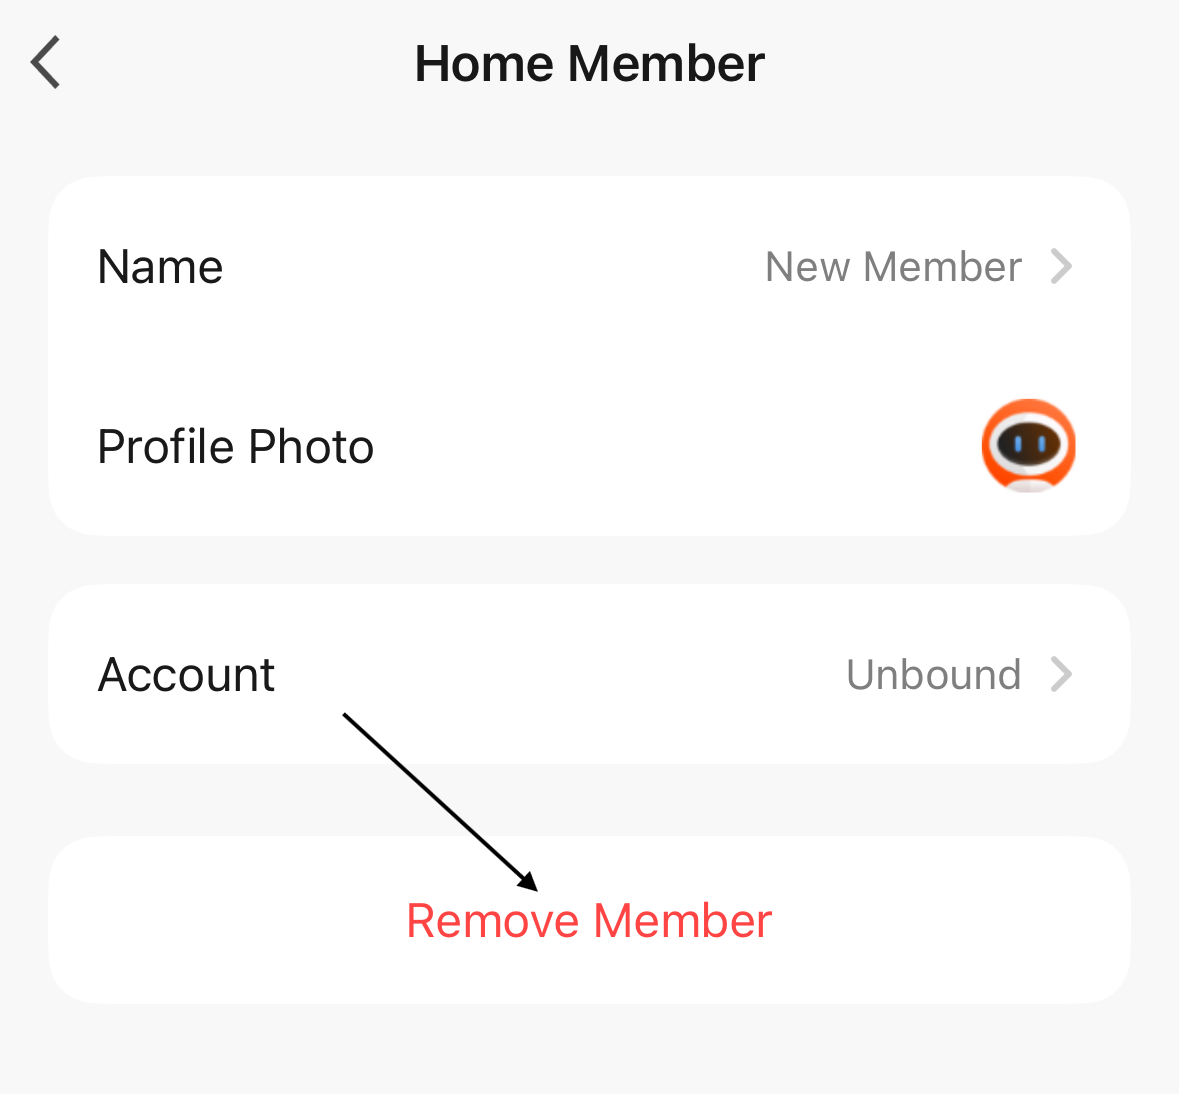
The member is now removed from the home management settings.