ODU Disassembly for Quantum Fresh High-Wall SystemsUpdated 17 days ago
Introduction
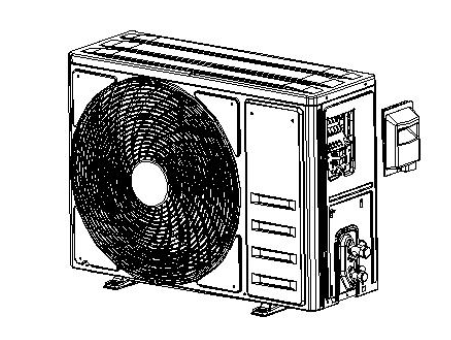
This article provides steps for disassembling the outdoor unit of Quantum Fresh High-Wall (WYT-FA) systems.
Outdoor Unit Disassembly
Before disassembly:
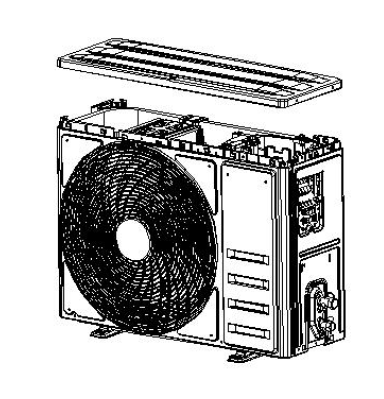
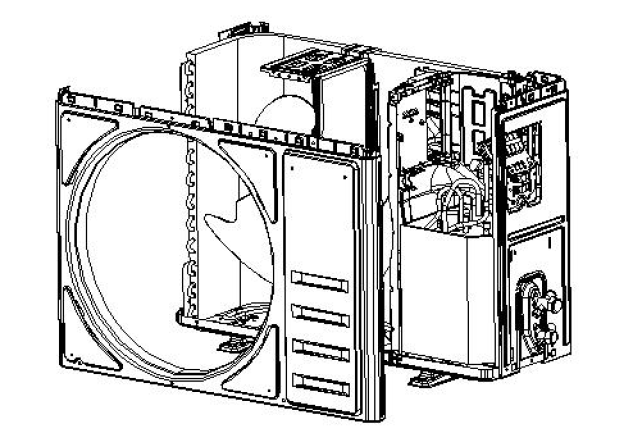
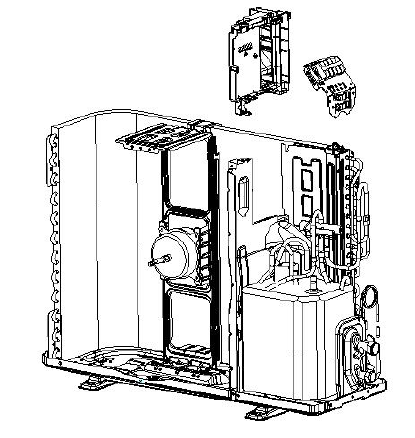
1. Remove the handle and top cover.
A. Remove the handle by unfixing the screw between the handle and right plate.
B. Unfix the screws on the top cover, front panel, left panel, right panel.
C. Take off the top cover.
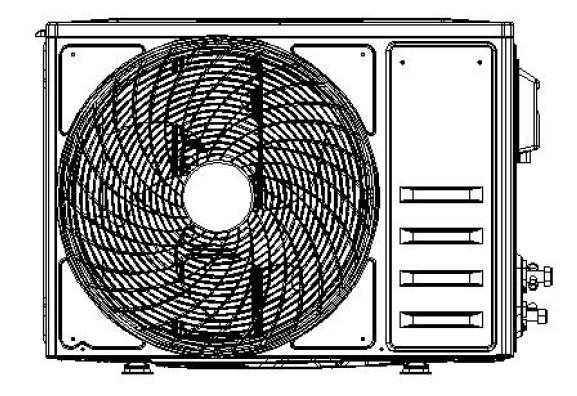
2. Disassemble the fan guard and front panel.
A. Unfix the screws on the front panel of the fan guard.
B. Turn the fan guard anticlockwise to remove it from the unit.

C. Unfix the screws between the top cover of the middle plate and base plate.
D. Remove the front panel from the unit.
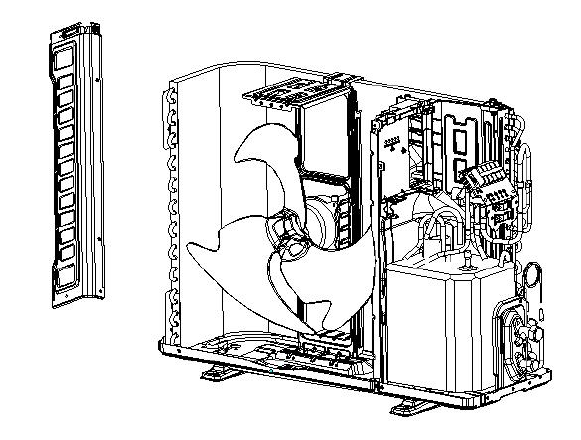
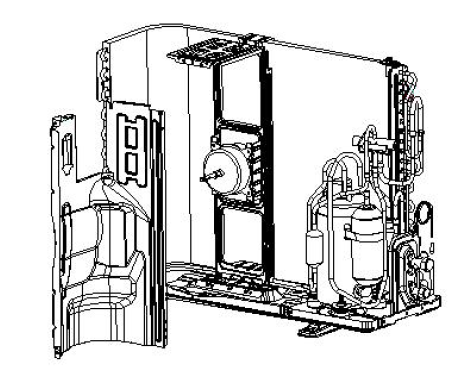
3. Disassemble the left and right plate.
A. Unfix the screws on the right plate, electric box assembly, valve plate, and base plate.
B. Remove the right plate.
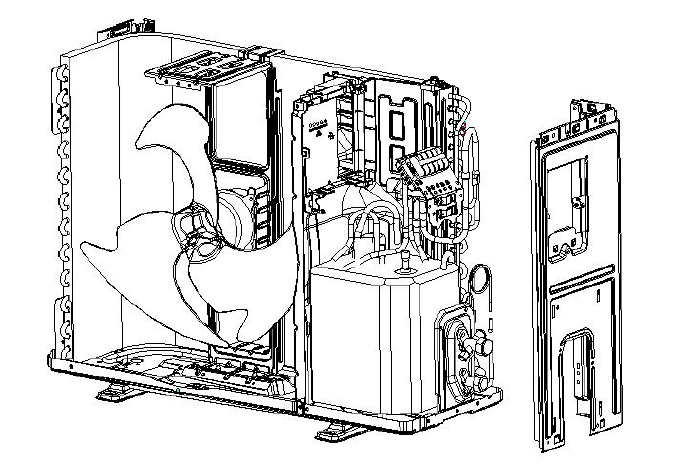
C. Unfix the screws on the left plate, base plate, and condenser plate.
D. Remove the left plate.
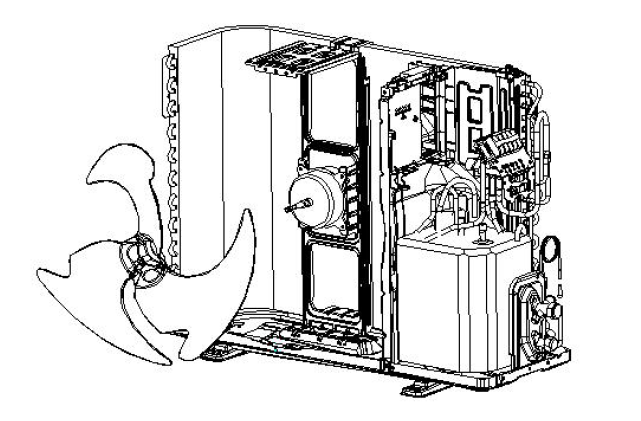
4. Disassemble the axis fan blade.
A. Unscrew the fan blade nut, then remove it from the fan motor.
5. Disassemble the electric box.
A. Remove the wire of the fan motor and temperature sensors from the PCB (printed circuit board).
B. Remove the wire of the compressor from the connector.
C. Unfix the screw between the electric box and partition plate.
D. Remove the electric box from the unit.
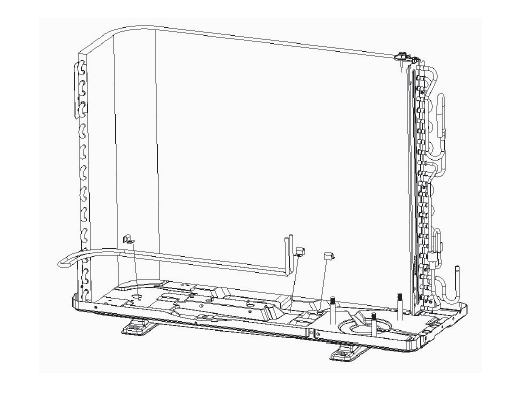
6. Remove the soundproof cotton.

7. Disassemble the partition plate.
A. Unfix the screw between the separate plate and unit, then remove it from the unit.
8. Disassemble the gas and liquid valves.
A. Unfix the screws between the valve support plate and unit.
B. Remove the gas and liquid valves from the unit by welding.
Notes: Before welding, release all the refrigerant in the unit. Use wet cloths to protect the gas and liquid valves from heat damage.
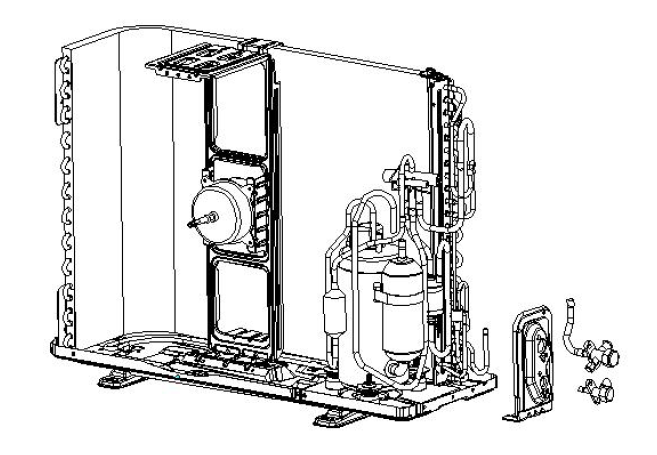
9. Disassemble the 4-way valve assembly.
A. Remove the 4-way valve from the system by welding from the suction and discharge port of the compressor.
Note: Ensure that there is no damage to the compressor, nameplate, etc.
10. Disassemble the compressor.
A. Unscrew the nuts and remove the compressor from the unit.
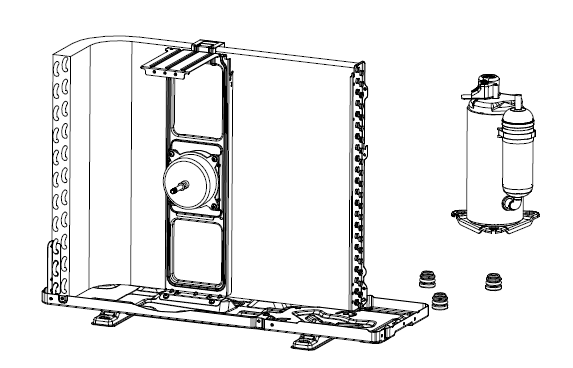
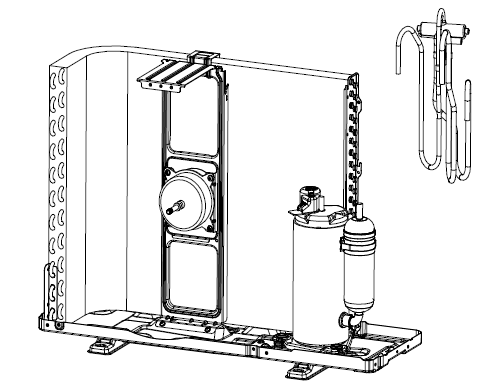
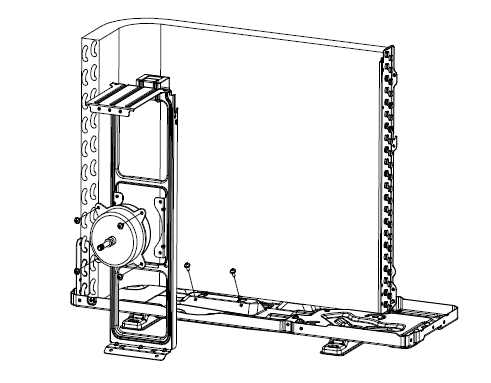
11. Disassemble the fan motor and fan support.
A. Unfix the screws between the fan support and base plate, then remove the support from the unit.
B. Loosen the metal cable clamps on the back of the fan support.
C. Unfix the screws between the support and fan motor, then remove the fan motor from the fan support.
Note: Take care of the four rubber sleaves.
12. Disassemble the chassis electric heating belt.
A. Unfix the screws securing the electric heating fixed card to the chassis electric heating tube.
B. Remove the chassis electric heating tube.