
Hanging the Air Handler Unit for RYT-24 Ducted Ceiling Concealed SystemsUpdated 3 months ago
Introduction
Follow these steps to properly hang the air handler unit for the Quantum Ultra Ducted Ceiling Concealed (RYT-24) system.
Ensure sufficient space for installation and repairs. It is recommended to leave an air gap of 4 inches (102 mm) or greater between the air handler and the roof.
Steps
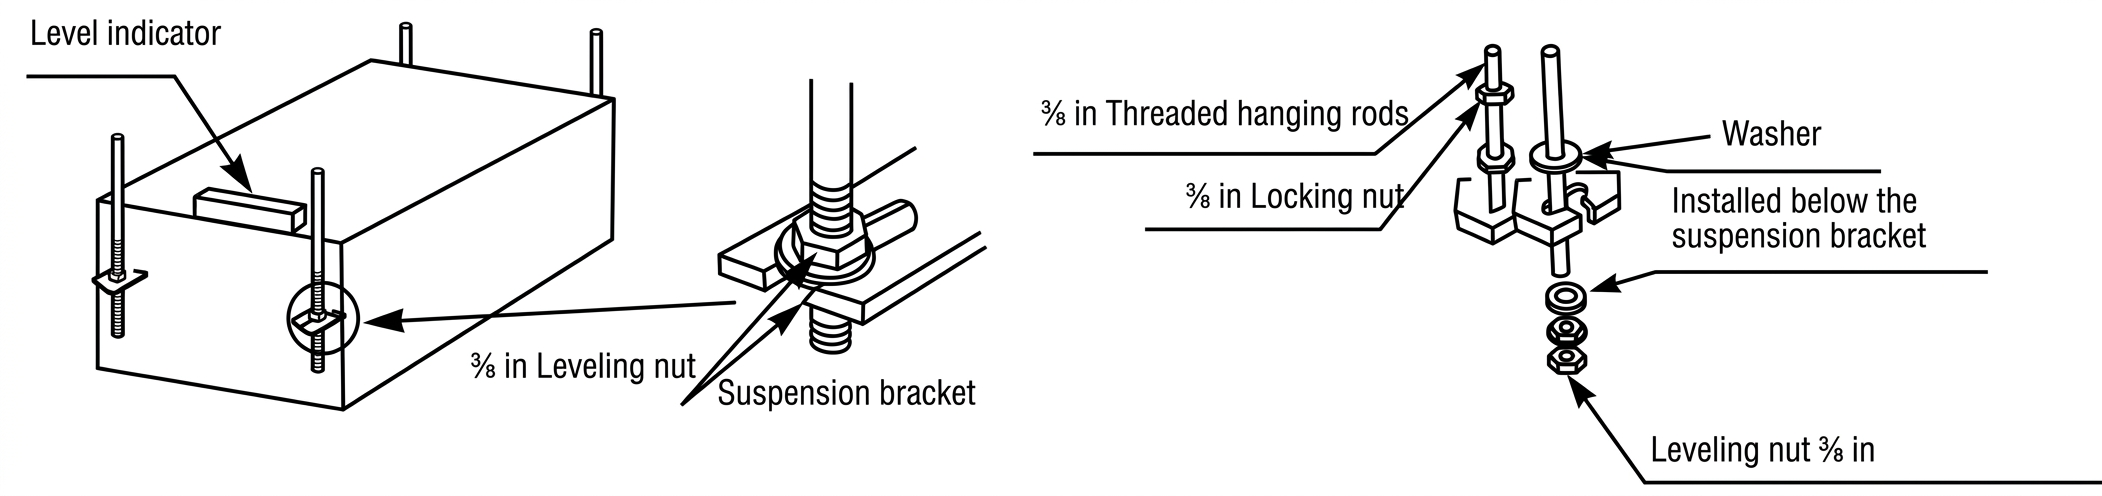
1. After setting the hanging bolts in place, slide one nut and one washer onto each bolt. Position the nuts slightly above the final resting place of the four suspension brackets. Use tape to keep the washers in place.
2. Align the four field-provided hanging bolts with the T-grooves on the indoor unit's hanging bracket, then slide them into place.
3. Carefully lift and suspend the indoor unit. This step requires two people or a mechanical lifting device.
4. Use a bubble level or built-in level indicator to ensure the unit is perfectly level.
Assembly Notes
- Attach the components in the following order:
- Nut (upper)
- Gasket (upper)
- Suspension bracket
- Gasket (lower)
- Nut (lower)
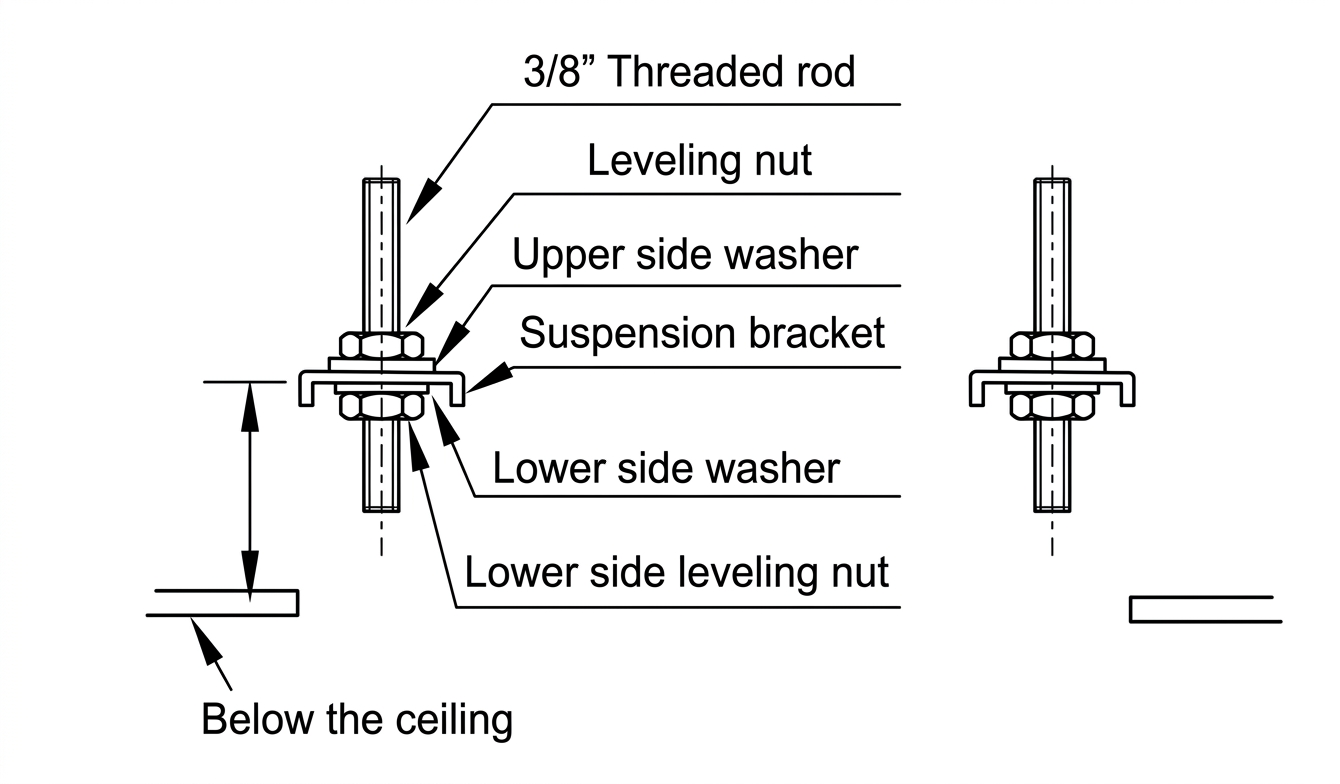
- Use a 3/8 inch locking nut to secure the final assembly.
- Fine-tune the adjustment until the cassette is level.
- Tighten all nuts firmly to ensure a stable, vibration-free installation, then re-check the level.
- When installing the unit in a location with a Sheetrock (plasterboard) ceiling, provide an access panel at a suitable location. This facilitates the final connection of the refrigerant piping, condensate drain, and electrical wiring, while allowing future maintenance access.
- If installing an access panel is not possible, ensure that all final connections are completed prior to installing the cassette cover panel. If installing the cassette body in a location that is above 80°F (27°C) with more than 80% RH, add a 0.4-inch (10 mm) insulation layer of polyethylene or similar material around the unit.
- Complete all piping and wiring connections before installing the panel.
- Verify that the indoor unit and ceiling opening dimensions are correct prior to panel installation.
- Seal all connection gaps between the panel, ceiling, and indoor unit.