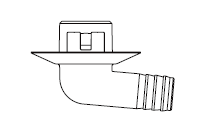
Installing the Drain Joint for Outdoor UnitsUpdated 3 months ago
Introduction
Follow these steps to properly install the drain joint for outdoor units.
Installing the drain joint for the condensate drain hose is optional; the hose is only required if you choose not to use the default bottom drainage port.
If a drain hose is required, install the drain joint into the outdoor unit's base pan hole before mounting. This step is unnecessary if the unit is mounted on a slab.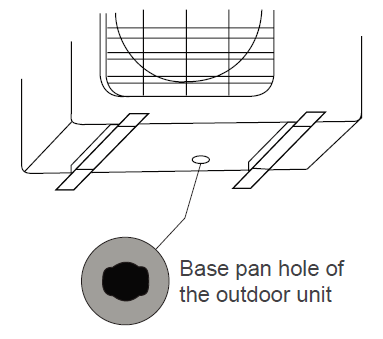
There are two types of drain joints for the outdoor unit: one with a rubber seal and one without.
Steps
Drain joint comes with a rubber seal:
1. Fit the rubber seal on the end of the drain joint connecting to the outdoor unit.
2. Insert the drain joint into the hole of the unit's base pan.
3. Rotate the drain joint 90-degrees until it clicks into place facing the front of the unit.
4. Connect a drain hose extension (not included) to the drain joint in order to redirect water from the unit. 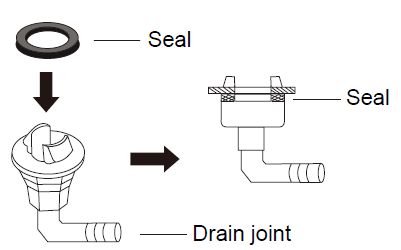
Drain joint does not come with a rubber seal:
1. Insert the drain joint into the base pan hole, then press firmly to ensure it is properly installed and does not become loose.
2. Connect a drain hose extension (not included) to the drain joint in order to redirect water from the unit.