Install the Panel for CYK-24 Single-Way Ceiling Cassette Indoor UnitsUpdated 2 months ago
Introduction
This article explains how to install the panel for CYK-24 single-way ceiling cassette indoor units.
Prepare the Ceiling
Note: When necessary, reinforce the ceiling to maintain a level surface and minimize vibrations.
1. Drill a 1-foot, 4-7/8-inch x 4-foot, 3-1/8-inch (430 mm x 1,300 mm) hole into the ceiling, following the layout of the installation board. The center of the ceiling open should match the center of the indoor unit's body.
2. After the ceiling is cut, remove the installation board, then install the ceiling panel.
Install the Panel
Note: The air grille is not meant to be tightened by the wire rope; it is specifically designed to be loose to allow for easier installation.
The procedure for installing the panel differs between the models.
Model A
1. Grab the air grille and pull it out slowly in the direction of the arrow. 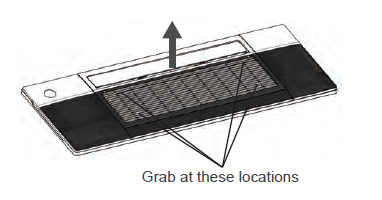
2. Pull the grille out of the panel, then attach the cassette panel to the single-way cassette using the two plastic buckles. 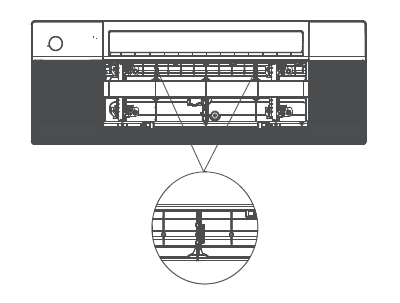
3. Manually rotate the air deflector, then attach the panel to the cassette using three M4*22 screws and a ST3.9*16 screw. Open the screw cover before attaching the screw, then close it once you're finished.
Eight M4*22 screws are supplied, two of which are spare. Two ST3.9*16 screws are supplied, one of which is a spare. 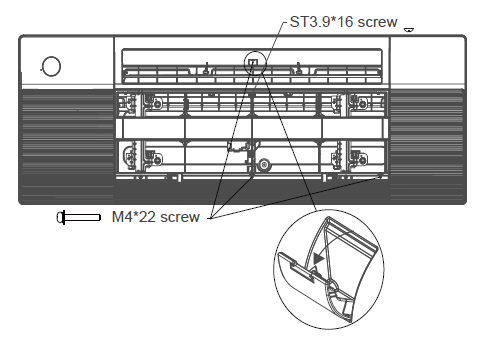
4. Open the covers on both sides of the panel, then attach the panel to the cassette using three M4*22 screws. 
5. Connect the display board to the main control board. Four wires are required for connection. The corresponding colors or pins are connected to each other. 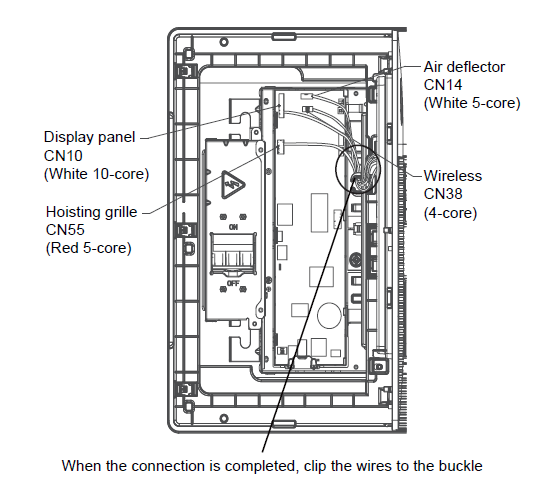
6. Install the control box cover and turn on the circuit breaker. Then, close the plastic covers on both sides of the panel. 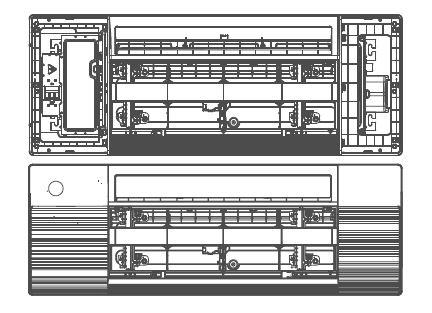
7. During the test run, the display will light up and the air grille will rise automatically. 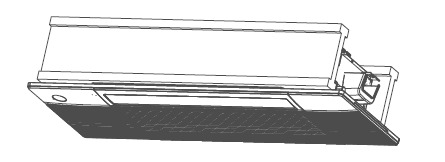
Model B
1. Press the circular tabs to open the screw covers, then remove the two screws. 
2. Hold the air grille open, then push both latches toward the middle to unlock it. 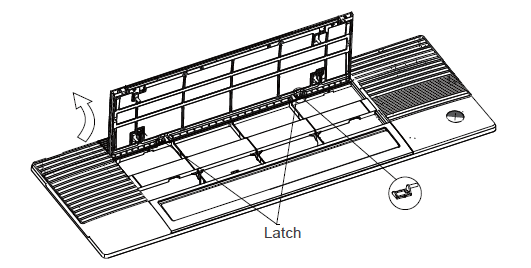
3. Pull the grille out of the panel, then attach the cassette panel to the one-way cassette using the two plastic buckles. 
4. Manually rotate the air deflector, then attach the panel to the cassette using three M4*22 screws and a ST3.9*16 screw. Open the screw cover before attaching the screw, then close it once you're finished.
Eight M4*22 screws are supplied, two of which are spare. Two ST3.9*16 screws are supplied, one of which is a spare.
5. Open the covers on both sides of the panel, then attach the panel to the cassette using three M4*22 screws.
6. Connect the display board to the main control board. Four wires are required for connection. The corresponding colors or pins are connected to each other.
7. Install the control box cover and turn on the circuit breaker. Then, close the plastic covers on both sides of the panel. 
8. Reinstall the air grille by pushing the latch to lock it and attach the two screws. Then, close the two screw covers.