IDU Disassembly for Quantum FreshUpdated 4 hours ago
Introduction
This article provides steps for disassembling the indoor unit of the Quantum Fresh system.
Indoor Unit Disassembly
Before disassembly:

1. Disassemble the front panel and display PCB.
A. Open the front panel.
B. Unfix the screw on the electric control box cover, then remove the cover.
C. Unfix the screw on the display PCB, then remove the display PCB.
D. Slightly release the panel axis by hand, then remove the panel from the unit.

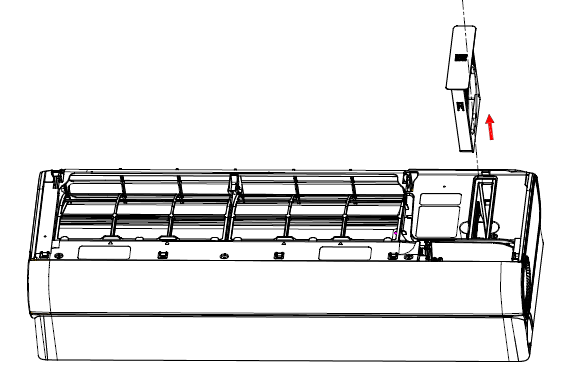
2. Disassemble the purification filter.
A. Remove the purification filter from the unit in the direction shown in the photo.
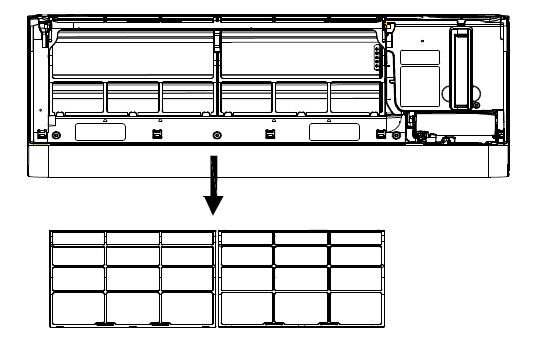
3. Remove the filter.
A. Remove the filter from the unit in the direction shown in the photo. Press the two holding buttons on the filter in order to remove it easily.
4. Remove the small vane.
A. Open the large valve to its maximum capacity, then remove the small vane.

5. Remove the screw covers and large vane.
A. Remove the three screw covers.
B. Remove the large vane.

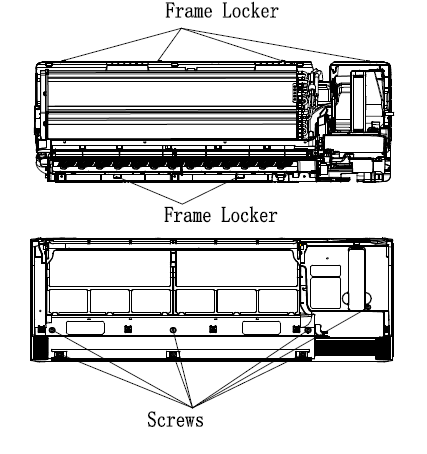
6. Disassemble the middle frame.
A. Remove the seven screws on the mid frame.
B. Lift the mid frame to loosen the first frame locker in the direction shown in the photo. Four lockers in total.
C. Hold the unit with both hands and lift slightly to loosen the second frame locker.
D. Remove the middle frame the unit.
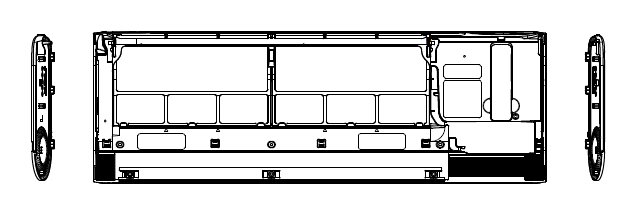
7. Disassemble the side plate.
A. Remove the side plate from the frame.
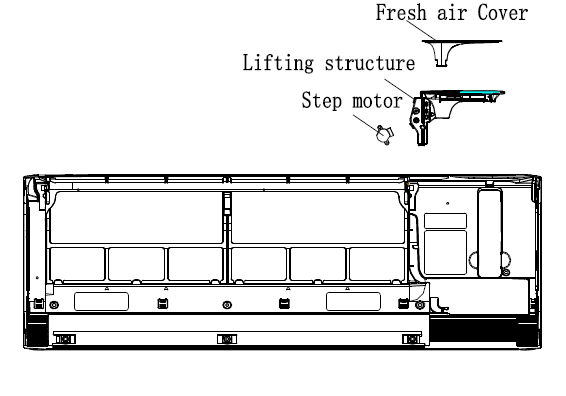
8. Disassemble the lifting structure.
A. Unfix one screw on the lifting structure.
B. Loosen the three lockers between the middle frame and lifting structure. Then remove the structure.
C. Unfix one screw on the stepping motor of the lifting structure and withdraw the motor.
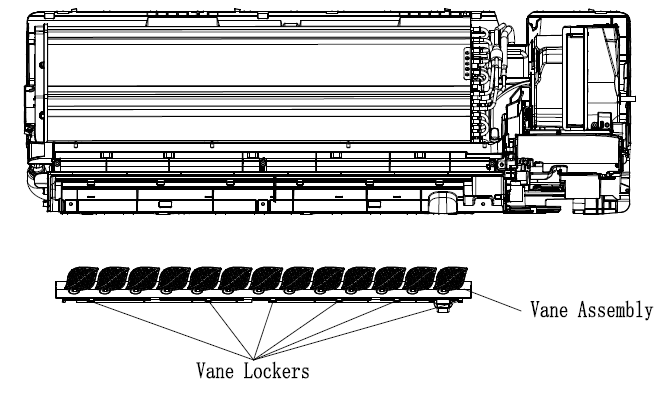
9. Disassemble the stepping vane assembly.
A. Loosen the six vane lockers, then remove the vane assembly from the unit.
10. Disassemble the electric box.
A. Unfix the screws on the electric box and unit base.
B. Unfix the ground screw on the evaporator, then remove the copper pipe sensor.
C. Remove the electric box from the unit.

11. Disassemble the Air-Fresh module.
A. Unfix three screws on the Air-Fresh module and the unit base.
B. Remove the Air-Fresh assembly.

12. Disassemble the installation plate and pipe clamp.
A. Unfix the screws on the installation pipe and unit base.
B. Loosen the lockers on the plate and base, then remove the installation plate.
C. Slightly lift the hand clasp, then remove the clamp.

13. Disassemble the evaporator.
A. Unfix two screws on the left side on the evaporator.
B. Unfix one screw on the right side of the evaporator.
C. Loosen the left side locker of the EVP, then lift the left side of the EVP.
D. While the left side of the EVP is lifted, remove the EVP from the right locker.

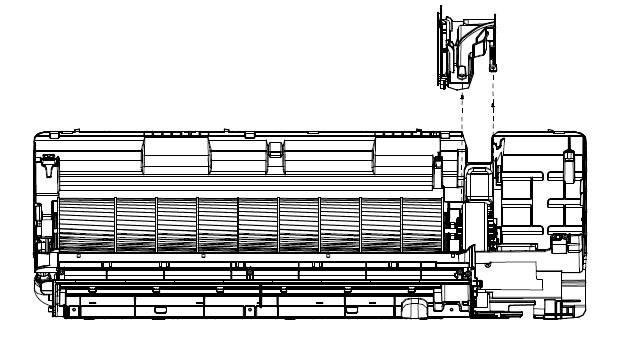
14. Remove the motor cover.
A. Unfix two screws on the motor cover and unit base, then remove the cover.
15. Remove the cross-flow fan and fan motor.
A. Lift the cross-flow fan and fan motor, then move them to the right.
B. Remove the cross-flow fan shaft out of the bearing.
C. Take out the cross-flow fan and fan motor from the unit.
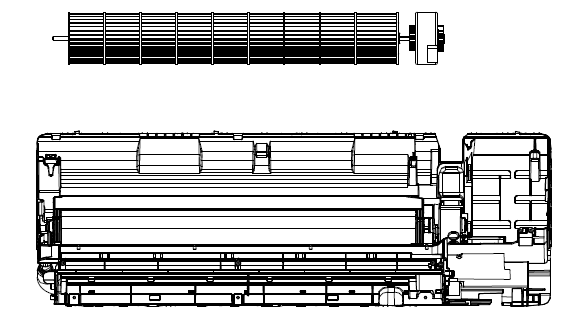
16. Disassemble the cross-flow fan and fan motor.
A. Remove the fixing screw on the cross-flow fan and fan motor, then take out the cross-flow fan and fan motor separately.
