ODU Disassembly for Diamante & Quantum SystemsUpdated 8 days ago
Introduction
This article provides steps for disassembling the outdoor unit of Diamante and Quantum High-Wall systems.
This article applies to the following systems:
- Diamante Essenza High-Wall (WYT-17)
- Diamante Essenza High-Wall (WYT-20U)
- Diamante Pro High-Wall (WYT-20S)
- Quantum Ultra High-Wall (WYT-24)
- Quantum Hyperformance High-Wall (WYT-25)
- Quantum Fresh High-Wall (WYT-FA)
- Quantum Ultra 8-Way Ceiling Cassette (CYT-24)
- Quantum Ultra Ducted Ceiling Concealed (RYT-24)
- Quantum Ultra Universal Floor-Ceiling Flex (UYT-24)
Steps
Before Disassembly
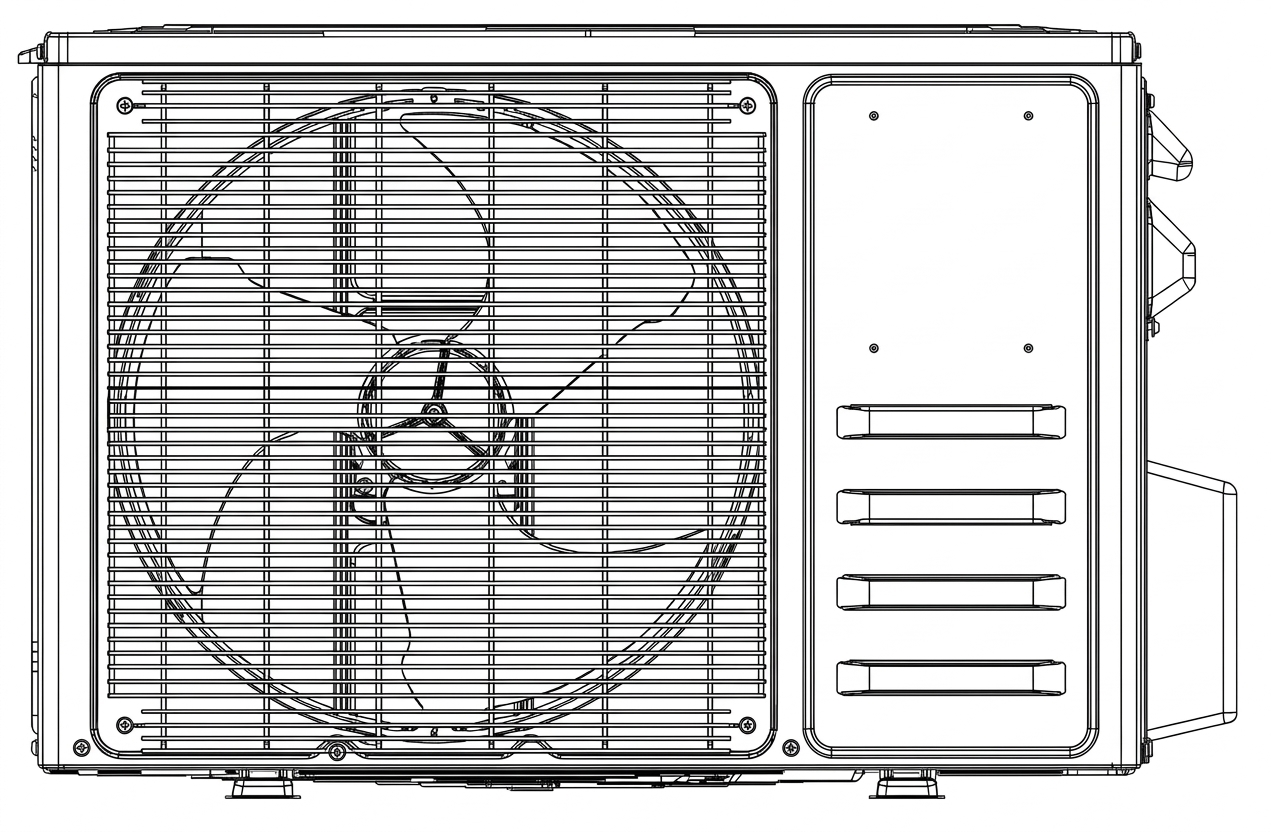
1. Remove the PCB Cover, Valve Cover, and Top Cover
A. Remove the screw that secures the PCB cover, and then remove the cover from the unit (see image 1A).
B. Remove the screw that secures the valve cover, and then remove the cover from the unit (see image 1A).
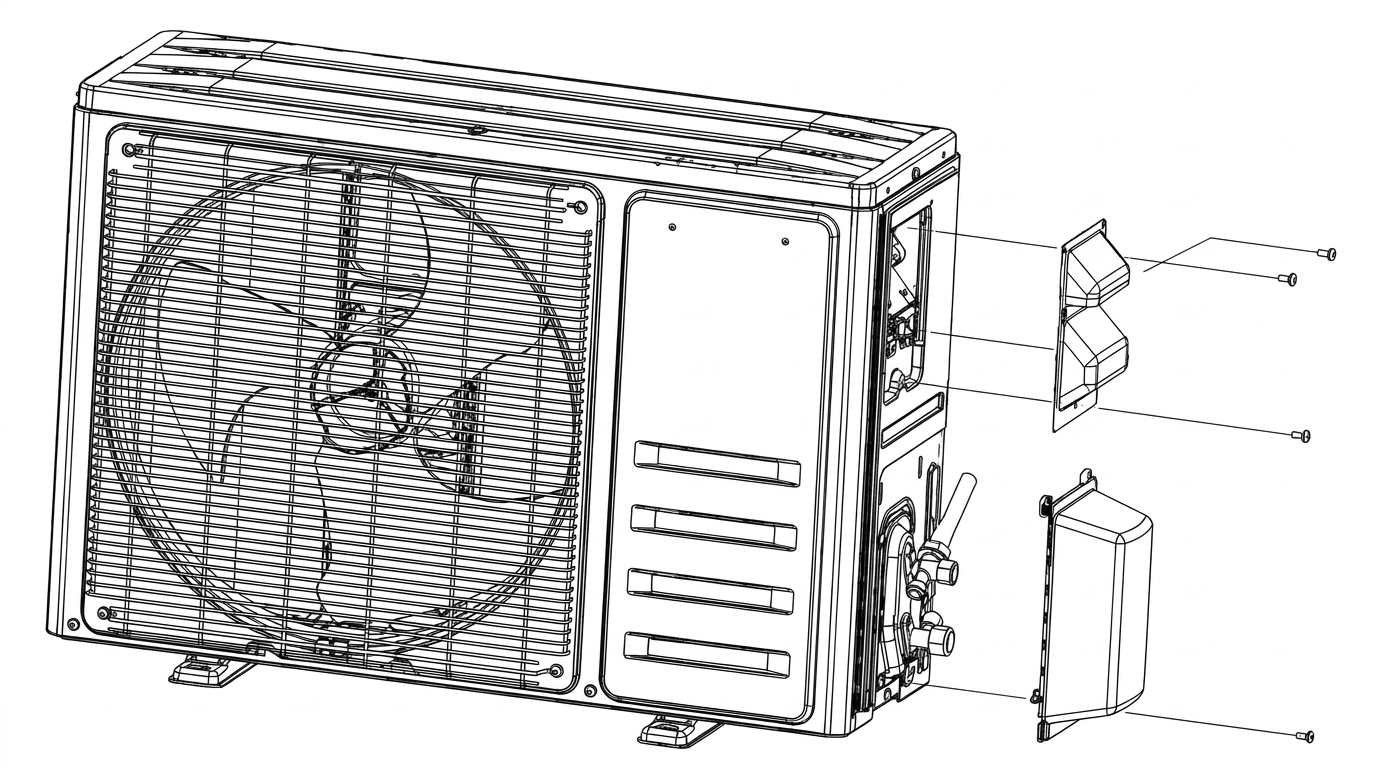 Image 1A
C. Remove the screws that secure the top cover to the top, left, and right sides of the unit, and then remove the top cover (see image 1B).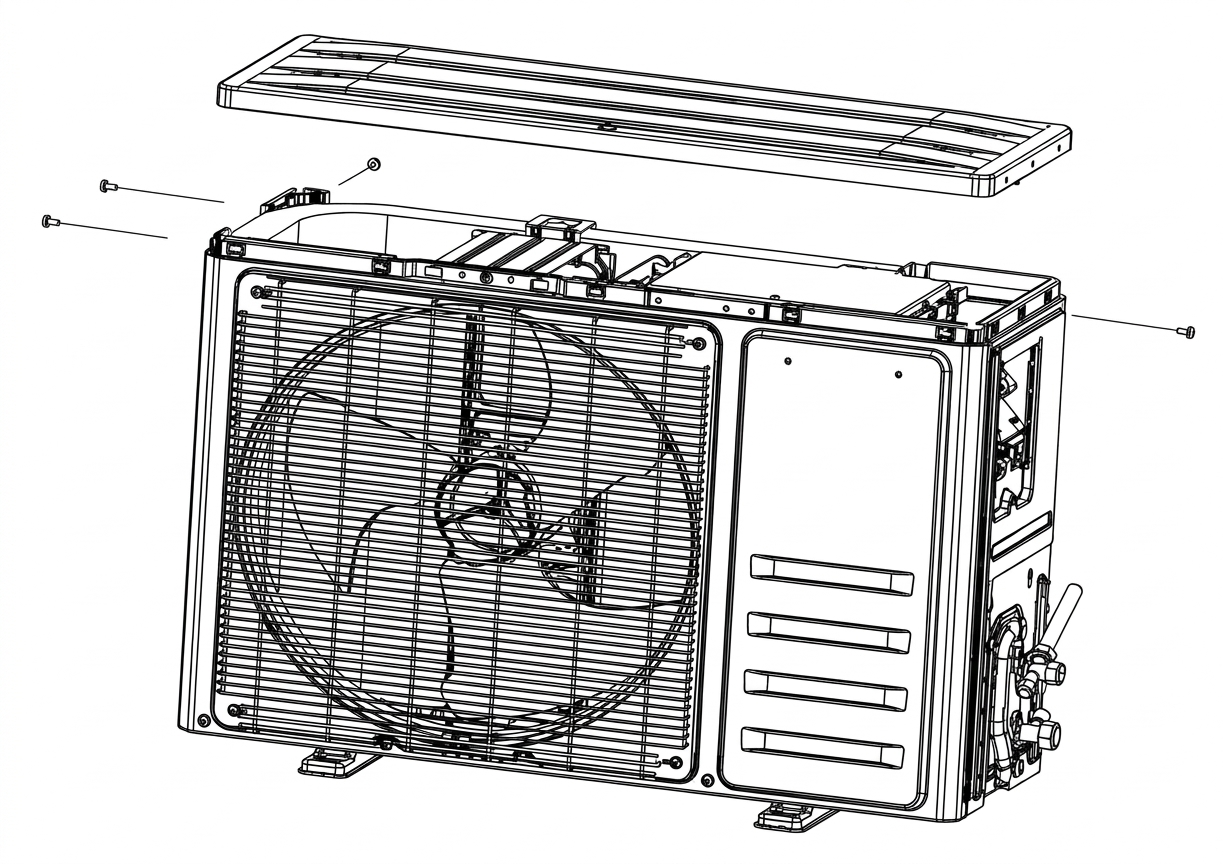 Image 1B
2. Remove the Front Grille and Front Panel
A. Remove the screws that secure the front grille to the front panel, and then remove the front grille (see image 2A).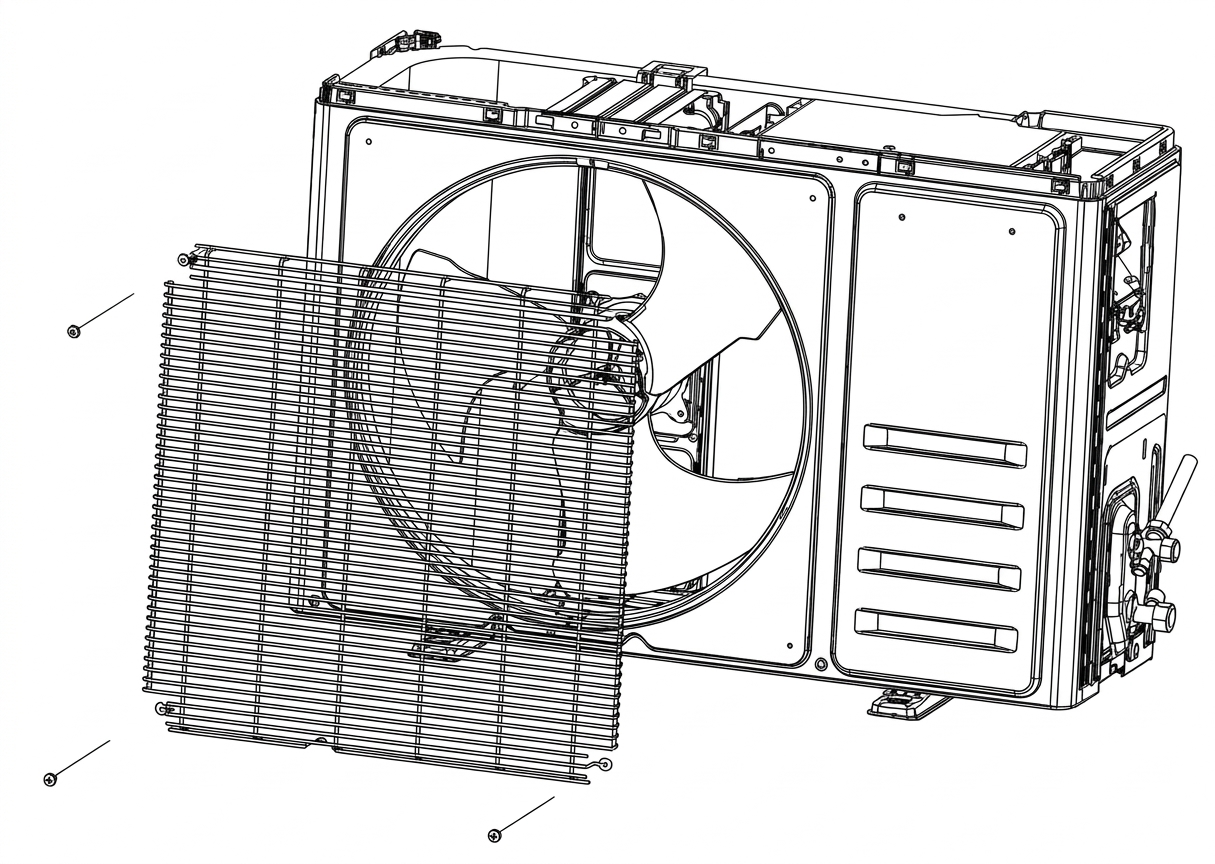 Image 2A
B. Remove the screws around the fan guard on the front panel (see image 2B).
C. Separate the middle plate from the base plate. Lift the front panel, and then pull it out of the unit (see image 2B).
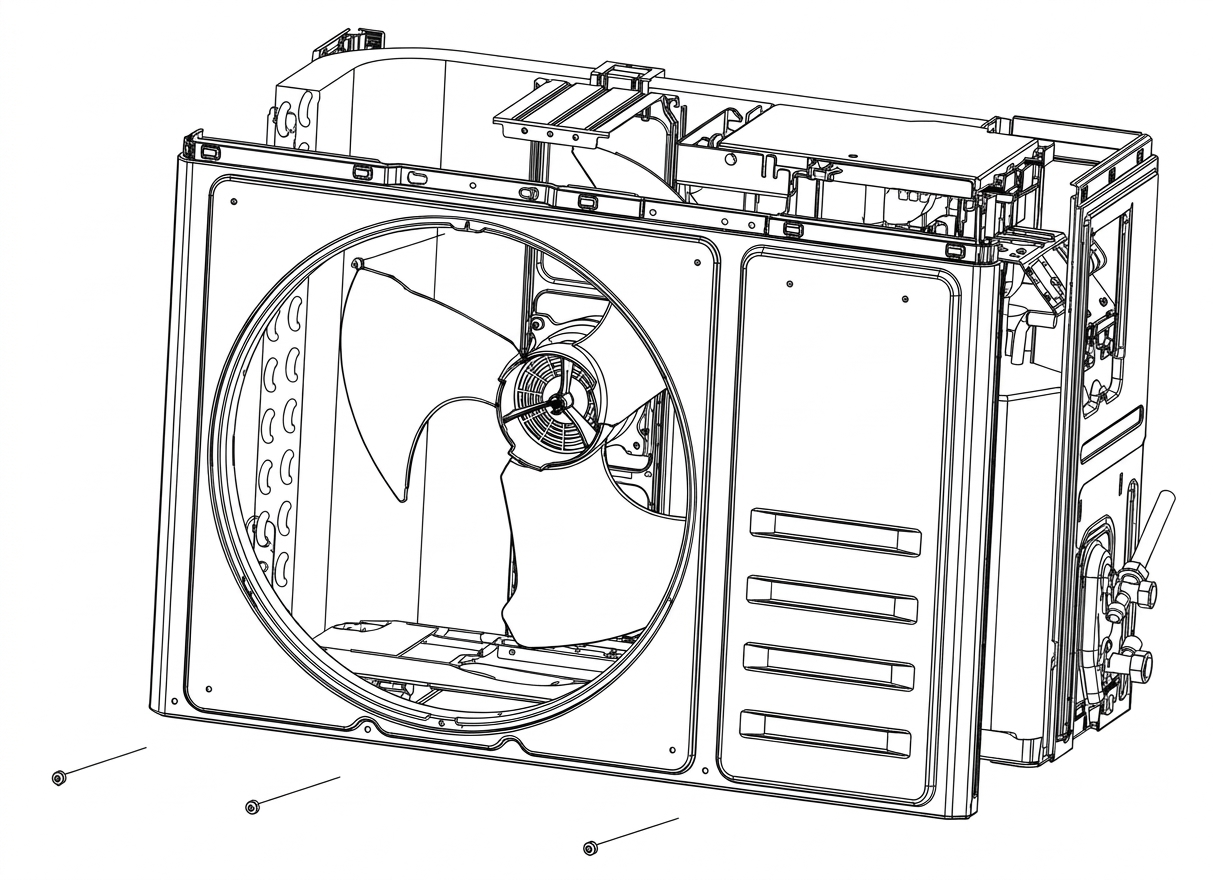 Image 2B
3. Remove the Left and Right Plate
A. Remove the screws that secure the right plate to the electric control box, valve plate, and base plate, and then remove the right plate (see image 3A).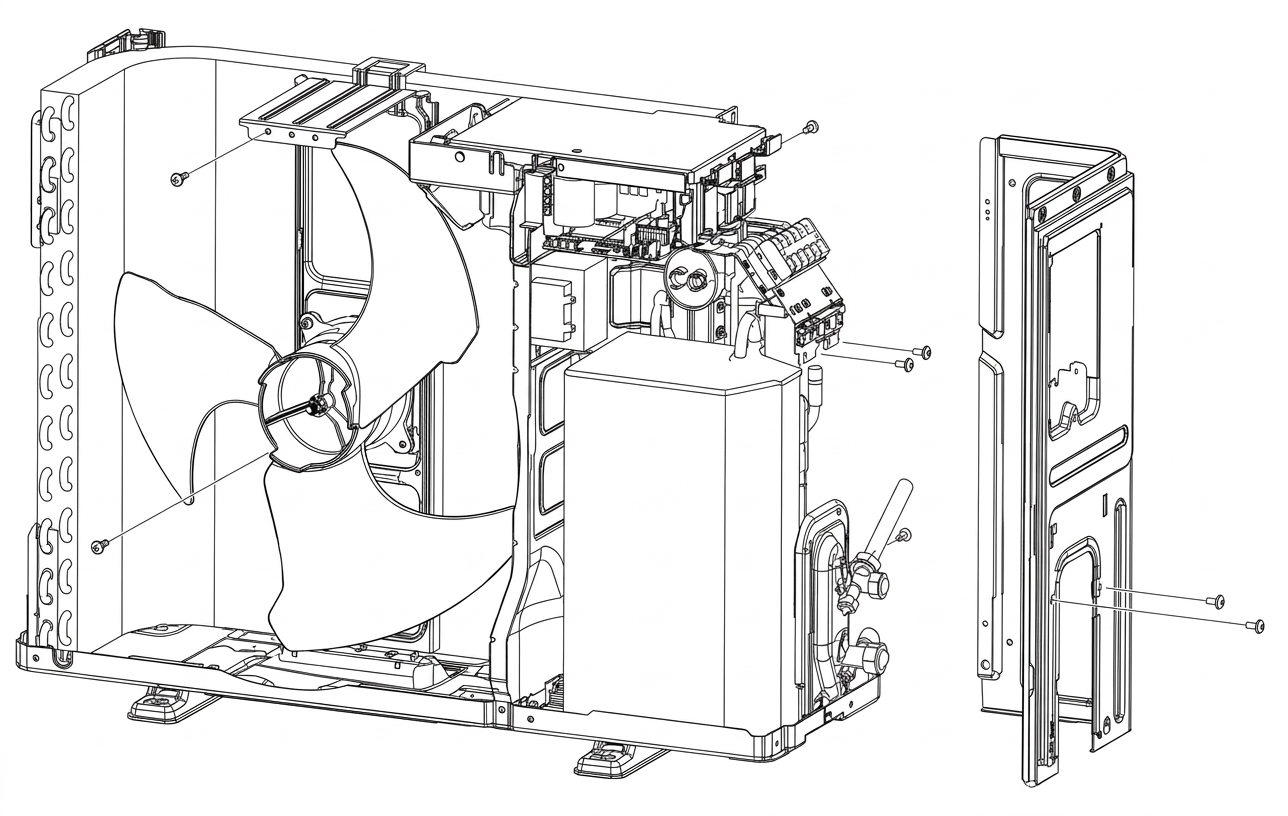 Image 3A
B. Remove the screws that secure the left plate to the base plate and condenser plate, and then remove the left plate (see image 3B).
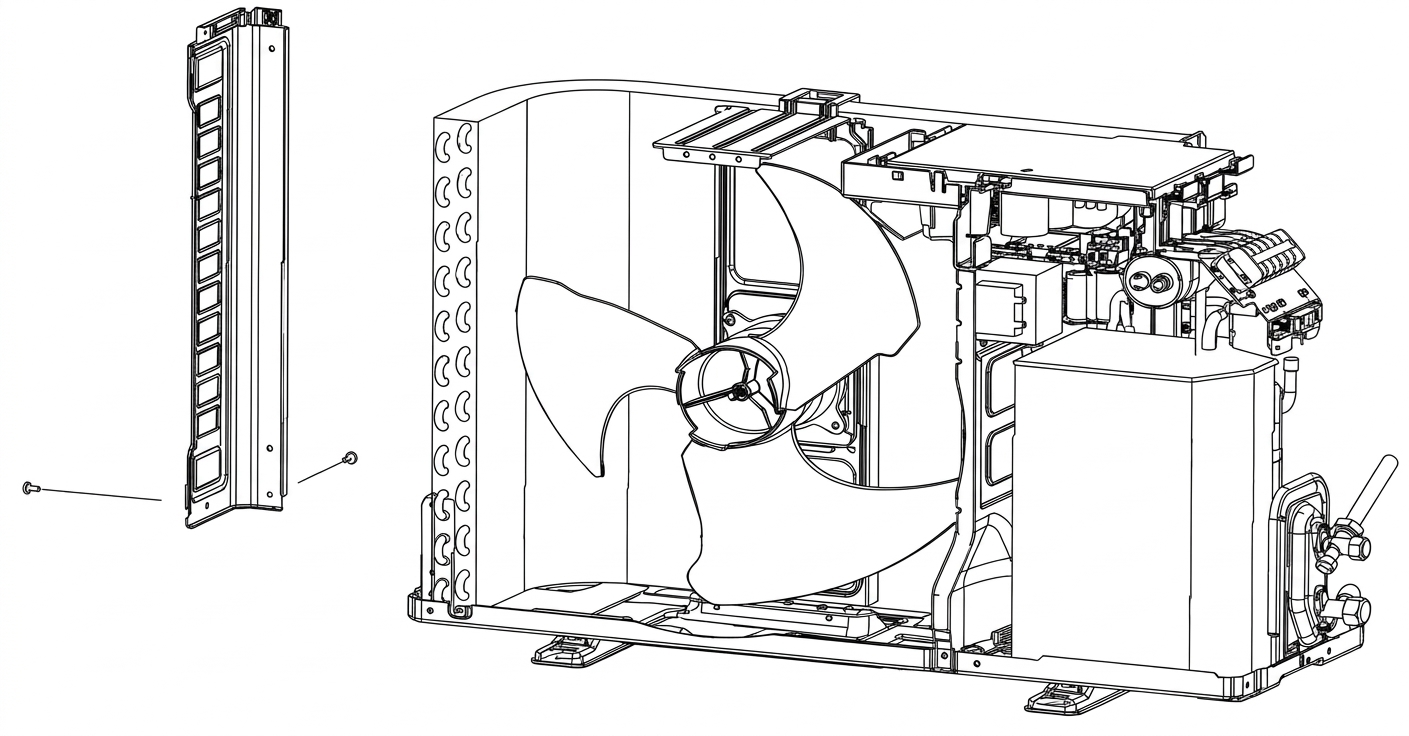 Image 3B
4. Remove the Fan Blade
A. Unscrew the fan blade nut, and then remove the fan blade.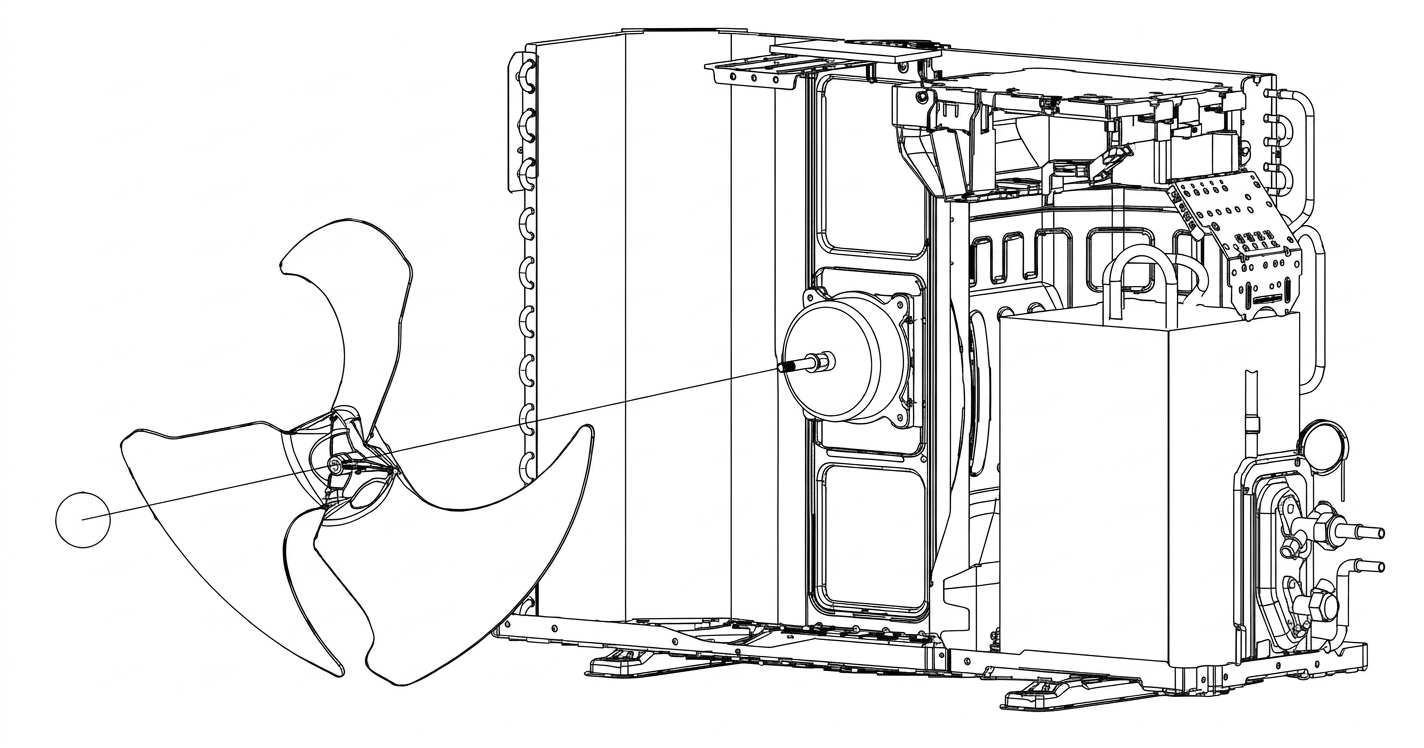
5. Remove the Electric Control Box
A. Remove the screws that secure the electric control box to the motor bracket.
B. Loosen the wire clamp, and then remove the electric control box.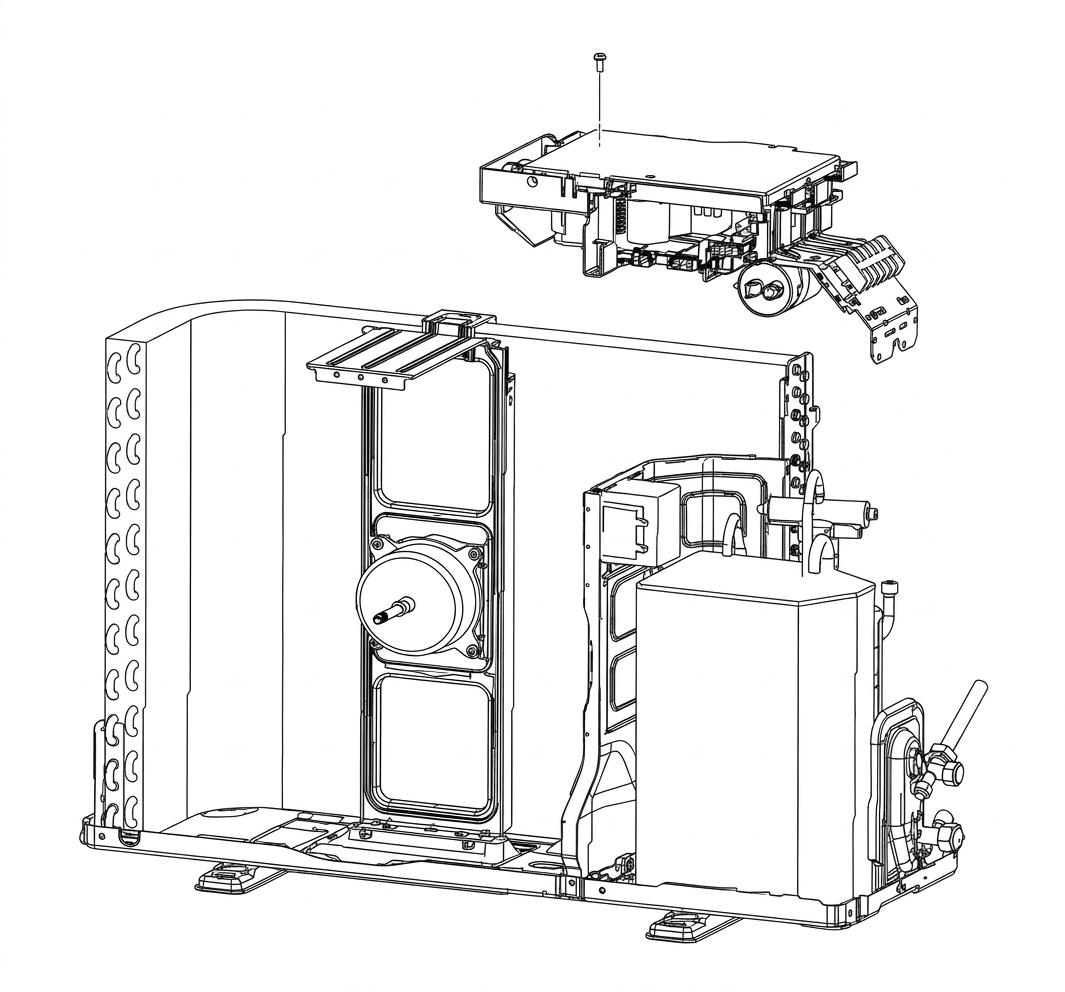
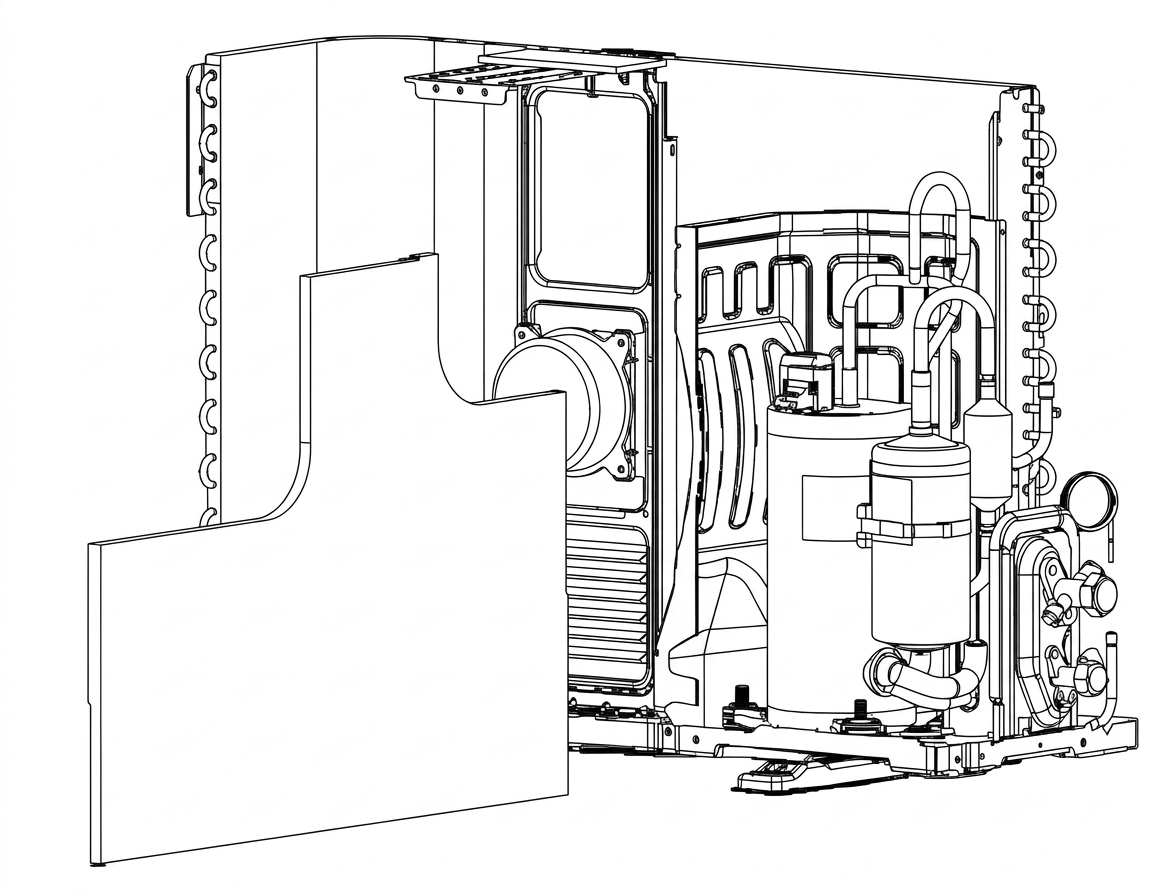
6. Remove the Noise Cotton
A. Remove the noise cotton.
7. Remove the Partition Plate
A. Remove the screw that secures the partition plate to the unit, and then remove the partition plate.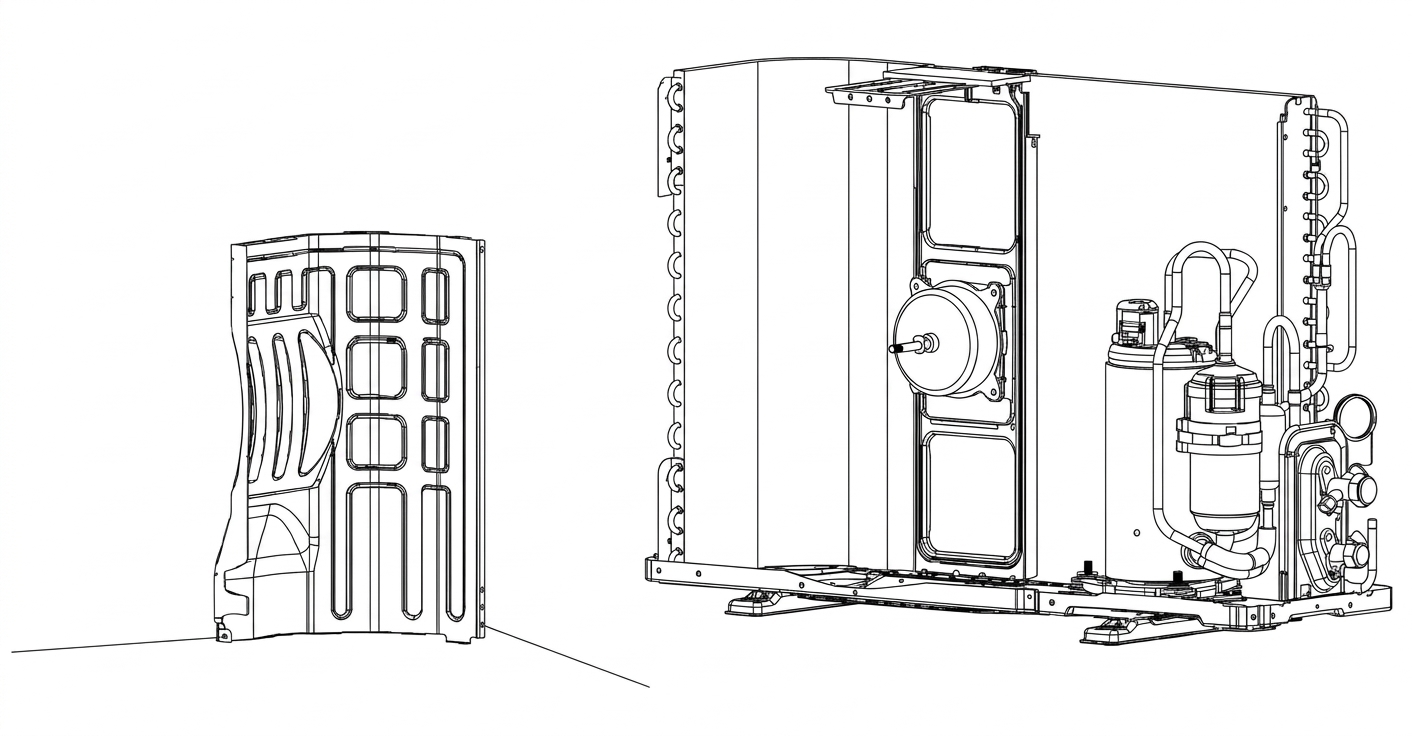 8. Remove the 2-Way and 3-Way Valve
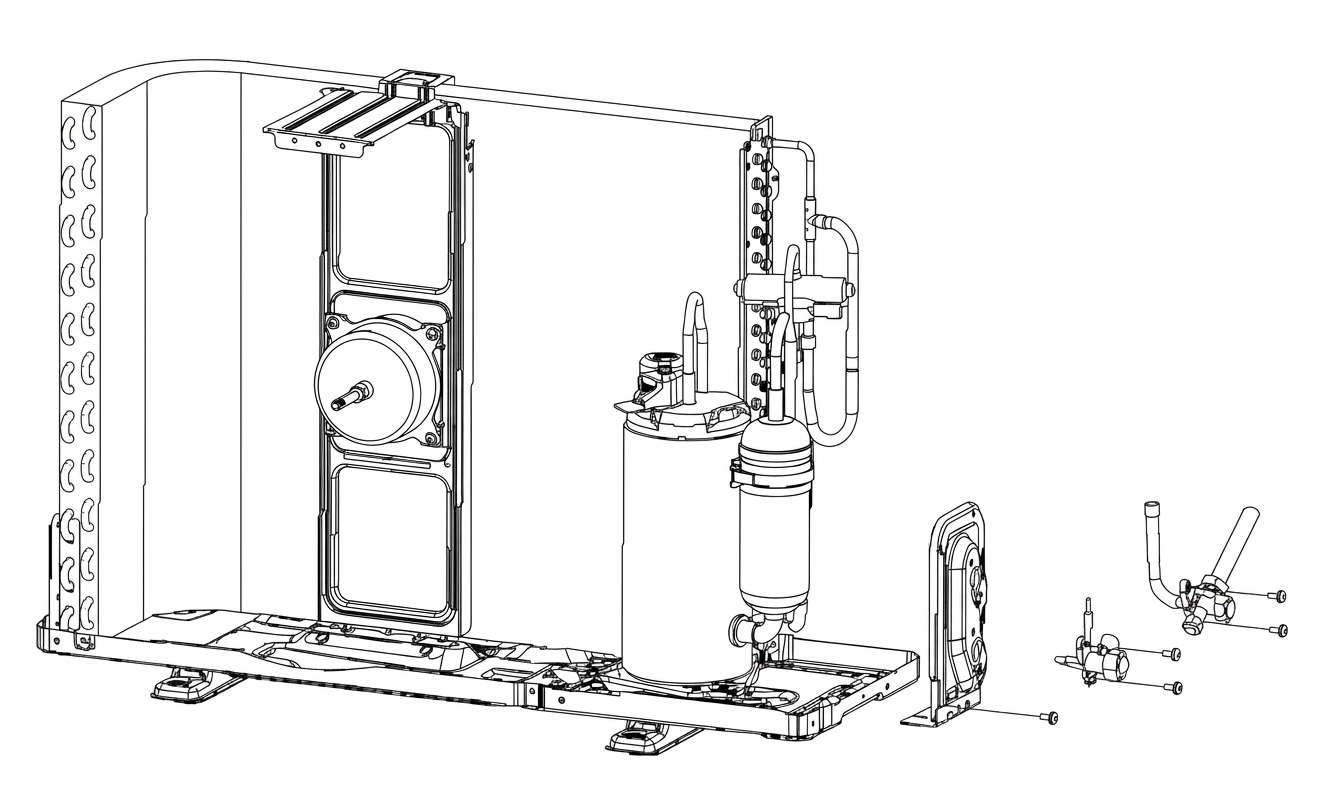
A. Remove the screws that secure the 2-way and 3-way valves to the valve plate and base plate.
B. Unbraze the 2-way and 3-way valves, and then remove the valves.
Notes:
- Recover all refrigerant from the unit before brazing or unbrazing.
- Use caution when working with an open flame to prevent fire and injury.
9. Remove the 4-Way Valve
A. Unbraze the 4-way valve, and then remove it from the unit.
Note: Do not let the torch flame damage the compressor, nameplate, or other nearby components.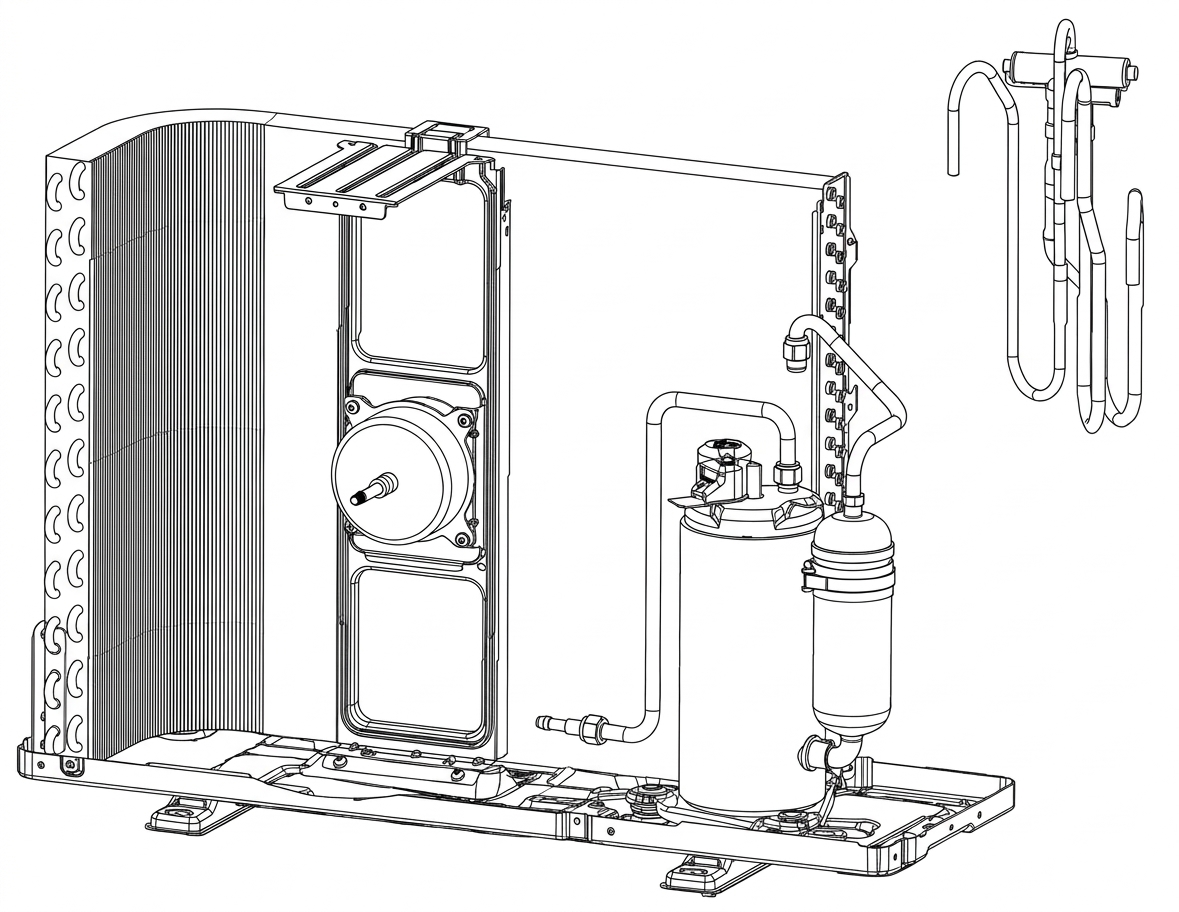
10. Remove the Compressor
A. Unscrew the compressor mounting nuts, and then remove the compressor.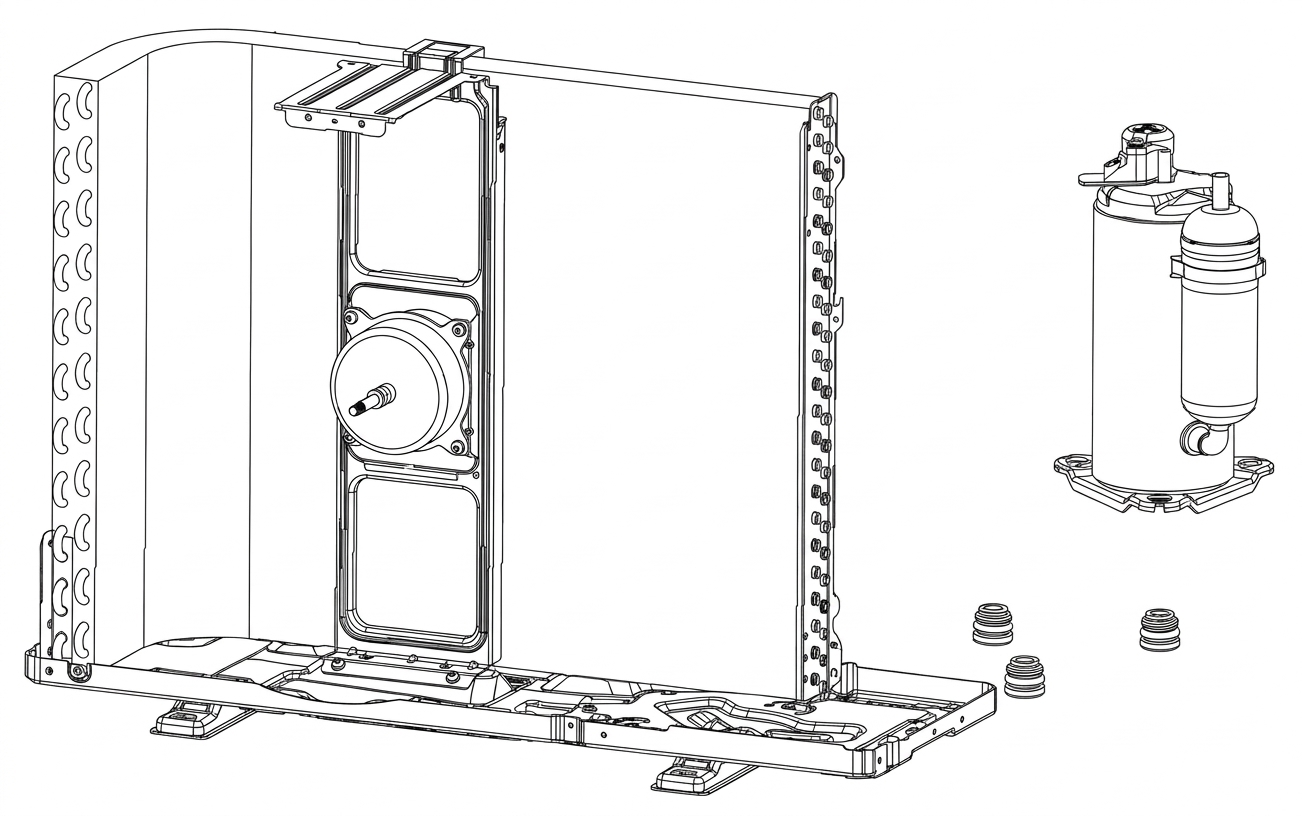 11. Remove the Fan Motor and Motor Bracket
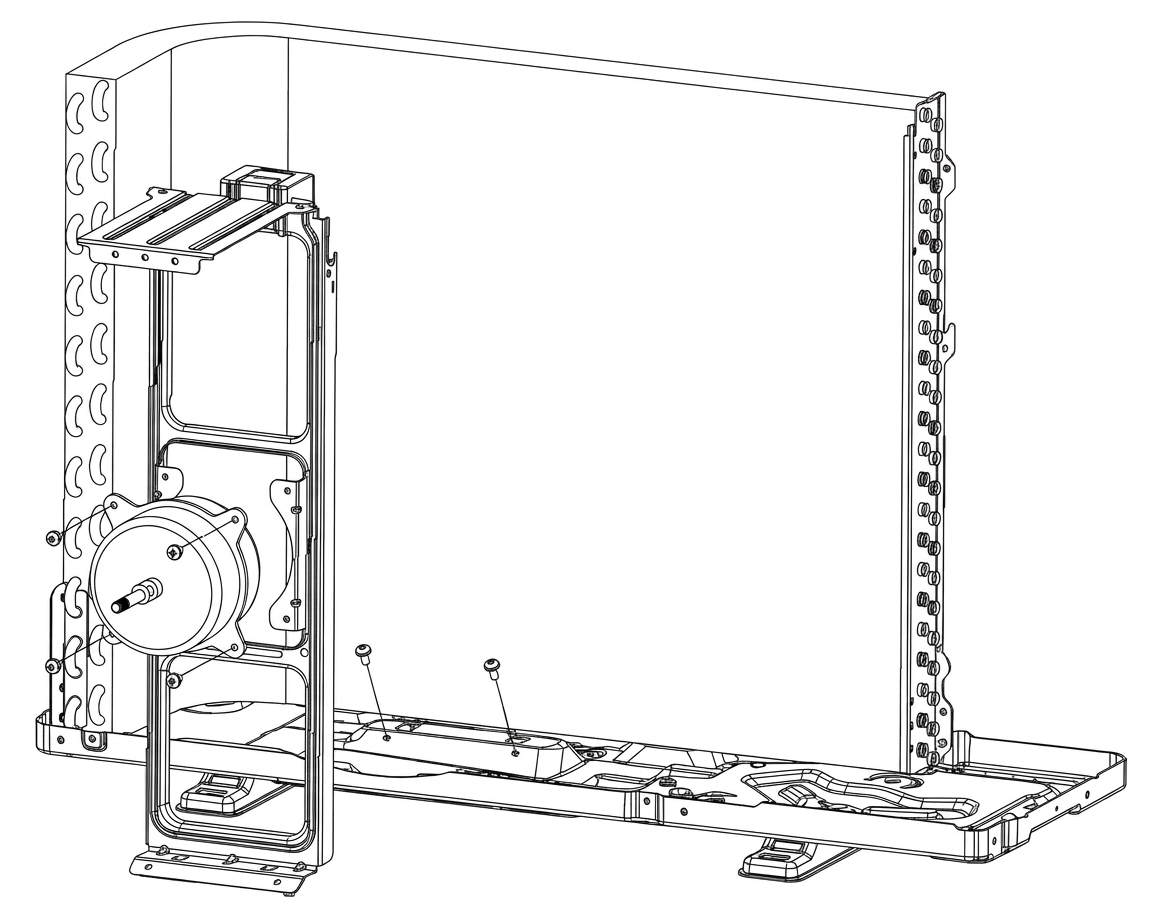
A. Remove the screws that secure the motor bracket to the base plate, and then remove the motor bracket and fan motor together.
Note: Do not pull on the motor wiring when removing the fan motor.