Apply Pioneer Flare Leak Guard During InstallationUpdated 5 months ago
Introduction
The Pioneer Flare Connection Leak Guard Sealer is a gasket and thread sealant used for HVAC/R systems. The leak guard is commonly applied to flare fittings to ensure a tight, leak-free seal. Pioneer Leak Guard packet
The leak guard is not a replacement for properly flaring and tightening a connection. We recommend using the leak guard as a supplement.
We recommend wearing gloves and safety glasses when working with HVAC/R systems and using sealants.
Steps
- Clean the Surfaces: Clean both mating surfaces thoroughly before applying the leak guard. Use a cloth to remove any dirt or oil. Ensure that the surfaces are completely clean by using a mild solvent. Cleaning the surfaces helps the leak guard bond effectively.
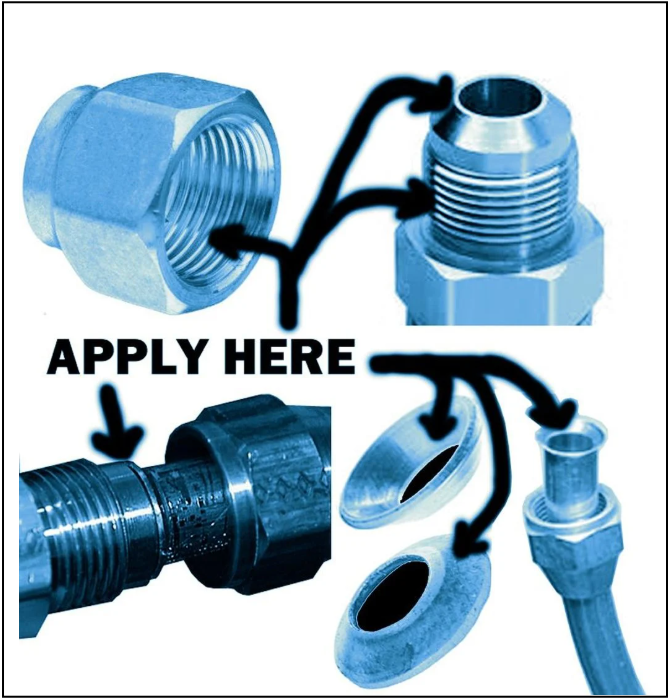
- Apply the Leak Guard: Use a small brush or the tip of your finger to apply the leak guard evenly on the mating surfaces. Applying a large amount is not necessary. Use enough to thinly coat the flare’s mating surfaces. Create a thin film over the entire surface.
- Connect the Surfaces: After applying the leak guard, connect the flare fitting properly.
- Tighten the Fitting: Tighten the flare fitting after connecting it. Do not over-tighten the fitting to avoid stripping the threads or cracking the flare.
- Wipe Off Excess Leak Guard: Remove any excess leak guard after tightening the fitting.
Note: Refer to the manufacturer’s instructions when working with the leak guard and fittings.